Watercolor Windsor Cake: A Masterpiece of Flavor and Elegance
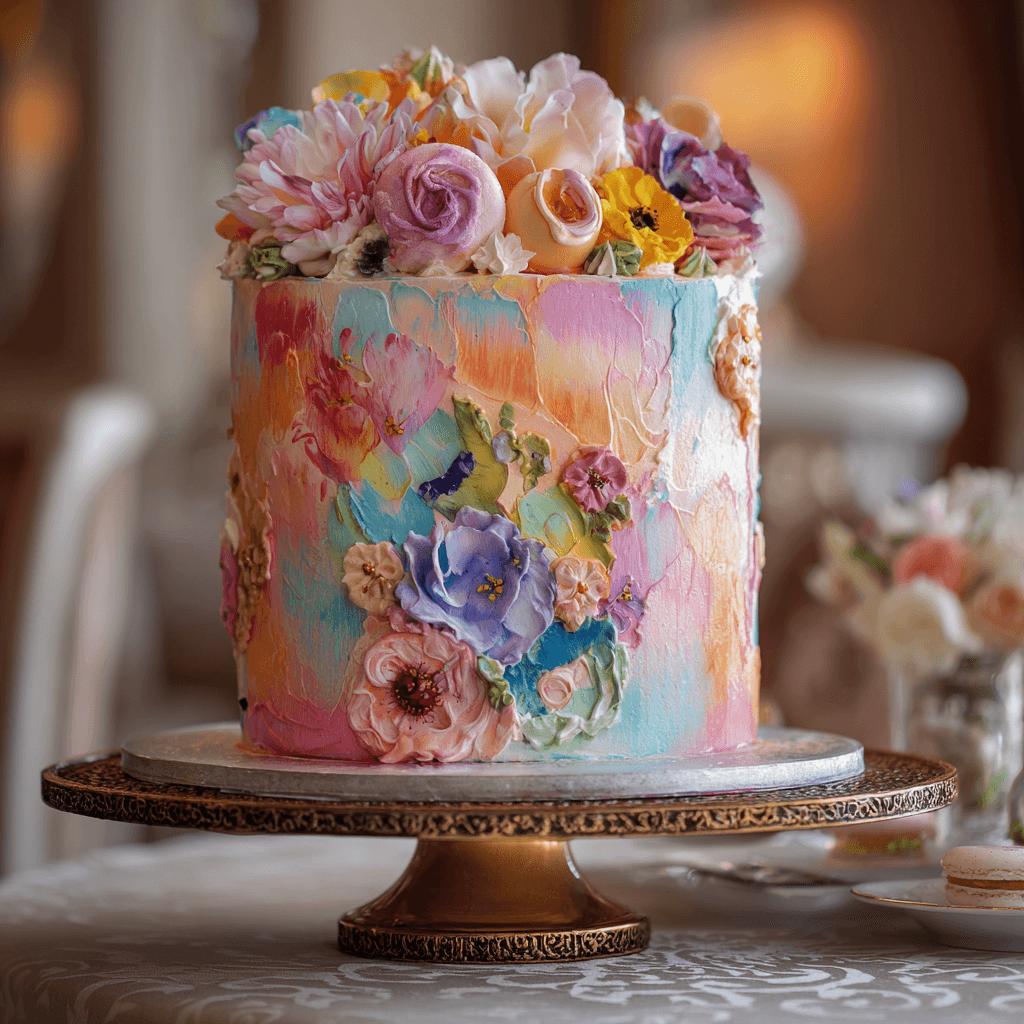
The Watercolor Windsor Cake is more than just a dessert — it’s a culinary work of art. Inspired by the delicate hues of watercolor paintings and the refined elegance of Windsor style, this cake blends visual beauty with an unforgettable taste experience. Its origins trace back to modern patisseries that sought to merge aesthetics with gastronomy, creating desserts that could be admired as much as they are enjoyed.
A Brief History of the Watercolor Windsor Cake
The concept of visually artistic cakes gained popularity in the early 2010s, when bakers began experimenting with edible paints, natural dyes, and brushstroke techniques reminiscent of fine art. The “Windsor” element refers to the classic, regal design often seen in British architecture and furniture, known for its clean lines and sophistication. When combined with the soft gradients and color blending of watercolor, the result was the Watercolor Windsor Cake — a perfect blend of tradition and creativity.
Ingredients Breakdown: Crafting the Perfect Canvas
The foundation of the Watercolor Windsor Cake lies in its high-quality ingredients, each chosen not only for flavor but also for how well it supports the aesthetic presentation:
- Butter: Unsalted butter ensures a rich base with controlled salt levels.
- Sugar: Fine granulated sugar or caster sugar for a smooth texture.
- Eggs: At room temperature for better emulsification.
- Flour: All-purpose or cake flour depending on desired density.
- Milk or Buttermilk: Adds moisture and enhances tenderness.
- Vanilla Extract: Pure extract for depth of flavor.
- Baking Powder: For leavening and rise.
- Fondant or Buttercream: Used as the canvas for the watercolor effect.
- Gel Food Coloring: In shades like aqua, lavender, coral, and mint for vibrant yet soft transitions.
- Edible Glaze or Clear Alcohol (like vodka): To mix with coloring and apply smoothly.
Step-by-Step Recipe: Creating Your Watercolor Windsor Cake
- Prepare the Cake: Mix dry ingredients in one bowl and wet ingredients in another. Combine gently until smooth. Divide batter into round pans and bake at 350°F (175°C) for 25–30 minutes. Cool completely.
- Make the Frosting: Prepare a batch of Swiss meringue buttercream or your favorite frosting. Set aside.
- Level and Stack: Level the cakes if necessary, then frost between layers and stack carefully.
- Cover with Fondant or Crumb Coat: Apply a crumb coat and chill before applying the final layer of frosting or fondant.
- Create the Watercolor Effect: Dip a soft paintbrush into gel food coloring mixed with a bit of clear alcohol. Gently brush onto the frosted cake surface in soft strokes, blending colors as desired.
- Chill and Set: Refrigerate briefly to set the colors and allow them to meld into a seamless gradient.
Pro Tips for a Perfect Watercolor Finish
- Use gel-based colors for intensity without altering texture.
- Choose complementary colors — think pastels or ocean tones for a calming effect.
- Work quickly and lightly — you can always add more color, but it’s hard to remove once applied.
- Keep brushes clean between colors to avoid muddy results.
- Apply color on a chilled, firm frosting or fondant for best absorption.
Variations and Customizations
The beauty of the Watercolor Windsor Cake lies in its adaptability. Here are some popular variations:
- Chocolate Version: Use chocolate cake layers and a chocolate ganache frosting for a richer base.
- Lemon or Almond Variants: Infuse the batter with lemon zest or almond extract for a different flavor profile.
- Gluten-Free: Substitute flour with a 1:1 gluten-free all-purpose flour blend.
- Vegan Adaptation: Replace eggs with flaxseed or applesauce and use vegan butter and non-dairy milk.
- Layered Design: Create multiple tiers for weddings or events, using the same watercolor motif across each tier.
Health Considerations and Nutritional Value
While the Watercolor Windsor Cake is a celebration centerpiece, mindful indulgence is key. Here’s a general nutritional estimate per slice (based on 12 servings):
- Calories: ~400–500 kcal
- Fat: ~18–25g (mostly from butter and frosting)
- Carbohydrates: ~60–70g (from sugar and flour)
- Protein: ~4–6g (from eggs and milk)
- Sodium: ~150–300mg
To make it healthier:
- Replace half the butter with unsweetened applesauce.
- Use natural sweeteners like honey or maple syrup in place of sugar (adjust liquid content accordingly).
- Opt for low-fat dairy or plant-based alternatives.
- Top with fresh fruit instead of heavy frosting for a lighter finish.
Full Ingredients List
For the Cake:
- 2 cups all-purpose flour
- 1 1/2 cups granulated sugar
- 1 tsp baking powder
- 1/2 tsp baking soda
- 1/2 cup unsalted butter, softened
- 2 large eggs
- 1 cup buttermilk
- 1 tsp vanilla extract
For the Frosting:
- 1 cup unsalted butter, softened
- 4 cups powdered sugar
- 1 tbsp vanilla extract
- 2–3 tbsp heavy cream or milk
For the Watercolor Effect:
- Gel food coloring (e.g., pink, teal, purple, yellow)
- 1–2 tbsp clear alcohol (vodka or rum extract)
- Soft-bristled food-safe paintbrush
Directions in Detail
- Preheat oven to 350°F (175°C). Grease and flour two 9-inch round cake pans.
- In a medium bowl, sift together flour, baking powder, and baking soda.
- In a large bowl, beat butter and sugar until light and fluffy (about 3–4 minutes).
- Add eggs one at a time, beating well after each addition.
- Stir in vanilla extract.
- Add dry ingredients alternately with buttermilk, starting and ending with dry ingredients. Mix until just combined.
- Pour batter into prepared pans and bake for 25–30 minutes, or until a toothpick inserted in center comes out clean.
- Cool cakes in pans for 10 minutes, then remove and cool completely on wire racks.
- Prepare frosting by beating butter until creamy, then gradually adding powdered sugar and mixing on low speed until incorporated. Add vanilla and cream, and beat until light and fluffy.
- Frost between layers and stack cakes on a serving plate.
- Apply a crumb coat, chill