Introduction
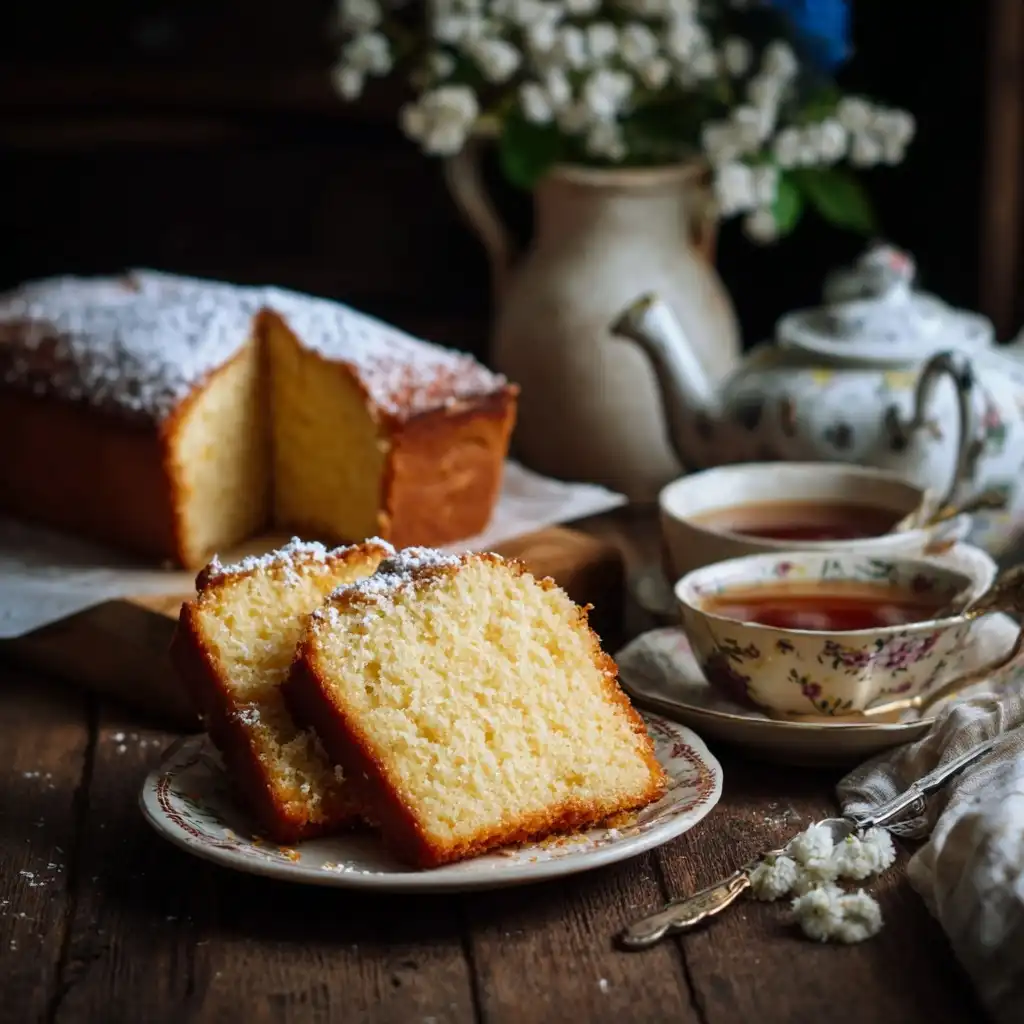
Vintage Hot Milk Cake is a beloved relic of mid-20th-century American home baking—a tender, moist, and subtly rich cake that owes its velvety crumb and delicate sweetness to a time-honored technique: scalding milk and pouring it directly into the batter. Unlike modern cakes reliant on chemical leaveners or oil-based emulsions, this heirloom recipe harnesses the transformative power of heat-activated fats and denatured proteins to create an unparalleled texture—soft as cloud, fine-grained, and luxuriously springy without being dense. Its quiet elegance lies in its simplicity: no fancy equipment, no exotic ingredients, just pantry staples elevated by methodical care. Revered by grandmothers, featured in church social cookbooks from Ohio to Oregon, and whispered about in vintage Good Housekeeping and Ladies’ Home Journal columns, the Hot Milk Cake is more than dessert—it’s edible nostalgia, a warm embrace in cake form, and a testament to how patience, temperature control, and respect for tradition yield extraordinary results.
The History
The origins of Hot Milk Cake trace back to the late 19th and early 20th centuries, evolving alongside advances in home dairy practices and domestic science education. While precursors appear in British “milk sponge” recipes of the 1880s, the distinctly American version solidified during the 1920s–1940s—coinciding with the widespread adoption of pasteurized milk, electric mixers, and standardized oven thermostats. The technique was championed by home economists like Mary Lincoln and Fannie Farmer, who emphasized the role of scalded milk in improving gluten development and fat incorporation. During the Great Depression and WWII rationing era, Hot Milk Cake gained popularity for its resourcefulness: it used modest amounts of butter and eggs while maximizing tenderness through thermal emulsification—meaning less fat was needed to achieve richness. It became a staple at PTA bake sales, hospital luncheons, and Sunday suppers across the Midwest and South. By the 1950s, regional variations flourished—Tennessee versions added a splash of buttermilk for tang; Pennsylvania Dutch bakers folded in dried cherries and almond extract; and Hawaiian adaptations incorporated coconut milk and macadamia nuts. Though eclipsed in mainstream consciousness by boxed cake mixes post-1955, Hot Milk Cake never vanished—it lived on in handwritten recipe cards tucked inside biscuit tins, photocopied pages passed between neighbors, and the quiet confidence of bakers who knew that greatness begins not with speed, but with a carefully watched pot of simmering milk.
Ingredients Breakdown
Every ingredient in Vintage Hot Milk Cake plays a precise, non-negotiable role—no component is merely “for flavor” or “bulk.” Understanding their functional interplay is key to mastery:
- Whole Milk (1 cup): Must be whole (3.25% fat) for optimal emulsification and richness. Scalding (heating to just below boiling, ~180°F) denatures whey proteins, which then bind more effectively with flour starches and butterfat—yielding superior moisture retention and a finer crumb. Skim or low-fat milk produces dryness and coarse texture; ultra-pasteurized milk may scorch easily and lacks enzymatic nuance.
- Unsalted Butter (½ cup / 1 stick): Provides structure, flavor, and steam for lift. Unsalted ensures precise sodium control. Cut into small cubes *before* heating with milk so it melts evenly and integrates fully—no greasy pools or unmelted flecks. European-style butter (82–86% fat) deepens flavor but requires careful temperature monitoring to avoid overheating.
- Granulated Sugar (1 cup): Not just sweetener—acts as a tenderizer by inhibiting gluten formation and contributes to browning (Maillard reaction) and crust development. Caster sugar dissolves faster but isn’t essential; avoid raw or coconut sugars—they alter pH and moisture balance.
- All-Purpose Flour (1¾ cups): Standard bleached or unbleached AP flour works best. Avoid bread flour (too much protein → toughness) or cake flour alone (too little structure → collapse). Sift *twice*—once before measuring by weight (210g), once after—to aerate and prevent compaction. Chlorinated flour (common in Southern U.S.) yields slightly softer crumb due to starch modification.
- Baking Powder (1½ tsp) & Baking Soda (¼ tsp): A synergistic double-acting system. Baking powder provides primary lift; soda neutralizes acidity from buttermilk (if used in variation) and boosts browning. Freshness is critical—test baking powder by dropping ½ tsp in hot water (should fizz vigorously); replace if >6 months old.
- Salt (½ tsp): Enhances all flavors and tightens gluten network just enough to support rise without chewiness. Use fine sea salt or kosher salt measured by volume—not coarse flakes.
- Eggs (3 large, room temperature): Provide structure (via coagulating proteins), emulsification (yolks), and leavening (whipped whites in some versions). Room temp ensures uniform blending and prevents re-solidification of melted butter. Pasture-raised eggs impart golden hue and richer mouthfeel.
- Vanilla Extract (2 tsp pure): Alcohol-based pure extract—not imitation—carries volatile aromatic compounds that survive baking. Madagascar Bourbon vanilla offers creamy depth; Mexican vanilla adds spicier notes. Add *after* milk cools slightly to preserve top notes.
Optional but traditional: 1 tbsp lemon juice or white vinegar—added to scalded milk mixture to gently acidify, further tenderizing gluten and brightening flavor without detectable sourness.
Step-by-Step Recipe
- Preheat & Prep: Position oven rack in center. Preheat to 350°F (177°C). Generously grease two 9-inch round cake pans with softened butter, then line bottoms with parchment paper rounds. Dust sides with flour, tapping out excess. Let pans sit at room temperature—cold pans cause uneven baking and sticking.
- Scald the Milk Mixture: In a heavy-bottomed saucepan (stainless steel or enameled cast iron preferred), combine milk, butter cubes, and optional lemon juice/vinegar. Heat over medium-low flame, stirring constantly with a silicone spatula. Watch closely—do NOT boil. When tiny bubbles form around edges and surface shimmers with steam (175–180°F), remove from heat immediately. Let cool 3 minutes—still hot but no longer actively steaming (~150°F). Stir until butter is fully melted and emulsified (no separation).
- Cream Dry Ingredients: In a large mixing bowl, whisk together flour, sugar, baking powder, baking soda, and salt until thoroughly blended and lump-free. Whisk for full 45 seconds—this incorporates air and ensures even distribution of leaveners.
- Combine Wet & Dry Gradually: Make a well in center of dry mixture. Pour in warm milk-butter mixture. Add eggs one at a time, beating with a sturdy wire whisk (not electric mixer yet) for 90 seconds after each addition—just until smooth and slightly thickened. Then add vanilla. Whisk continuously in a figure-eight motion—this develops gentle gluten elasticity *without* overworking. Batter will be thin, glossy, and pourable, with faint ribbons when lifted.
- Final Rest & Pour: Let batter rest 5 minutes—this allows flour to fully hydrate and gluten to relax, preventing tunneling. Stir once gently to reincorporate any settled solids. Divide evenly between prepared pans (use a kitchen scale for precision: ~480g per pan). Tap pans firmly on counter 3 times to release air pockets.
- Bake with Precision: Place pans on middle rack. Bake 28–33 minutes—start checking at 26 minutes. Cake is done when tops are golden, spring back lightly when touched, and a toothpick inserted 1 inch from edge comes out clean (center may show moist crumbs—this is ideal; overbaking dries it out). Rotate pans front-to-back at 20 minutes for even browning.
- Cool Strategically: Remove pans from oven. Let cakes cool in pans on wire racks for exactly 12 minutes—any less and they’ll tear; any more and steam softens crust, causing sticking. Run a thin offset spatula around edges, then invert onto racks. Peel off parchment, then reinvert right-side-up to cool completely (1 hour minimum). Do not frost until fully cool—warm cake melts buttercream and causes sliding.
Tips
- Thermometer Required: An instant-read thermometer eliminates guesswork. Scalded milk must hit 175–180°F—under-scalded milk won’t denature proteins properly; over-scalded (boiling) causes curdling and loss of emulsifying power.
- No Substitutions for Technique: Do NOT use cold milk, skip scalding, or substitute oil. This is a thermal-emulsion cake—its magic lives in the precise heat transfer. Microwaving milk is discouraged (uneven heating risks hot spots and scorching).
- Altitude Adjustments: Above 3,000 ft: reduce sugar by 1 tbsp, increase flour by 1 tbsp, raise oven temp to 360°F, and decrease bake time by 2–3 minutes. Monitor closely—leavening acts faster at elevation.
- Humidity Hack: On rainy or humid days, reduce milk by 1 tbsp and add 1 extra tsp flour—ambient moisture affects flour hydration.
- Butter Temperature Matters: Butter should be cool-room temp (65°F)—firm enough to hold shape but yielding to gentle pressure. Too soft = greasy batter; too cold = unmelted lumps.
- Whisk, Don’t Mix: Electric mixers introduce too much air and over-develop gluten. A balloon whisk gives perfect aeration and shear force—essential for that signature “melt-in-mouth” texture.
- Resting Is Non-Negotiable: That 5-minute rest allows starch gelatinization to begin, ensuring even rise and preventing cratering. Skipping it leads to peaked centers and cracked tops.
- Storage Wisdom: Unfrosted layers keep 3 days wrapped tightly in beeswax cloth at cool room temp (65–68°F), or 5 days refrigerated. Freeze unfrosted, wrapped in parchment + foil, up to 3 months. Thaw overnight in fridge, then bring to room temp before frosting.
Variations and Customizations
While the classic version remains timeless, generations of bakers have lovingly adapted it—always preserving the scalded-milk foundation:
- Lemon-Hot Milk Loaf: Add zest of 2 lemons + 2 tbsp lemon juice to milk mixture; replace ¼ cup sugar with finely ground candied lemon peel. Bake in a 9×5″ loaf pan (55–65 min). Glaze with lemon-confectioners’ sugar icing.
- Spiced Brown Sugar Version: Substitute ½ cup dark brown sugar for granulated; add 1 tsp cinnamon, ¼ tsp ground ginger, ⅛ tsp cloves. Use molasses-infused butter (simmer 1 tbsp molasses with butter before scalding).
- Chocolate-Infused: Replace ¼ cup flour with unsweetened cocoa powder (Dutch-process preferred); add ½ tsp espresso powder to enhance depth. Optional: fold in ½ cup toasted walnuts and ⅓ cup mini chocolate chips post-mixing.
- Coconut-Macadamia: Replace milk with full-fat canned coconut milk (well-shaken); add 1 tsp coconut extract with vanilla. Fold in ¾ cup toasted macadamia nuts and ½ cup unsweetened shredded coconut.
- Old-Fashioned Buttermilk Swirl: Prepare batter as directed, then divide. Stir ¼ cup buttermilk + 1 tsp baking soda into half the batter. Alternate spoonfuls into pan and swirl gently with knife—creates tender, tangy ribbons.
- Gluten-Free Adaptation: Use 1:1 GF blend with xanthan gum (e.g., King Arthur Measure for Measure); add 1 extra egg yolk and 1 tsp apple cider vinegar. Rest batter 10 minutes pre-bake. Expect slightly denser crumb—compensate with extra vanilla and citrus zest.
- Vegan Reinvention: Replace milk with oat milk + 1 tbsp refined coconut oil (scalded together); use flax eggs (3 tbsp ground flax + 9 tbsp water, rested 10 min); swap sugar for organic cane sugar. Add ½ tsp guar gum to batter for binding. Best baked as cupcakes (18–22 min) for reliability.
Pro Tip: For holiday flair, brush cooled layers with simple syrup infused with rosewater, orange blossom water, or bourbon before stacking—and fill with fruit compotes (blackberry-thyme, spiced pear) or stabilized whipped cream.
Health Considerations and Nutritional Value
A single 3-ounce slice (1/12th of standard two-layer cake) contains approximately:
- Calories: 295 kcal
- Total Fat: 11g (6.5g saturated, from butter and whole milk)
- Carbohydrates: 45g (32g sugars, primarily sucrose from granulated sugar)
- Protein: 4.2g (from milk, eggs, and flour)
- Fiber: 0.6g (naturally low; boost with whole wheat pastry flour substitution—replace ½ cup AP with whole wheat pastry flour)
- Sodium: 210mg (moderate; reduces further with low-sodium baking powder)
- Calcium: 120mg (12% DV, from milk)
- Vitamin D: 45 IU (9% DV, naturally occurring in whole milk)
Health Notes: While not a “health food,” Hot Milk Cake offers nutritional advantages over many commercial cakes: zero trans fats, no artificial preservatives or colors, minimal processing, and bioavailable nutrients from whole foods. The scalding process mildly increases digestibility of milk proteins and may reduce allergenicity for some sensitive individuals. To align with wellness goals:
- Reduce Sugar Mindfully: Decrease granulated sugar to ¾ cup—flavor remains balanced due to butter and milk richness; add 1 tsp monk fruit extract for perceived sweetness without calories.
- Boost Nutrition: Enrich batter with 2 tbsp ground flaxseed or chia seeds (adds omega-3s and fiber); stir in ¼ cup mashed ripe banana or unsweetened applesauce (replaces 2 tbsp butter).
- Dairy Alternatives: Lactose-intolerant bakers can use lactose-free whole milk—scalding remains essential for texture. A2 milk is another gentle option.
- Portion Control: Bake as 24 mini-cupcakes (18–20 min) for consistent serving sizes and easier mindful eating.
Contraindications: Not suitable for strict vegans, those with cow’s milk protein allergy (CMPA), or individuals managing severe insulin resistance without medical guidance. Always consult a registered dietitian for personalized modifications.
Ingredients
- 1 cup (240 ml) whole milk
- ½ cup (113 g / 1 stick) unsalted butter, cut into ½-inch cubes
- 1 cup (200 g) granulated sugar
- 1¾ cups (210 g) all-purpose flour, spooned & leveled
- 1½ tsp aluminum-free baking powder
- ¼ tsp baking soda
- ½ tsp fine sea salt
- 3 large eggs, room temperature
- 2 tsp pure vanilla extract
- (Optional) 1 tbsp fresh lemon juice or white vinegar
Directions
- Preheat oven to 350°F (177°C). Grease and flour two 9-inch round cake pans; line bottoms with parchment.
- In a heavy-bottomed saucepan, combine milk, butter, and optional lemon juice. Heat over medium-low, stirring constantly, until tiny bubbles form at edges and temperature reaches 175–180°F (80–82°C). Remove from heat; cool 3 minutes.
- In a large bowl, whisk together flour, sugar, baking powder, baking soda, and salt for 45 seconds until fully blended.
- Pour warm milk mixture into dry ingredients. Add eggs one at a time, whisking 90 seconds after each. Stir in vanilla.
- Let batter rest 5 minutes. Stir gently once. Pour evenly into pans; tap to release air.
- Bake 28–33 minutes until golden and toothpick near edge comes out clean.
- Cool in pans 12 minutes. Invert onto racks, peel parchment, reinvert to cool completely (≥1 hour).
FAQ
- Can I make this cake ahead of time?
- Yes! Unfrosted layers freeze beautifully for up to 3 months. Wrap tightly in parchment, then heavy-duty foil. Thaw overnight in refrigerator, then bring to room temperature before frosting. Frosted cake keeps 3 days refrigerated (cover loosely with inverted cake dome or toothpicked plastic wrap).
- Why did my cake sink in the center?
- Sinking usually results from underbaking (check earlier next time), opening oven door before 25 minutes (causes thermal shock), or overmixing the batter after adding eggs (excess gluten elasticity collapses when cooling). Ensure your baking powder is fresh—expired leavener fails mid-rise.
- Can I bake this in a Bundt pan?
- Yes—but adjust time and technique. Use a 10-cup Bundt pan, grease *thoroughly* (including intricate crevices), and bake at 325°F for 50–60 minutes. Cool in pan 20 minutes before inverting—Bundt cakes are fragile when hot. Note: Crumb may be slightly denser due to deeper pan geometry.
- Is there a way to make it egg-free?
- For reliable structure, use “Ener-G Egg Replacer” (1 tbsp + 4 tbsp water per egg) or flax eggs (1 tbsp ground flax + 2.5 tbsp water per egg, rested 10 min). Expect a slightly more delicate crumb—best served as cupcakes or layered with sturdy buttercream.
- What’s the best frosting to pair with Hot Milk Cake?
- Its subtle sweetness and tender crumb shine with light, complementary frostings: Swiss meringue buttercream (silky, not overly sweet), lemon cream cheese frosting (bright contrast), or old-fashioned boiled milk frosting (a period-accurate, cloud-like topping made with scalded milk, sugar, and butter). Avoid heavy ganaches or dense fudgy frostings—they overwhelm the delicate texture.
- Can I double the recipe?
- Yes—but do not double the batter in one batch. Scale all ingredients by 2x and prepare in two separate batches to ensure proper emulsification and mixing time. Doubling the batter volume risks inconsistent heating of the milk mixture and uneven gluten development.
- My batter looks curdled after adding eggs—did I ruin it?
- No—this is normal! The warm milk-butter emulsion can temporarily seize when cold eggs hit it. Keep whisking vigorously for 30–60 seconds—the mixture will re-emulsify into a smooth, satiny batter. If it remains broken, let batter sit 2 minutes, then whisk again.
- Can I add fruits or nuts directly to the batter?
- Absolutely—fold in 1 cup fresh blueberries (tossed in 1 tsp flour), ¾ cup chopped toasted pecans, or ½ cup diced crystallized ginger. Add *after* the final rest, using a spatula with gentle folding motion—overmixing deflates air.
Summary
Vintage Hot Milk Cake is a masterclass in restrained elegance—a deceptively simple, scalded-milk cake whose ethereal tenderness, fine crumb, and nostalgic warmth have comforted generations since the 1920s.
Its enduring legacy rests not on novelty, but on reverence for technique: precise temperature control, patient emulsification, and the quiet alchemy that occurs when humble ingredients are treated with time-honored intention.