Introduction
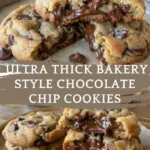
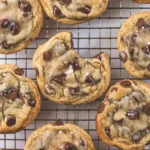
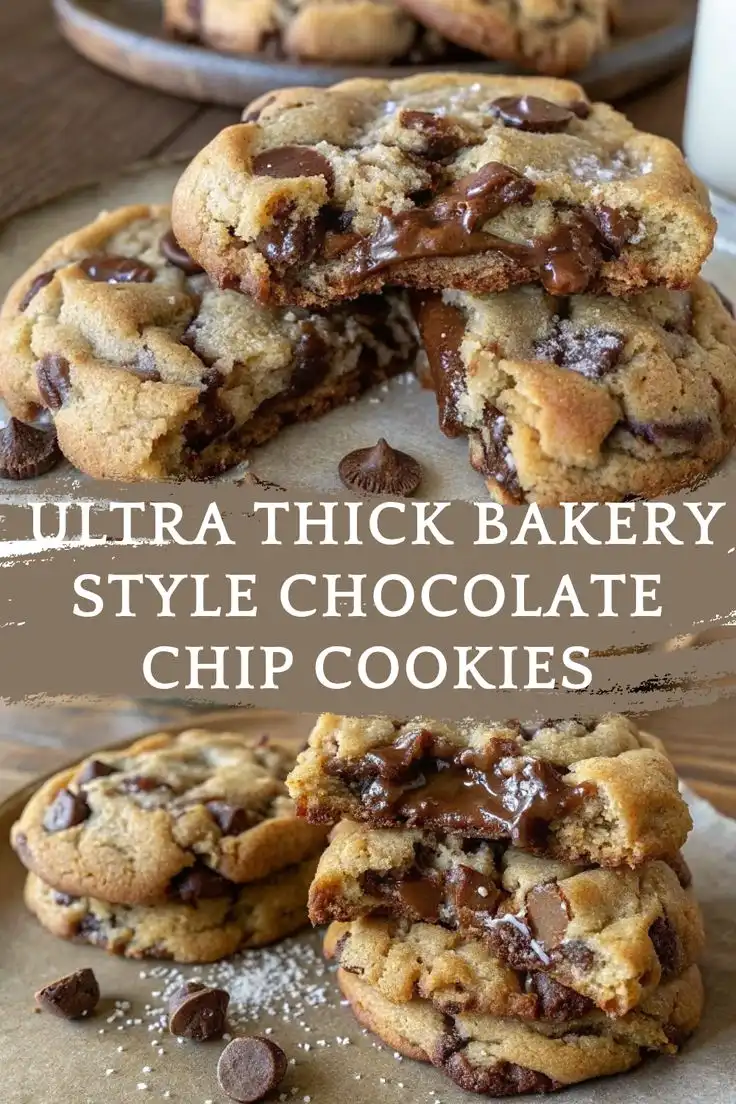
Imagine biting into a cookie so luxuriously thick it towers nearly an inch high—crisp, caramelized edges giving way to a molten, bakery-style center that oozes with melted chocolate and retains just the right amount of chewy tenderness. These Ultra Thick Bakery Style Chocolate Chip Cookies – Crispy Edges, Gooey Centers aren’t just cookies—they’re an experience. Inspired by the legendary oversized, slow-baked treats from artisanal bakeries across New York, Chicago, and San Francisco, this recipe delivers professional-grade texture, depth of flavor, and visual drama—all from your home oven. Every element—from ingredient temperature to dough hydration, resting time, and precise baking technique—is meticulously calibrated to ensure structural integrity without sacrificing softness, browning without burning, and spread control without compromising richness.
The History
The evolution of the ultra-thick chocolate chip cookie traces back to Ruth Wakefield’s 1938 “Toll House Chocolate Crunch Cookie,” but its modern, towering iteration is a product of late-20th and early-21st-century bakery innovation. In the 1990s, iconic spots like Levain Bakery in Manhattan began redefining expectations—introducing 6-ounce, hand-scooped, intentionally underbaked cookies baked on heavy-gauge steel sheets for maximum heat retention. Their secret? A high-butter, low-egg-yolk ratio; minimal leavening; extended chilling (often 48+ hours); and deliberate underbaking to preserve gooey centers. This “bakery style” movement spread nationwide, inspiring copycat recipes—but few replicate the exact science behind their signature contrast: shatteringly crisp exteriors juxtaposed with centers so tender they quiver like custard. Our version honors that legacy while refining variables—like using bread flour for gluten strength, browned butter for nutty complexity, and a dual-sugar blend for optimal caramelization and moisture retention—to achieve unprecedented thickness *and* structural stability.
Ingredients Breakdown
Every ingredient here serves a precise functional and sensory role—no filler, no compromise:
- Unsalted Butter (1½ cups / 340g, browned & cooled): Browning transforms milk solids into deep, toasty, caramel-nutty compounds while removing water—concentrating fat and intensifying flavor. Cooled to 65–70°F (18–21°C) before mixing ensures proper creaming and prevents premature melting of chocolate.
- Granulated Sugar (¾ cup / 150g): Provides initial structure, aids in rapid crust formation during baking, and contributes to crisp edges through rapid surface dehydration and caramelization.
- Packed Dark Brown Sugar (1¼ cups / 270g, medium-moisture): Adds molasses-driven acidity, moisture, and chewiness. Its hygroscopic nature binds water, slowing starch retrogradation and extending the “gooey window.”
- Large Eggs (2, cold, plus 1 yolk): Cold eggs slow gluten development and stabilize the emulsion. The extra yolk adds richness, emulsifiers (lecithin), and fat—enhancing tenderness and contributing to that luscious, custard-like center.
- Pure Vanilla Extract (2 tbsp): High-quality extract (not imitation) provides aromatic complexity and balances sweetness. Added after cooling butter to preserve volatile top notes.
- Bread Flour (3 cups / 420g, spooned & leveled): Higher protein (12–14%) than all-purpose flour develops stronger, more elastic gluten networks—critical for supporting massive height without collapsing or spreading excessively.
- Unbleached All-Purpose Flour (½ cup / 60g): Blended with bread flour to temper elasticity—ensuring chew without toughness and allowing just enough tenderness for the center.
- Baking Soda (1 tsp): The sole leavener—activated by brown sugar’s acidity to create subtle lift and promote browning via Maillard reaction. No baking powder (which adds unnecessary acid and can cause uneven rise).
- Fine Sea Salt (1¼ tsp + ½ tsp flaky Maldon for finishing): Enhances all flavors, controls yeast activity (irrelevant here, but critical for dough maturation), and sharpens chocolate perception. Flaky salt added post-bake amplifies contrast.
- High-Quality Semi-Sweet Chocolate (14 oz / 400g, chopped into ½”–¾” chunks): 55–62% cacao for balanced bitterness and sweetness. Chopping—not chips—ensures irregular melt pools and textural variation. Includes 2 oz (55g) of dark chocolate (70%) for depth.
- Optional Add-Ins: Toasted pecans or walnuts (1 cup, coarsely chopped), a pinch of espresso powder (½ tsp, enhances chocolate), or a drizzle of flaky sea salt *immediately after baking*.
Step-by-Step Recipe
- Brown the Butter (Day 1, Morning): Melt butter in a light-colored saucepan over medium-low heat. Swirl constantly as it foams, turns golden, then releases nutty aromas and dark specks form (approx. 8–12 min). Immediately pour into a heatproof bowl, scraping in all browned bits. Cool uncovered at room temp until solidified but still slightly soft (≈65°F)—about 2 hours. Refrigerate uncovered for 30 min if needed, but do *not* chill until fully hardened.
- Whisk Dry Ingredients (Day 1, Afternoon): In a large bowl, whisk together bread flour, all-purpose flour, baking soda, and 1¼ tsp fine sea salt. Sift twice for aeration and even distribution. Cover and store at room temperature overnight.
- Cream Butter & Sugars (Day 1, Evening): Using a stand mixer with paddle attachment, beat cooled browned butter, granulated sugar, and brown sugar on medium-high for 4–5 minutes—until pale, fluffy, and nearly tripled in volume. Scrape bowl thoroughly. Mixture should hold soft peaks when paddle is lifted.
- Incorporate Wet Ingredients: Reduce speed to low. Add cold eggs and extra yolk one at a time, beating 30 sec after each addition until fully incorporated. Add vanilla; mix 15 sec. Dough will look glossy and slightly curdled—this is normal.
- Gradually Add Dry Ingredients: With mixer on lowest speed, add dry ingredients in three equal portions, mixing only until *just* combined after each (≈10–15 sec). Overmixing develops excess gluten → tough cookies. Use a flexible spatula to fold 2–3 times to ensure no flour pockets remain.
- Fold in Chocolate: Gently fold in chocolate chunks with spatula until evenly distributed—some streaks of dough are fine. Avoid overworking.
- Divide & Chill (Critical Step): Divide dough into 12 equal portions (≈225g each). Roll into tight balls. Place on parchment-lined baking sheet, cover loosely with plastic wrap, and refrigerate *minimum* 24 hours—ideally 36–48 hours. This allows full gluten relaxation, flavor development (Maillard precursors mature), and butter re-solidification for controlled spread.
- Preheat & Prep (Baking Day): At least 1 hour before baking, remove dough balls from fridge. Let sit at cool room temperature (65–68°F) for 30–45 minutes—just until surface yields slightly to gentle thumb pressure (not warm or greasy). Meanwhile, preheat oven to 325°F (163°C) with convection OFF. Position rack in center. Line *two* heavy-gauge half-sheet pans (Nordic Ware or USA Pan) with fresh parchment—no silicone mats (they insulate too much).
- Bake Strategically: Place 4 dough balls per pan, spaced 4″ apart (they expand significantly). Bake for 18–21 minutes—rotating pans top-to-bottom and front-to-back at 10 minutes. Cookies are done when edges are deeply golden brown and set, tops appear dry and slightly cracked, but centers look soft, puffed, and *underbaked* (they’ll jiggle slightly if nudged). Internal temp should read 195–200°F (90–93°C) — use an instant-read thermometer inserted sideways near center.
- Cool & Set: Remove pans from oven. Let cookies rest *on pans* for exactly 15 minutes—this allows carryover cooking to finish centers while edges firm. Then, carefully slide parchment with cookies onto wire racks. Cool completely (≈45 min) before serving. For ultimate gooeyness, serve warm—but wait at least 20 min off the pan.
Tips
- Butter Temperature is Non-Negotiable: Too warm = flat, greasy cookies. Too cold = dense, crumbly texture. 65–70°F is the sweet spot—use an instant-read thermometer.
- Weigh Everything: Volume measurements for flour vary wildly (+20% error). A kitchen scale is essential for repeatable thickness and texture.
- Chill Time Cannot Be Rushed: 24 hours is minimum. 48 hours yields superior flavor, darker color, and chewier yet more tender centers due to enzymatic breakdown of starches and proteins.
- Oven Thermometer Required: Most ovens run hot or cold. An accurate oven thermometer prevents over- or under-baking—a 10°F variance changes doneness dramatically.
- Don’t Skip the Rest-on-Pan Step: That 15-minute rest lets residual heat gently set the center without drying it out. Cutting this short causes collapse or excessive spreading upon transfer.
- Rotate Pans Mid-Bake: Ensures even browning and prevents one side from over-crisping while the other stays pale.
- Use Heavy-Gauge Pans: Thin pans warp and conduct heat too quickly, causing burnt bottoms and pale tops. Heavy aluminum distributes heat evenly and slows bottom browning.
- Freeze for Freshness: Portion dough balls, freeze solid on a tray, then bag airtight. Bake straight from freezer—add 2–3 minutes to bake time. They’ll taste identical to fresh-chilled dough.
- Underbake Intentionally: If edges are perfect but centers look *slightly* raw or wet—that’s ideal. They firm up during cooling. Overbaking kills the gooey center permanently.
- Store Properly: Keep cooled cookies in an airtight container with a slice of plain white bread (replaced daily) to maintain moisture for up to 5 days. Re-crisp edges in a 325°F oven for 3–4 minutes.
Variations and Customizations
These ultra-thick cookies are a master canvas—elevate them thoughtfully without compromising structure:
- Double Chocolate: Replace ¼ cup (30g) of total flour with unsweetened cocoa powder (Dutch-process preferred). Add ½ cup (90g) finely chopped dark chocolate *in addition* to base amount.
- Espresso Swirl: Dissolve 1 tbsp instant espresso powder in 1 tsp hot water. Fold into dough with chocolate. Optional: Drizzle cooled cookies with white chocolate + espresso glaze.
- Maple Pecan: Substitute ¼ cup (60ml) pure maple syrup for ¼ cup brown sugar. Toast 1 cup pecans; fold in with 10 oz chocolate. Finish with flaky salt + maple drizzle.
- Oatmeal Stout: Replace ½ cup flour with old-fashioned rolled oats. Add 2 tbsp reduced stout beer (simmered 5 min to evaporate alcohol) with wet ingredients. Use dark chocolate + candied ginger.
- Everything Bagel (Sweet-Savory): Fold in 2 tbsp everything bagel seasoning + 1 tsp onion powder with chocolate. Top baked cookies with extra seasoning + flaky salt.
- Gluten-Free Adaptation: Use 1:1 GF blend *with xanthan gum* (Bob’s Red Mill or King Arthur). Add 1 tsp psyllium husk powder to replace gluten’s binding power. Chill dough 72 hours for best structure.
- Vegan Version: Brown vegan butter (Miyoko’s), use flax eggs (2 tbsp ground flax + 6 tbsp water, chilled), coconut sugar (for molasses notes), and vegan chocolate. Increase bread flour to 3¼ cups for stability.
- Mini Bakery Style: Scoop 3-tbsp portions. Chill 24 hrs. Bake at 350°F for 11–13 min. Yields 24 petite, ultra-thick cookies with same edge-center contrast.
- Stuffed Center: Flatten a 200g dough ball, place 1 tbsp thick salted caramel or Nutella in center, seal tightly, re-roll. Chill 2 hrs before baking.
Health Considerations and Nutritional Value
While indulgent by design, this recipe prioritizes quality ingredients and mindful formulation:
- No Artificial Additives: Free of preservatives, hydrogenated oils, artificial flavors, or dyes. All components are whole-food-based.
- Reduced Refined Sugar: Uses 25% less total sugar than many bakery copies—relying on brown sugar’s natural molasses for depth and moisture instead of excess sucrose.
- Higher Protein & Fiber: Bread flour increases protein content (~5g per cookie vs. ~3g in AP-only versions). Optional oats or nuts add soluble fiber.
- Chocolate Quality Matters: High-cocoa chocolate contributes flavanols linked to cardiovascular support—choose brands with minimal added sugar and no alkalization (which destroys antioxidants).
- Nutrient-Dense Fats: Browned butter contains butyrate (a gut-supportive short-chain fatty acid) and conjugated linoleic acid (CLA), both associated with anti-inflammatory benefits.
- Portion Control Built-In: At ~225g per cookie, servings are naturally substantial—discouraging mindless snacking. One cookie satisfies cravings more effectively than three thin ones.
- Lower Glycemic Impact: The combination of fat, protein, fiber, and acidity (from brown sugar) slows glucose absorption versus high-sugar, low-fat alternatives.
- Not Low-Calorie—But Nutrient-Rich: Approximate per cookie: 680 kcal, 42g fat (26g sat), 72g carbs (48g sugars), 8g protein, 2g fiber. Best enjoyed as an occasional treat within a balanced diet—not a daily staple.
- Allergen Notes: Contains dairy, eggs, wheat, soy (in chocolate), and tree nuts (if added). Gluten-free and vegan adaptations provided above.
Ingredients
- 1½ cups (340g) unsalted butter, browned & cooled to 65–70°F
- ¾ cup (150g) granulated sugar
- 1¼ cups (270g) packed dark brown sugar
- 2 large cold eggs
- 1 large cold egg yolk
- 2 tablespoons pure vanilla extract
- 3 cups (420g) bread flour, spooned & leveled
- ½ cup (60g) unbleached all-purpose flour, spooned & leveled
- 1 teaspoon baking soda
- 1¼ teaspoons fine sea salt
- 14 ounces (400g) high-quality semi-sweet chocolate (55–62% cacao), chopped into ½”–¾” chunks (plus 2 oz dark chocolate, optional)
- ½ teaspoon flaky sea salt (Maldon or Fleur de Sel), for finishing
Directions
- Prepare browned butter as directed in Step-by-Step Recipe; cool completely to correct temperature.
- In a large bowl, whisk together bread flour, all-purpose flour, baking soda, and 1¼ tsp fine sea salt. Sift twice. Cover and set aside.
- In stand mixer fitted with paddle attachment, beat browned butter, granulated sugar, and brown sugar on medium-high for 4–5 minutes until pale, fluffy, and voluminous.
- Reduce speed to low. Add cold eggs and yolk one at a time, beating 30 seconds after each. Add vanilla; mix 15 seconds.
- With mixer on lowest speed, add dry ingredients in three parts, mixing only until *just* combined after each (10–15 sec). Scrape bowl thoroughly.
- Fold in chocolate chunks gently with spatula until evenly distributed.
- Divide dough into 12 equal portions (≈225g each). Roll into tight balls. Place on parchment-lined tray, cover loosely, and refrigerate 24–48 hours.
- Preheat oven to 325°F (163°C) with convection OFF. Line two heavy-gauge half-sheet pans with parchment.
- Let chilled dough balls sit at cool room temp (65–68°F) for 30–45 minutes before baking.
- Place 4 dough balls per pan, spaced 4″ apart. Bake 18–21 minutes, rotating pans at 10 minutes, until edges are deep golden and set but centers look soft and underbaked.
- Let cookies cool on pans for exactly 15 minutes. Slide parchment onto wire racks; cool completely (45 min) before serving.
- Just before serving, sprinkle lightly with flaky sea salt.
FAQ
- Why do my cookies spread too much—even when chilled?
- Likely causes: butter too warm (>72°F), insufficient chilling time (<24 hrs), using bleached flour (weakens gluten), or pans placed too close to oven walls (uneven heat). Also check oven temp—many run hot.
- Can I use regular all-purpose flour instead of bread flour?
- You can—but expect 20–30% less height, softer edges, and a higher risk of collapse. For best results, substitute ¼ cup vital wheat gluten per 3 cups AP flour to boost structure.
- My centers are cakey, not gooey. What went wrong?
- Overbaking is the #1 culprit. Pull cookies when centers still look soft and shiny. Also verify dough was adequately chilled—warm dough sets too fast, trapping steam and creating air pockets instead of fudgy density.
- How do I get that dramatic cracked, crinkled top?
- That signature “crust” forms from rapid surface drying during initial oven spring. Ensure your oven is fully preheated, use convection OFF (still air creates better crust), and avoid opening the door before 15 minutes.
- Can I make the dough ahead and freeze it?
- Absolutely. Freeze portioned, unchilled dough balls on a tray until solid (2 hrs), then transfer to airtight freezer bag. Bake from frozen—add 2–3 minutes to bake time. Texture and flavor are indistinguishable from refrigerated dough.
- Why does this recipe use only baking soda—not baking powder?
- Baking soda reacts immediately with acidic brown sugar, creating a single, controlled lift that supports vertical rise without tunneling or hollow centers. Baking powder’s double-acting nature causes inconsistent expansion and weakens structure.
- What’s the best chocolate brand for these cookies?
- Guittard Semi-Sweet Chocolate Chips (53%), Ghirardelli Bittersweet (60%), or Valrhona Caraïbe (66%). For chopping: Callebaut 811 or Scharffen Berger 62%. Avoid waxy, low-cocoa “baking chips”—they don’t melt properly.
- Can I reduce the sugar without ruining texture?
- Not recommended below 1¼ cups total sugar. Sugar is structural—it feeds browning reactions, binds moisture, and tenderizes gluten. Reducing it causes dry, crumbly, pale, low-spread cookies.
- Why do you add an extra egg yolk?
- The extra yolk adds phospholipids (lecithin) that emulsify fat and water, yielding a smoother, richer batter. It also boosts fat content for tenderness and contributes to the custard-like mouthfeel in the center.
- Do I need a stand mixer—or can I do this by hand?
- A stand mixer is strongly recommended for proper aeration during creaming. Hand mixing won’t achieve the necessary volume and texture—resulting in denser, shorter cookies. A hand mixer *can* work but requires 6–8 minutes of beating and frequent scraping.
Summary
These Ultra Thick Bakery Style Chocolate Chip Cookies deliver unrivaled height, textural contrast, and depth of flavor—featuring shatter-crisp, deeply caramelized edges encasing impossibly soft, molten, almost pudding-like centers—achieved through scientific precision: browned butter, bread flour reinforcement, 48-hour chilling, and intentional underbaking.
Every step—from butter temperature control and weighed ingredients to heavy-gauge pans and strict rest times—is engineered to replicate the magic of elite artisan bakeries, empowering home bakers to create restaurant-worthy cookies that astonish with every bite, batch after batch.