Turkey Cheese Ball: A Festive and Flavorful Delight
The Turkey Cheese Ball is more than just a holiday appetizer—it’s a centerpiece, a conversation starter, and a delicious blend of savory flavors wrapped in festive charm. Whether you’re hosting a Thanksgiving dinner, a Christmas party, or simply gathering with loved ones during the fall season, this edible turkey-shaped cheese ball brings joy to any table. With its creamy interior, crunchy coating, and whimsical presentation, it’s no wonder this recipe has become a staple at seasonal gatherings across homes in North America and beyond.
The History of the Turkey Cheese Ball
The origins of the cheese ball can be traced back to mid-20th century American cuisine, particularly gaining popularity in the 1950s and 60s when molded dishes and entertaining with flair became all the rage. Hostesses sought creative ways to impress guests with visually appealing, easy-to-make appetizers, and the cheese ball—often rolled in nuts or herbs—fit the bill perfectly. Over time, seasonal variations emerged, with holiday-themed presentations like the Turkey Cheese Ball rising in popularity during the Thanksgiving season.
While there isn’t a single documented inventor of the Turkey Cheese Ball, food bloggers, home cooks, and magazine editors began sharing versions of the recipe in the early 2000s. The concept combines classic Southern-style cheese balls (made with cream cheese, cheddar, and spices) with a playful nod to the traditional Thanksgiving turkey. By shaping the cheese ball into a turkey form and using vegetables or dried fruit for feathers, eyes, and beak, the dish transforms from simple spread to edible art. Today, it remains a beloved tradition, often featured in family recipe collections and Pinterest boards alike.
Ingredients Breakdown
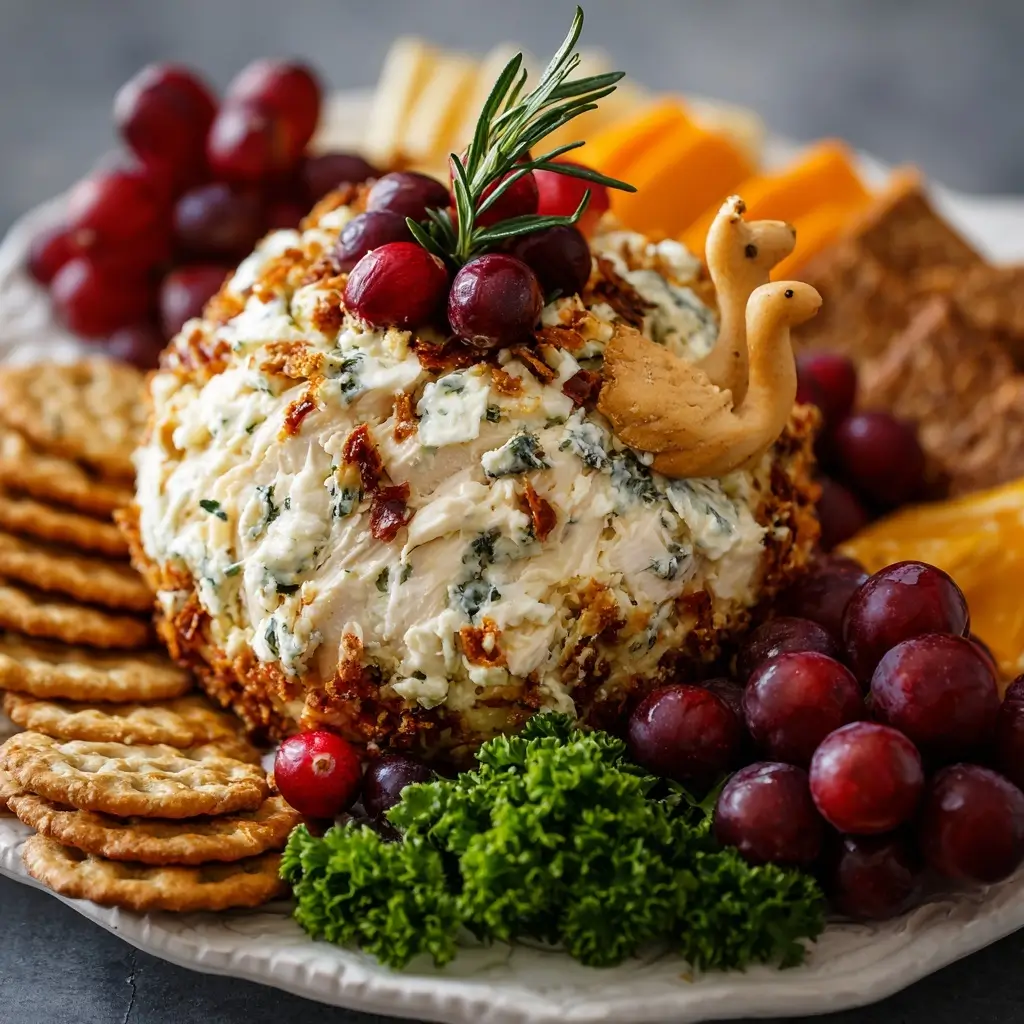
Creating the perfect Turkey Cheese Ball starts with selecting high-quality ingredients that balance richness, tanginess, crunch, and flavor. Here’s a detailed breakdown of each component:
- Cream Cheese: The base of the cheese ball. Full-fat cream cheese ensures a rich, smooth texture that holds its shape well. It should be softened to room temperature for easy mixing.
- Sharp Cheddar Cheese: Adds depth and a bold, tangy flavor. Real shredded cheddar works better than pre-shredded varieties, which contain anti-caking agents.
- Blue Cheese or Feta (optional): For those who enjoy a pungent kick, crumbled blue cheese or feta adds complexity and gourmet flair.
- Garlic Powder & Onion Powder: These dry seasonings enhance savoriness without adding moisture, helping maintain the cheese ball’s firm consistency.
- Worcestershire Sauce: A few dashes provide umami and subtle sweetness, tying all the flavors together.
- Fresh Parsley or Chives: Finely chopped herbs add freshness and color, balancing the richness of the cheeses.
- Paprika: Used both in the mix and on the surface for warmth and vibrant color.
- Nuts (Pecans, Walnuts, or Almonds): Finely chopped and used as a coating, they offer a satisfying crunch and earthy contrast.
- Vegetable Garnishes: Carrots for the beak, olives for eyes, green onions or celery for feet, and bell peppers or dried cranberries for feathers bring the turkey to life.
Each ingredient plays a role not only in taste but also in texture and visual appeal, making the Turkey Cheese Ball as delightful to look at as it is to eat.
Step-by-Step Recipe
Follow these detailed instructions to create a stunning and delicious Turkey Cheese Ball that will wow your guests:
- Prepare Ingredients: Allow cream cheese to soften at room temperature for about 30 minutes. Grate the cheddar cheese if not pre-shredded. Chop herbs and nuts finely.
- Mix the Base: In a large bowl, beat the softened cream cheese with an electric mixer until smooth and creamy. Add shredded cheddar, garlic powder, onion powder, Worcestershire sauce, paprika, and chopped herbs. Mix until fully combined and uniform in color.
- Taste and Adjust: Sample the mixture and adjust seasoning as needed—add more salt, pepper, or Worcestershire for depth.
- Shape the Body: Lay out a large piece of plastic wrap on a clean surface. Scoop the cheese mixture onto the center and use the wrap to help shape it into a large oval or round ball—this will be the turkey’s body.
- Create the Head: Take a smaller portion of the mixture and form a smaller ball for the head. Attach it slightly to the top side of the main ball using a little pressure or a dab of extra cream cheese.
- Chill the Balls: Refrigerate the shaped cheese balls for at least 1 hour to firm up, making them easier to coat and decorate.
- Coat with Nuts: Spread chopped nuts on a plate. Remove the chilled cheese balls from the fridge. Roll the main body in the nuts, pressing gently so they adhere. You may leave the head uncoated for contrast or lightly dust it.
- Final Chill: Return the coated cheese ball to the refrigerator for another 30 minutes to set the coating.
- Decorate as a Turkey:
- Insert thin slices of black olive for eyes.
- Use a small triangle of orange carrot for the beak, placing it between the head and body.
- Cut a red pepper slice into a wattle shape and attach below the beak.
- Arrange bell pepper strips, dried cranberries, or rosemary sprigs around the back of the body to mimic feathers.
- Cut celery or green onion stalks into foot shapes and insert them at the bottom.
- Serve: Transfer the finished Turkey Cheese Ball to a serving platter lined with lettuce, kale, or fresh herbs for a natural base. Surround with crackers, breadsticks, apple slices, and vegetable sticks for dipping.
Tips for Success
- Use Full-Fat Dairy: Low-fat cream cheese or cheese may result in a softer, less stable cheese ball that doesn’t hold its shape well.
- Chill Thoroughly: Don’t skip the chilling steps. Cold cheese is easier to handle and coat neatly.
- Prevent Browning: If preparing a day ahead, cover tightly with plastic wrap touching the surface to prevent oxidation and discoloration.
- Customize Coating: Try different coatings like crushed pretzels, sunflower seeds, bacon bits, or everything bagel seasoning for variety.
- Make Ahead: Assemble the cheese ball up to 2 days in advance (without garnish), then decorate the day of serving for best appearance.
- Kid-Friendly Version: Use mild cheese, skip strong seasonings, and let children help decorate with safe, colorful toppings.
- Stabilize the Shape: For larger cheese balls, consider inserting a small skewer between head and body for support.
Variations and Customizations
The beauty of the Turkey Cheese Ball lies in its versatility. Here are some creative twists to suit different tastes and dietary needs:
- Vegan Turkey Cheese Ball: Use dairy-free cream cheese and vegan cheddar shreds. Coat with toasted pumpkin seeds or crushed cashews for a plant-based version.
- Spicy Kick: Add diced jalapeños, cayenne pepper, or hot sauce to the mix for a fiery twist.
- Holiday Herb Blend: Mix in rosemary, thyme, and sage for a Thanksgiving-inspired herbal note.
- Bacon Lover’s Edition: Fold in crumbled cooked bacon and sprinkle extra on top before adding nut coating.
- Southwest Style: Use pepper jack cheese, add roasted corn, cumin, and chopped green chilies.
- Fruit & Nut Fusion: Incorporate dried cranberries, apricots, or cherries along with toasted pecans for a sweet-savory profile.
- Gluten-Free Option: Naturally gluten-free, just ensure all additives (like Worcestershire sauce) are certified GF.
- Different Shapes: Make mini cheese balls shaped like pumpkins, scarecrows, or snowmen for other holidays.
Health Considerations and Nutritional Value
While undeniably delicious, the Turkey Cheese Ball is a rich, calorie-dense appetizer. Understanding its nutritional content can help with mindful enjoyment:
- Calories: Approximately 150–200 calories per 2-tablespoon serving (excluding crackers).
- Fat Content: High in saturated fat due to full-fat dairy. One serving may contain 12–15g of fat.
- Protein: Provides about 4–6g of protein per serving from cheese and nuts.
- Sodium: Can be high due to cheese, seasoning, and Worcestershire sauce—around 300–400mg per serving.
- Calcium: A good source thanks to dairy ingredients, supporting bone health.
- Portion Control: Serve with plenty of raw vegetables to balance indulgence with nutrition.
- Lower-Fat Options: While not recommended for texture reasons, reduced-fat versions can be attempted with neufchâtel cheese and light cheddar, though stability may suffer.
- Allergens: Contains dairy and tree nuts (if using pecans/walnuts). Always label accordingly for guests.
Enjoy this treat in moderation, especially for those monitoring cholesterol, blood pressure, or calorie intake. Pairing with fiber-rich dippers like carrots, cucumbers, and whole-grain crackers enhances the overall nutritional balance.
Ingredients
- 16 oz (2 packages) full-fat cream cheese, softened
- 1 ½ cups sharp cheddar cheese, shredded
- ¼ cup finely chopped pecans or walnuts (plus 1 cup for coating)
- 2 tbsp fresh parsley or chives, minced
- 1 tsp garlic powder
- 1 tsp onion powder
- ½ tsp paprika (plus extra for dusting)
- 1 tbsp Worcestershire sauce
- Salt and freshly ground black pepper to taste
- 1 medium carrot, cut into small triangles
- Black olives, sliced (for eyes)
- Red and green bell peppers, cut into feather shapes
- Celery or green onions (for feet)
- Optional: blue cheese crumbles, dried cranberries, rosemary sprigs
Directions
- In a large mixing bowl, beat the softened cream cheese until smooth and fluffy.
- Add shredded cheddar, chopped nuts (¼ cup), parsley, garlic powder, onion powder, paprika, Worcestershire sauce, salt, and pepper. Mix until thoroughly combined.
- Taste and adjust seasonings as desired.
- Line a bowl or tray with plastic wrap. Scoop the mixture and shape into a large oval for the body and a small ball for the head.
- Refrigerate uncovered for 1 hour to firm.
- Sprinkle chopped nuts on a flat plate. Roll the main cheese ball in the nuts until fully coated. Lightly press nuts to adhere.
- Return to the fridge for 30 minutes.
- Attach the head to the body using gentle pressure or a dab of cream cheese.
- Insert olive slices for eyes, a carrot triangle for the beak, and a red pepper wattle.
- Arrange pepper strips or cranberries in a fan shape at the back for feathers.
- Cut celery into foot shapes and insert at the bottom.
- Place on a bed of greens and surround with crackers and veggies.
- Serve cold and store leftovers in an airtight container for up to 5 days.
FAQ
Can I make the Turkey Cheese Ball ahead of time?
Yes! Prepare the cheese ball (without garnish) up to 2 days in advance. Wrap tightly in plastic and refrigerate. Decorate the day of serving for the freshest look.
How long does it last in the fridge?
The cheese ball will keep for 5–7 days in an airtight container. Remove garnishes like fresh veggies before storing and replace them when serving.
Can I freeze it?
Freezing is not recommended, as cream cheese tends to separate and become grainy upon thawing, affecting texture and appearance.
What can I use instead of nuts?
Try crushed pretzels, seasoned breadcrumbs, toasted coconut flakes, sunflower seeds, or crumbled bacon for a nut-free coating.
Why did my cheese ball turn out too soft?
This usually happens if low-fat cream cheese is used or if it wasn’t chilled long enough. Always use full-fat cream cheese and allow sufficient chilling time between steps.
Is it safe for pregnant women to eat?
Since the recipe uses pasteurized dairy and is served cold, it’s generally safe. However, consult a healthcare provider if concerned about unpasteurized additives or cross-contamination.
Can I make mini turkey cheese balls?
Absolutely! Use small scoops to form mini bodies and heads. Place on a tray and decorate with tiny veggie pieces for adorable individual servings.
Summary
The Turkey Cheese Ball is a festive, flavorful, and fun-to-make appetizer that combines rich cream cheese, sharp cheddar, and aromatic seasonings, all shaped into a whimsical turkey for holiday cheer. Easy to customize and perfect for entertaining, it’s sure to become a cherished tradition at your seasonal gatherings.