Introduction
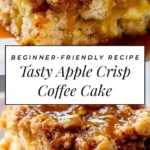
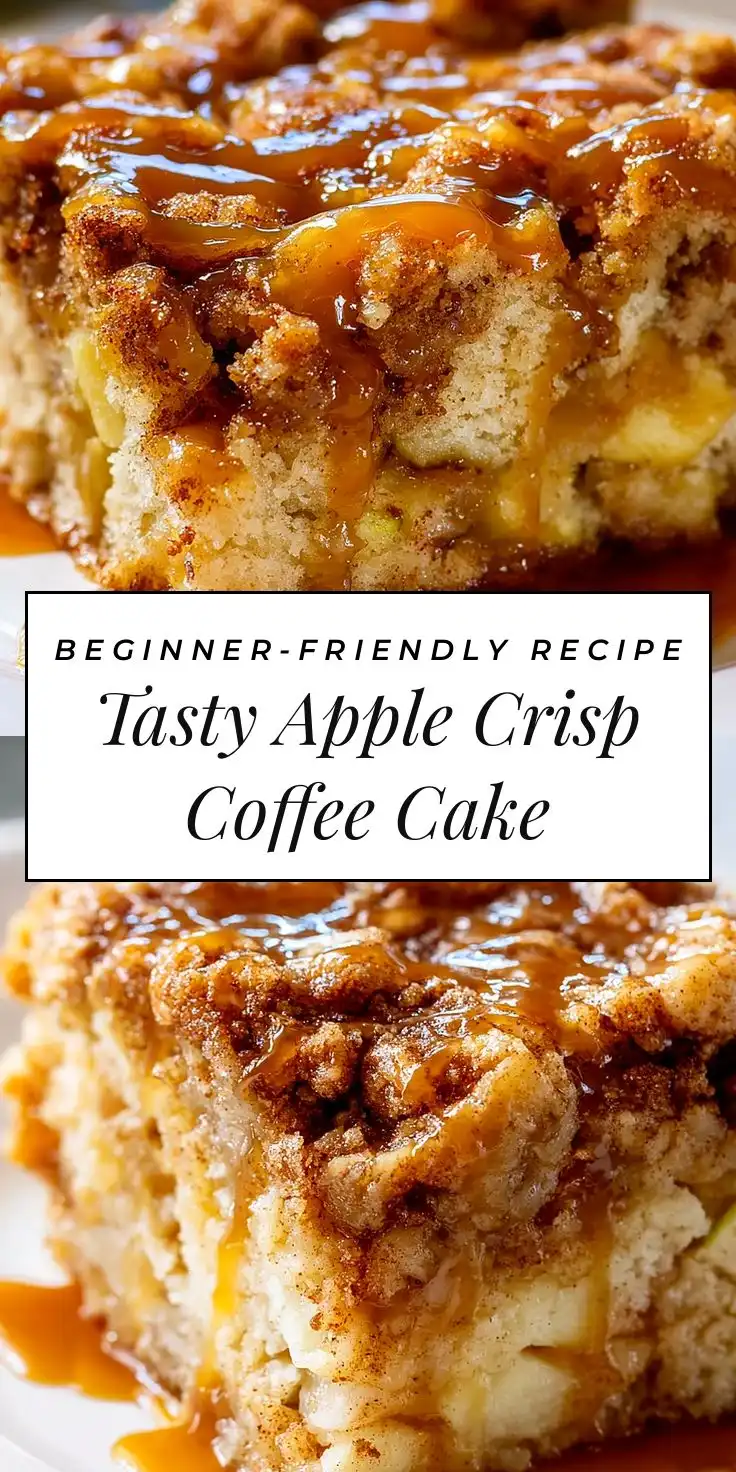
Welcome to the ultimate comfort-baking experience: the Super Easy Apple Crisp Coffee Cake — a harmonious fusion of tender cinnamon-spiced cake, juicy baked apples, and a buttery, golden-brown oat-and-brown-sugar crumble topping. Designed for home bakers of all skill levels, this recipe delivers bakery-quality results with minimal effort, zero fancy equipment, and no complicated techniques. Whether you’re whipping up a cozy weekend breakfast, prepping an effortless dessert for guests, or seeking a warm, aromatic treat that fills your kitchen with the scent of fall (even in summer!), this coffee cake checks every box. It’s moist, flavorful, texturally dynamic, and forgiving — meaning slight measurement variances, substitutions, or timing hiccups won’t derail your success. Think of it as your new go-to “I want something special but don’t want to spend all morning baking” solution.
The History
The roots of apple crisp coffee cake stretch across two beloved American baking traditions: the humble coffee cake, which emerged in the late 19th century as a yeast-leavened, often ring-shaped, lightly sweetened cake served alongside coffee (not a cake meant to contain coffee), and the apple crisp, a Depression-era innovation born from resourcefulness — swapping labor-intensive pie crusts for a quick streusel-like topping made from pantry staples like oats, brown sugar, butter, and spices. By the mid-20th century, especially during the postwar baking boom fueled by accessible packaged ingredients (like self-rising flour and pre-sliced apples), bakers began layering these concepts: folding spiced apples directly into a simple batter and crowning them with crisp topping — eliminating the need for separate prep steps or double-layer assembly. The “Super Easy” evolution arrived in the 2010s with the rise of one-bowl mixing methods, emphasis on natural sweetness (reducing refined sugar), and intentional simplification — dropping eggs where possible, using melted butter instead of creaming, and relying on baking powder (not yeast) for reliable lift. Today’s version honors that legacy while embracing modern sensibilities: faster prep time, adaptable ingredients, and built-in flexibility for dietary needs — all without sacrificing soul-satisfying richness or that iconic crackly, caramelized edge.
Ingredients Breakdown
Every ingredient in this recipe plays a deliberate role — no filler, no fluff. Here’s why each matters:
- All-purpose flour: Provides essential structure and tender crumb. A small amount of cornstarch (optional add-in) can be used to further soften texture if desired.
- Baking powder & baking soda: Work in tandem — baking powder delivers primary lift, while baking soda reacts with the natural acidity in apples and brown sugar to enhance browning, tenderness, and subtle caramel notes.
- Granulated and brown sugar: Granulated sugar ensures even sweetness distribution and contributes to cake lightness; brown sugar adds moisture, molasses depth, and helps bind the crisp topping. Dark brown sugar intensifies flavor — light brown yields milder results.
- Cinnamon, nutmeg, and optional cardamom: Warm, aromatic spices that complement apples without overpowering. Freshly ground spices yield exponentially more fragrance and complexity than pre-ground.
- Sour cream or full-fat plain Greek yogurt: Adds fat, acidity, and moisture — crucial for keeping the cake incredibly tender and preventing dryness. Low-fat versions may result in a denser, less resilient crumb.
- Melted unsalted butter: Used both in the batter *and* the topping. Melted (not softened) butter blends seamlessly into the wet ingredients and creates a rich, cohesive base. Unsalted allows precise salt control.
- Large egg: Acts as binder and emulsifier, contributing to structure and lift. For egg-free versions, see Variations.
- Vanilla extract (pure, not imitation): Enhances all other flavors and adds warmth and roundness — never skip this.
- Fuji, Honeycrisp, or Braeburn apples: Chosen for their balance of sweetness, tartness, and ability to hold shape when baked (no mush!). Granny Smith works if you prefer tangier contrast — just reduce added lemon juice.
- Lemon juice (fresh): Brightens the apples’ flavor, prevents browning pre-bake, and balances sweetness — a tiny amount makes a big difference.
- Old-fashioned rolled oats: The backbone of the crisp topping — provides chew, texture, and toasty flavor. Quick oats become gummy; steel-cut won’t soften properly.
- Walnuts or pecans (optional but highly recommended): Add crunch, richness, and nutty aroma. Toast them first for maximum impact.
Note: This recipe intentionally avoids buttermilk (too acidic for this ratio), vegetable oil (lacks flavor depth), and excessive sugar — letting the apples and spices shine.
Step-by-Step Recipe
- Preheat & Prep: Position oven rack in the center. Preheat oven to 350°F (175°C). Lightly grease a 9×13-inch metal or ceramic baking pan (avoid glass for most even baking — though glass works if reduced to 340°F and monitored closely). Line bottom with parchment paper for foolproof removal.
- Prepare the Apples: Peel, core, and slice 4 medium apples (about 6 cups total) into ½-inch thick wedges or chunks. Toss immediately in a large bowl with 1 tbsp fresh lemon juice and 1 tsp granulated sugar. Let sit 5 minutes — this draws out a little juice and jumpstarts flavor infusion.
- Make the Batter: In a large mixing bowl, whisk together 2 cups all-purpose flour, 1½ tsp baking powder, ½ tsp baking soda, 1 tsp ground cinnamon, ¼ tsp ground nutmeg, ¼ tsp salt, and ¾ cup granulated sugar until fully combined and no lumps remain.
- Combine Wet Ingredients: In a separate medium bowl, vigorously whisk 1 cup sour cream (or Greek yogurt), ½ cup melted unsalted butter, 1 large egg, 2 tsp pure vanilla extract, and ¼ cup whole milk (or apple cider for extra apple essence) until smooth and slightly frothy — about 45 seconds. Ensure egg is fully incorporated before adding to dry ingredients.
- Mix the Batter: Pour wet mixture into dry ingredients. Using a silicone spatula or wooden spoon, fold gently *just until no dry streaks remain*. Do NOT overmix — 12–15 folds max. Batter will be thick, slightly lumpy, and glossy. Overmixing develops gluten = tough cake.
- Layer the Apples: Spread batter evenly into prepared pan using an offset spatula or the back of a spoon. Smooth top. Arrange lemon-tossed apple slices in a single, slightly overlapping layer over batter — covering surface completely but not stacking high. Gently press apples down so they nestle into batter.
- Prepare the Crisp Topping: In a small bowl, combine 1 cup old-fashioned rolled oats, ½ cup packed dark brown sugar, 1 tsp cinnamon, ¼ tsp salt, ⅓ cup cold unsalted butter (cut into ½-inch cubes), and ½ cup chopped walnuts or pecans (toasted if possible). Use fingers or a pastry cutter to work butter into dry ingredients until mixture resembles coarse, pea-sized crumbs with some larger clumps — do not let it become pasty. A few dry spots are fine.
- Top & Bake: Sprinkle crisp topping evenly over apples. Gently pat down to adhere. Bake at 350°F for 48–55 minutes, rotating pan halfway through. Cake is done when a toothpick inserted into the *cake layer beneath the apples* (not just apples) comes out clean or with moist crumbs (not wet batter), the edges are deeply golden and pulling slightly from pan, and the topping is crisp, fragrant, and set. Apples should be tender but still hold shape — no bubbling lava!
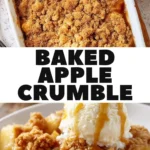
- Cool & Serve: Cool in pan on a wire rack for *at least 30 minutes*. This allows structure to set and prevents topping from sliding off. For clean slices, cool 1 hour. Serve warm or room temperature. Optional: drizzle with maple glaze (see Variations) or serve with vanilla ice cream, cinnamon whipped cream, or a dollop of crème fraîche.
Tips
- Room Temperature Matters: While this recipe is forgiving, ensure sour cream, egg, and milk are at room temp (15–20 min out of fridge) for optimal emulsion and even rising.
- Apple Slicing Consistency: Uniform thickness = uniform cooking. Use a mandoline or sharp knife. Too thin? They’ll disappear. Too thick? They’ll stay crunchy.
- Don’t Skip the Lemon Juice: It’s not for tartness — it’s a flavor catalyst and enzymatic shield. Even ½ tsp makes apples taste brighter and more complex.
- Batter Texture Check: If batter looks too dry after folding, add 1 tsp milk. Too wet? Sprinkle with 1 tsp flour and fold once. Trust your eyes — it should mound softly, not run.
- Crisp Topping Perfection: Cold butter is non-negotiable for crisp texture. If your kitchen is hot, chill butter cubes for 10 minutes before cutting. For extra crunch, bake topping separately on parchment for 8–10 min at 350°F, then scatter over cooled cake.
- Oven Thermometer Essential: Most home ovens run hot or cold. An inexpensive oven thermometer prevents under/over-baking — the #1 cause of dense or dry cake.
- Resting Is Baking: That 30+ minute rest isn’t passive — residual heat continues to cook the center gently while starches set. Cutting too soon = crumbles and weeping.
- Storage Wisdom: Keep covered at room temp up to 2 days (topping stays crisp), refrigerated up to 5 days (reheat slices at 325°F for 10 min to revive texture), or freeze unfrosted slices for up to 3 months. Thaw overnight in fridge, then warm.
- Golden Edge Hack: For extra-crispy, caramelized edges, run a thin knife around the pan’s interior after 40 minutes of baking — releases steam and encourages browning.
- Scale Up Gracefully: To double, use two 9×13 pans — do NOT try one 12×18. Baking time increases only ~5–7 minutes, not double. Rotate pans top-to-bottom halfway.
Variations and Customizations
This recipe is a canvas — adapt it to your pantry, preferences, and dietary needs without compromising integrity:
- Gluten-Free: Substitute 1:1 gluten-free all-purpose flour blend (with xanthan gum) + 2 tbsp almond flour for better structure. Increase baking powder to 1¾ tsp. Ensure oats are certified GF.
- Egg-Free: Replace egg with ¼ cup unsweetened applesauce + ½ tsp baking powder OR 1 tbsp ground flaxseed + 3 tbsp warm water (let sit 5 min). Texture remains tender; rise is slightly less lofty.
- Dairy-Free: Use full-fat coconut milk yogurt (unsweetened) instead of sour cream, dairy-free butter (like Miyoko’s or Earth Balance), and unsweetened almond or oat milk. Top with toasted coconut flakes for richness.
- Lower-Sugar: Reduce granulated sugar to ½ cup, brown sugar in topping to ⅓ cup. Boost apple sweetness with 1 extra ripe Honeycrisp. Add 1 tsp monk fruit blend (not stevia) to batter for lift without aftertaste.
- Spice It Up: Add ¼ tsp ground ginger + ⅛ tsp ground cloves to dry ingredients. Or swirl 2 tbsp salted caramel sauce into batter before adding apples.
- Fruit Swaps: Replace half the apples with peeled, diced pears (Bartlett or Anjou) or quince paste folded in. For berry lovers: layer 1 cup fresh or frozen (unthawed) blackberries or raspberries *under* apples — they’ll burst into jammy pockets.
- Maple Pecan Variation: Replace brown sugar in topping with ⅓ cup pure maple syrup + reduce butter to 3 tbsp. Toast ¾ cup pecans and fold ½ into topping, ¼ into batter.
- Breakfast Twist: Stir ½ cup cooked steel-cut oats and 2 tbsp chia seeds into batter. Top with pumpkin seeds and a sprinkle of flaky sea salt before baking.
- Mini-Muffin Version: Grease a 24-cup regular muffin tin. Fill cups ⅔ full with batter, top with 2–3 apple pieces, then crisp topping. Bake at 375°F for 18–22 minutes. Makes ~20–22 muffins.
- Decadent Drizzle: Whisk together 1 cup powdered sugar, 2 tbsp maple syrup, 1 tsp vanilla, and 1–2 tsp milk until smooth. Drizzle over cooled cake. Optional: sprinkle with crystallized ginger or edible rose petals.
Health Considerations and Nutritional Value
While undeniably indulgent, this Super Easy Apple Crisp Coffee Cake offers meaningful nutritional upside when viewed holistically — especially compared to traditional coffee cakes loaded with frosting, refined flour, and excess butter. A standard 2″x2″ serving (1/16th of the full pan) contains approximately:
- Calories: 285–310 (varies with butter/nut content)
- Total Fat: 12–14g (mostly unsaturated from nuts and butter; heart-healthy when consumed in context of balanced diet)
- Carbohydrates: 42–46g (including 4–6g dietary fiber from apples, oats, and whole grain options)
- Sugars: 22–26g (roughly 40% naturally occurring fructose from apples, 60% added sugars — well below typical bakery cakes at 35–45g per slice)
- Protein: 4–5g (enhanced by Greek yogurt and nuts)
- Vitamins & Minerals: Significant vitamin C (from apples + lemon), potassium (apples), calcium (yogurt), iron (molasses in brown sugar), and antioxidants (quercetin in apple skin — leave peel on for extra boost!)
Key Health Notes:
- Fiber-Rich: Apples (with skin) and oats provide soluble and insoluble fiber — supports gut health, slows glucose absorption, and promotes satiety.
- No Refined Oils: Uses real butter — contains butyrate (anti-inflammatory) and fat-soluble vitamins A/D/E/K. Avoids inflammatory seed oils common in commercial versions.
- Minimal Processing: No artificial preservatives, colors, or hydrogenated fats — just whole-food ingredients you recognize.
- Portion-Conscious Design: The 9×13 size yields 16 generous servings — encouraging mindful enjoyment rather than “one slice turns into three.”
- Not “Diet Food” — But Nourishing Indulgence: This cake fits beautifully within Mediterranean, DASH, or flexible healthy eating patterns when paired with protein (e.g., Greek yogurt topping) and enjoyed occasionally as part of a varied, plant-forward diet.
- Allergen Awareness: Contains wheat, dairy, eggs, and tree nuts. Gluten-free, dairy-free, and egg-free variations are thoroughly tested and nutritionally sound.
Ingredients
Makes one 9×13-inch cake (16 servings)
- 4 medium (about 6 cups) firm-sweet apples — Fuji, Honeycrisp, or Braeburn, peeled, cored, sliced ½-inch thick
- 1 tablespoon fresh lemon juice
- 1 teaspoon granulated sugar (for apples)
- 2 cups (250g) all-purpose flour (spooned & leveled)
- 1½ teaspoons baking powder
- ½ teaspoon baking soda
- 1 teaspoon ground cinnamon
- ¼ teaspoon ground nutmeg
- ¼ teaspoon fine sea salt
- ¾ cup (150g) granulated sugar
- 1 cup (240g) full-fat sour cream or plain Greek yogurt
- ½ cup (115g) unsalted butter, melted and slightly cooled
- 1 large egg, room temperature
- 2 teaspoons pure vanilla extract
- ¼ cup (60ml) whole milk or unsweetened apple cider
- For the Crisp Topping:
- 1 cup (90g) old-fashioned rolled oats (certified gluten-free if needed)
- ½ cup (100g) packed dark brown sugar
- 1 teaspoon ground cinnamon
- ¼ teaspoon fine sea salt
- ⅓ cup (75g) cold unsalted butter, cut into ½-inch cubes
- ½ cup (60g) chopped walnuts or pecans, toasted (optional but recommended)
Directions
- Preheat oven to 350°F (175°C). Grease a 9×13-inch baking pan and line bottom with parchment paper, leaving overhang on two opposite sides for easy lifting.
- In a large bowl, toss apple slices with lemon juice and 1 tsp granulated sugar. Set aside for 5 minutes.
- In another large bowl, whisk together flour, baking powder, baking soda, cinnamon, nutmeg, and salt. Stir in ¾ cup granulated sugar until evenly distributed.
- In a medium bowl, whisk sour cream, melted butter, egg, vanilla, and milk until smooth and homogenous (~45 seconds).
- Pour wet ingredients into dry ingredients. Fold with a spatula until *just combined* — batter will be thick and slightly lumpy. Do not overmix.
- Spoon batter into prepared pan and spread evenly. Arrange lemon-tossed apples in a single layer over batter, gently pressing down.
- Make topping: In a small bowl, combine oats, brown sugar, cinnamon, and salt. Add cold butter cubes and nuts. Use fingertips to rub butter into dry ingredients until mixture resembles coarse crumbs with some larger clusters.
- Sprinkle topping evenly over apples. Pat gently to adhere.
- Bake for 48–55 minutes, rotating pan halfway through, until toothpick inserted into cake layer (not apples) comes out clean or with moist crumbs, edges are deep golden, and topping is crisp and fragrant.
- Cool in pan on wire rack for at least 30 minutes before slicing. For cleanest cuts, cool 1 hour. Lift out using parchment overhang, then slice with a sharp serrated knife. Serve warm or at room temperature.
FAQ
- Can I make this ahead?
- Absolutely! Bake fully, cool completely, cover tightly, and refrigerate up to 5 days. Reheat individual slices at 325°F for 10–12 minutes or in microwave 20–30 seconds. Unbaked batter (with apples layered) can be refrigerated up to 12 hours — add topping just before baking.
- Why did my topping sink?
- Most commonly caused by overmixing the batter (making it too thin), using warm/melted butter in topping (causing it to melt into batter), or pressing topping down too firmly. Ensure batter is thick and topping has cold butter and visible clumps.
- Can I use frozen apples?
- Yes — but thaw completely, drain *all* liquid in a colander (press gently), and pat very dry with paper towels. Frozen apples release more water; excess moisture leads to soggy cake. Add 1 tsp extra flour to batter if using frozen.
- My cake is dry — what went wrong?
- Dryness usually stems from overbaking (check early!), using low-fat dairy (swap for full-fat), measuring flour incorrectly (scooping packs it — spoon & level instead), or omitting the sour cream/yogurt. Also, older baking powder loses potency — test it: 1 tsp in ¼ cup hot water should bubble vigorously.
- Can I omit the nuts?
- Easily! Just increase oats to 1¼ cups and add 1 extra tbsp brown sugar for volume and texture. Toasted sunflower or pumpkin seeds make excellent nut-free alternatives.
- Is there a way to make it more “coffee cake-y”?
- Add a cinnamon-sugar swirl: After spreading batter, sprinkle ¼ cup brown sugar + 1 tsp cinnamon + 1 tbsp melted butter over top, then layer apples. Or stir 1 tsp instant espresso powder into dry ingredients for subtle depth (not coffee flavor).
- What’s the best way to store leftovers?
- Cool completely, cover pan tightly with plastic wrap or aluminum foil, and keep at room temperature up to 2 days (topping stays crisp). For longer storage, refrigerate up to 5 days. Freeze whole cake (wrapped in plastic + foil) or individual slices for up to 3 months. Thaw in fridge overnight before warming.
- Can I bake this in a cast iron skillet?
- Yes — use a well-seasoned 10-inch or 12-inch skillet. Reduce initial baking time by 3–5 minutes and check early — cast iron heats faster and retains more heat. Rotate skillet halfway.
- Why does the recipe use both baking powder AND baking soda?
- Baking powder provides primary leavening. Baking soda neutralizes acid (from apples, brown sugar, sour cream) — boosting rise, improving browning, and tenderizing gluten. Skipping soda risks dense, pale, less flavorful cake.
- Can kids help make this?
- Perfect family project! Kids can toss apples, measure dry ingredients, stir wet ingredients, layer apples, and sprinkle topping. Supervise melting butter and oven use. Great for teaching measuring, mixing science, and food appreciation.
Summary
The Super Easy Apple Crisp Coffee Cake is a brilliantly simplified celebration of seasonal fruit, pantry staples, and nostalgic comfort — delivering restaurant-worthy layers of spiced cake, tender-sweet apples, and irresistibly crunchy oat topping with under 20 minutes of active prep time.
Forgiving, endlessly adaptable, nutritionally thoughtful, and deeply satisfying, it proves that truly special baking doesn’t require perfectionism — just good ingredients, clear steps, and the joyful confidence that comes from knowing your kitchen is always ready to create something warm, welcoming, and utterly delicious.