Introduction
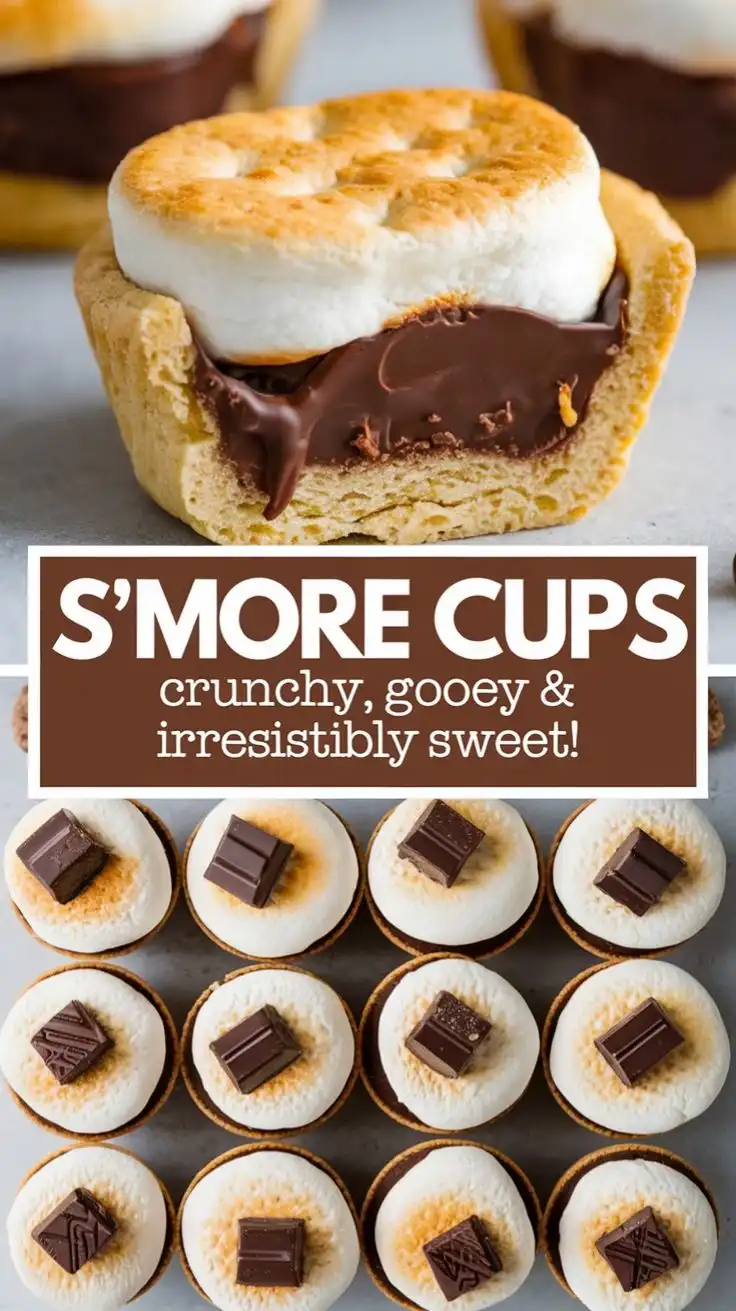
Imagine the nostalgic crackle of a campfire, the gentle snap of a roasted marshmallow pulling away from the stick, the rich aroma of melted chocolate mingling with toasted graham cracker crumbs — all captured in a single, perfectly portioned, no-mess bite. S’more Cups are the brilliant, modern evolution of the beloved classic s’more — transformed from an outdoor ritual into an elegant, make-ahead dessert that delivers the same magical trio of textures and flavors: crunchy, gooey, and irresistibly sweet. These individual cups are not just a treat; they’re a sensory experience reimagined for home bakers, party planners, holiday tables, and even weekday indulgences. Whether you’re hosting a summer BBQ, preparing teacher appreciation gifts, or simply craving that childhood comfort with grown-up polish, S’more Cups deliver pure, unadulterated joy — one decadent, layered cup at a time.
The History
The s’more — short for “some more” — traces its roots to early 20th-century America, with the earliest known printed recipe appearing in the 1927 Girl Scouts handbook *Trails to Treasures*, where it was called a “Graham Cracker Sandwich.” By the 1930s, variations appeared in camping guides and women’s magazines, cementing its status as the quintessential American campfire confection. Its genius lies in simplicity: three humble ingredients — graham crackers, milk chocolate, and marshmallows — elevated by fire and friction. Fast forward to the 2010s, as food bloggers and pastry chefs began experimenting with deconstructed, no-bake, and portion-controlled versions of beloved classics, the S’more Cup emerged. Inspired by chocolate cupcake liners, layered parfaits, and the rising popularity of edible gift jars, bakers started pressing graham cracker crusts into muffin tins, adding molten chocolate layers, and torching miniature marshmallow tops — creating a visually stunning, texturally complex, and remarkably stable reinterpretation. Today, S’more Cups appear in gourmet bakeries from Portland to Paris, feature in viral TikTok baking tutorials, and grace the menus of Michelin-starred dessert bars — proving that tradition and innovation can melt together as seamlessly as chocolate and marshmallow.
Ingredients Breakdown
Every extraordinary S’more Cup begins with intentionality — selecting ingredients that honor the original spirit while maximizing depth, texture, and stability. Here’s why each component matters:
- Graham Crackers (Full Sheet or Honey Variety): Not just a base — they’re the foundation of flavor and crunch. Opt for classic honey graham crackers for authentic warmth and subtle spice. Avoid overly sugary or cinnamon-heavy varieties unless intentionally customizing. For gluten-free needs, certified GF graham-style crackers work beautifully — just ensure they hold up when crushed and baked.
- Unsalted Butter: Melted and fully incorporated into the crumb mixture, it binds without greasiness and adds richness. Salted butter can be used, but reduce added salt accordingly — and remember: unsalted gives you full control over seasoning.
- High-Quality Milk Chocolate (60–70% Cacao): This is non-negotiable. Skip the candy bars with vegetable oils or artificial emulsifiers. Real chocolate — with cocoa butter as the primary fat — melts smoothly, sets with a clean snap, and delivers nuanced notes of caramel, nuts, and fruit. Semi-sweet works too, but milk chocolate captures the true s’more soul. Chopped bars or premium chocolate chips (like Guittard or Callebaut) are ideal.
- Mini Marshmallows (Premium Brand): Standard grocery-store mini mallows work, but for superior browning and less chewiness, seek out brands made with real cane sugar and gelatin (e.g., Dandies or Kraft Jet-Puffed). Their smaller size ensures even coverage and faster, more consistent toasting. Avoid “marshmallow fluff” here — it lacks structure and won’t hold shape.
- Flaky Sea Salt (Maldon or Jacobsen): A whisper of salt isn’t optional — it’s transformative. It cuts sweetness, enhances chocolate’s complexity, and makes your taste buds sing. Sprinkle *after* torching for maximum impact and visual elegance.
- Optional Enhancers: A teaspoon of pure vanilla extract in the crumb layer deepens aroma; a pinch of ground cinnamon or smoked paprika adds intrigue; a drizzle of homemade salted caramel or bourbon-infused chocolate ganache introduces next-level sophistication.
Step-by-Step Recipe
Yield: 12 standard S’more Cups (using a regular muffin tin)
Prep Time: 25 minutes | Chill Time: 2 hours (minimum) | Total Time: ~2 hours 25 minutes
- Prepare the Pan: Line a standard 12-cup muffin tin with high-quality parchment paper liners (not foil or silicone — they don’t allow proper setting or easy removal). Lightly spray liners with neutral cooking spray for extra insurance.
- Make the Graham Cracker Crust: In a food processor, pulse 1 ½ cups (about 12 full-sheet graham crackers) until fine, sandy crumbs form — ~15 seconds. Transfer to a bowl. Add 6 tbsp melted unsalted butter, 2 tbsp granulated sugar (optional, for extra caramelization), and a pinch of sea salt. Stir vigorously with a spatula until all crumbs are evenly moistened and clump together when squeezed. Evenly divide among liners (~2 heaping tbsp per cup). Press firmly into bottom and slightly up sides using the back of a measuring spoon or a small glass. Chill for 15 minutes to set.
- Melt & Layer the Chocolate: Place 12 oz high-quality milk chocolate (chopped) in a heatproof bowl. Use a double boiler (or microwave at 20-sec bursts, stirring between) until smooth and glossy — do not overheat. Let cool slightly (to ~90°F) so it doesn’t melt the crust. Spoon 1 generous tbsp into each cup, tilting to coat sides if desired. Tap tin gently to level. Return to fridge for 15 minutes to firm.
- Add the Marshmallow Crown: Generously fill each cup with mini marshmallows — mounding them high (about ¼ cup per cup). They should spill over slightly — this creates the iconic puffy, golden-brown dome. For ultra-professional results, use kitchen tweezers to place marshmallows neatly.
- Torch to Perfection: Using a culinary torch, slowly pass flame 2–3 inches above marshmallows in circular motions until deeply golden brown and delicately blistered — ~45–90 seconds per cup. Rotate tin for even browning. Do not rush — under-toasted = bland; over-toasted = bitter and hard.
- Finish & Chill: Immediately sprinkle each cup with a tiny pinch (⅛ tsp) of flaky sea salt. Let cool at room temperature for 10 minutes, then refrigerate uncovered for at least 2 hours — preferably overnight. This critical step allows chocolate to fully set, marshmallows to gently soften and meld, and crust to hydrate for optimal crunch.
- Serve: Remove cups from tin by gently lifting parchment. Serve chilled — never straight from freezer (marshmallows become icy) nor room temp (chocolate softens, structure collapses). Garnish with extra flaky salt or a dusting of cocoa powder if desired.
Tips
- Crumb Consistency is Key: Too coarse? Crust crumbles. Too fine? It becomes pasty. Aim for sand-like texture — not flour, not gravel. Pulse, don’t blend continuously.
- Butter Temperature Matters: Melt butter fully, but let it cool 1–2 minutes before mixing. Hot butter melts sugar prematurely and creates greasy pockets.
- Chocolate Tempering Hack: For extra shine and snap, temper your chocolate: melt ⅔, then stir in remaining ⅓ chopped cold chocolate until smooth and cooled to 88–90°F. Not required — but sublime.
- No Torch? No Problem: Broil on high for 60–90 seconds — watch like a hawk! Place tin on top rack, 6 inches from broiler element. Rotate halfway. Stop at first sign of deep gold — it darkens fast.
- Marshmallow Moisture Control: If humidity is high, store marshmallows in an airtight container with a silica gel packet for 24 hours before use — prevents weeping.
- Chill Religiously: Skipping the 2-hour chill guarantees melty, messy cups. The cold sets the chocolate’s crystalline structure and firms the marshmallow’s gelatin network — essential for clean release and bite integrity.
- Parchment Power: Never skip parchment liners. Wax paper melts; foil tears; silicone sticks. Parchment provides grip, insulation, and effortless lift-off — plus it’s compostable!
- Batch Efficiency: Make crusts and chill overnight. Melt chocolate day-of. Assemble and torch within 30 minutes of serving for peak texture contrast.
Variations and Customizations
Once you master the classic, the S’more Cup becomes your edible canvas — endlessly adaptable for seasons, diets, and whimsy:
- Dark Chocolate & Sea Salt: Swap milk for 70% dark chocolate and add a dark chocolate drizzle post-torch. Intensifies bitterness and luxury.
- Peanut Butter Swirl: After adding chocolate layer, drop 1 tsp natural peanut butter onto each cup and swirl gently with a toothpick before adding marshmallows.
- Maple-Bourbon: Replace 1 tbsp butter in crust with pure maple syrup; add ½ tsp bourbon to melted chocolate. Toast marshmallows with a maple sugar sprinkle.
- Strawberry Shortcake S’more: Layer crushed freeze-dried strawberries into crust; use white chocolate; top with torched marshmallows and fresh strawberry slice.
- Vegan & Gluten-Free: GF graham crackers + vegan butter + dairy-free chocolate (Enjoy Life or Hu) + Dandies marshmallows. Ensure all labels confirm GF/vegan certification.
- Spiced Chai: Infuse cream with chai spices, strain, then use in a ganache layer beneath marshmallows.
- Espresso Crunch: Add 1 tsp instant espresso powder to crust mixture; top torched marshmallows with crushed toffee bits and cocoa nibs.
- Kid’s Party Version: Skip torching — use mini marshmallows + colorful sprinkles + rainbow chocolate chips. Chill well for safe handling.
- Mini Bite-Sized: Use a mini muffin tin (24 cups) — perfect for weddings, baby showers, or tasting menus. Adjust timing: crust press = 1 tsp, chocolate = 1 tsp, marshmallows = 1 tbsp.
Health Considerations and Nutritional Value
Let’s be delightfully honest: S’more Cups are a celebration dessert — not a health food. That said, mindful preparation *can* enhance nutritional integrity without sacrificing joy:
- Sugar Awareness: A standard cup contains ~18–22g added sugar (mostly from chocolate and marshmallows). Reduce by using 70% dark chocolate (lower sugar, higher antioxidants) and limiting added sugar in crust. Note: “No sugar added” marshmallows exist but often contain sugar alcohols — read labels carefully.
- Fat Profile: Primarily unsaturated fats from cocoa butter and butter — beneficial in moderation. Choose grass-fed butter for higher CLA and vitamin K2 content.
- Whole Grain Option: Substitute ¼ of graham cracker crumbs with finely ground whole wheat or oat flour for added fiber (test first — affects binding).
- Allergen Notes: Contains dairy, gluten, and egg (in some marshmallows). Always verify marshmallow ingredients — many contain egg whites or gelatin (animal-derived). Vegan versions use carrageenan or tapioca starch.
- Portion Control Built-In: Unlike a full s’more (often 300+ calories), each cup is ~140–170 calories — making mindful indulgence possible.
- No Artificial Nasties: Choosing real chocolate and natural marshmallows avoids artificial colors (Red #40), preservatives (BHT), and high-fructose corn syrup common in mass-market versions.
- Functional Additions (Advanced): Stir 1 tsp chia seeds into crust mixture for omega-3s; dust with matcha powder pre-torch for calm energy; add crushed walnuts to crust for brain-boosting fats.
Remember: Nutrition is holistic. Enjoying S’more Cups with presence, gratitude, and shared laughter contributes profoundly to emotional well-being — a vital, often overlooked, nutrient.
Ingredients
- 12 full-sheet honey graham crackers (approx. 1 ½ cups finely crushed)
- 6 tablespoons unsalted butter, melted and slightly cooled
- 2 tablespoons granulated sugar (optional, for enhanced caramel notes)
- Pinch of fine sea salt
- 12 ounces high-quality milk chocolate (60–70% cacao), finely chopped
- 3 cups mini marshmallows (premium brand recommended)
- Flaky sea salt (Maldon or similar), for finishing
Directions
- Line a 12-cup standard muffin tin with parchment paper liners. Lightly spray with cooking spray.
- In a food processor, pulse graham crackers until fine, sandy crumbs form (~15 seconds). Transfer to a medium bowl.
- Add melted butter, optional sugar, and pinch of salt. Stir with a spatula until thoroughly combined and mixture holds together when pressed.
- Divide crumb mixture evenly among liners (about 2 heaping tablespoons each). Press firmly into bottom and slightly up sides using the back of a spoon or small glass. Chill 15 minutes.
- Melt chocolate using double boiler or microwave (20-sec bursts, stirring between) until smooth and glossy. Cool slightly to ~90°F.
- Spoon 1 generous tablespoon of melted chocolate into each cup. Tilt to coat sides if desired. Tap tin to level. Chill 15 minutes.
- Fill each cup generously with mini marshmallows, mounding high (~¼ cup each).
- Using a culinary torch, carefully toast marshmallows until deeply golden brown and delicately blistered (45–90 seconds per cup). Rotate tin for even browning.
- Immediately sprinkle each cup with a tiny pinch of flaky sea salt.
- Cool at room temperature for 10 minutes, then refrigerate uncovered for at least 2 hours — ideally overnight.
- To serve, gently lift cups from tin using parchment edges. Serve chilled.
FAQ
- Can I make these ahead?
- Absolutely! S’more Cups keep beautifully refrigerated in an airtight container for up to 5 days. For longer storage, freeze unfrosted (no marshmallow) cups for 1 month — thaw in fridge, then torch fresh marshmallows day-of.
- Why did my marshmallows weep or get soggy?
- Humidity is the main culprit. Store marshmallows with silica gel before use. Also ensure chocolate layer is fully chilled before adding marshmallows — residual warmth causes condensation.
- Can I use marshmallow fluff instead of mini mallows?
- Not recommended. Fluff lacks structure, melts unevenly, and won’t hold a torchable surface. It also introduces excess moisture and stabilizers that interfere with texture.
- My crust crumbled when I lifted it — what went wrong?
- Too little butter, insufficient pressing, or skipping the chill step. Ensure butter is fully incorporated and press *firmly*. Always chill crust before chocolate layer.
- Is there a stovetop method without a torch?
- Yes — carefully use your oven broiler (top rack, 6 inches from element, 60–90 sec) or even a cast-iron skillet heated on low to gently toast marshmallows in batches — though torching gives superior control.
- Can I make them nut-free and dairy-free?
- Easily! Use certified nut-free graham crackers, vegan butter, dairy-free chocolate, and vegan marshmallows (Dandies). Double-check all labels for cross-contamination warnings.
- Why does the recipe emphasize chilling so much?
- Chilling allows chocolate to crystallize properly (for snap), marshmallow gelatin to set (for chew), and crust to hydrate (for crunch). Skipping any chill step compromises structural integrity and mouthfeel.
- Can I add fruit or other mix-ins?
- Yes — but strategically. Fresh fruit adds water — use only freeze-dried (strawberries, raspberries) or very thin apple slices tossed in lemon juice. Add *under* chocolate layer, not on top of marshmallows.
Summary
S’more Cups are the triumphant fusion of childhood nostalgia and refined, modern baking — delivering the iconic crunch of graham, the velvety melt of premium chocolate, and the ethereal, torched cloud of marshmallow in every single, shareable, picture-perfect bite. With smart ingredient choices, precise technique, and thoughtful customization, they transform simple pantry staples into unforgettable moments of sweetness, texture, and pure, unapologetic joy.