Introduction
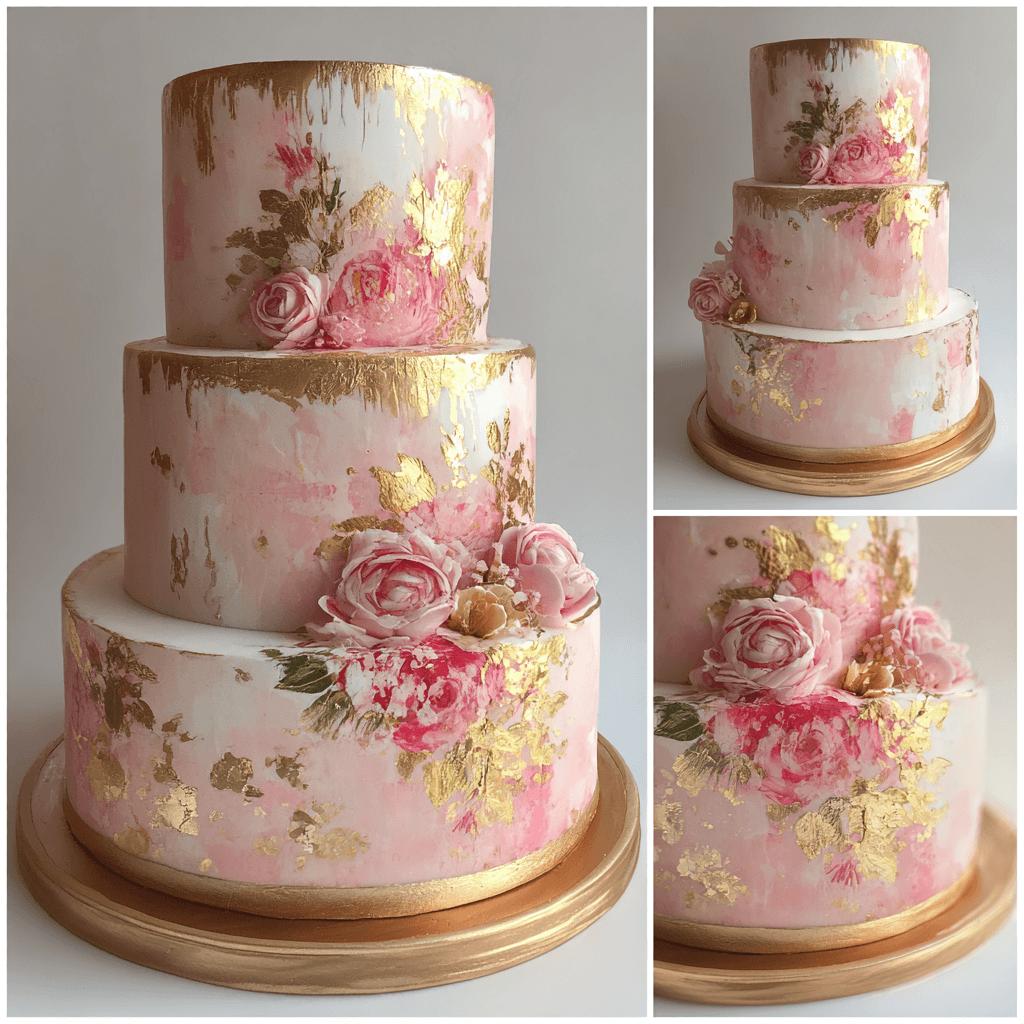
Welcome to the enchanting world of the Rose Gold Watercolor Cake – a stunning dessert that’s as beautiful as it is delicious. This cake combines artistry with baking, creating a visually captivating centerpiece perfect for weddings, birthdays, or any special celebration. The subtle blend of rose gold hues mimics the elegance of watercolor paintings, making this cake a true showstopper.
The History
Watercolor cakes emerged in the early 2010s as part of the growing trend of edible art. Inspired by abstract painting techniques, bakers began experimenting with food coloring and layering methods to create soft, blended designs. The addition of rose gold accents reflects modern luxury trends, combining vintage glamour with contemporary aesthetics. Today, these cakes are a favorite among those who appreciate both visual beauty and gourmet taste.
Ingredients Breakdown
- Cake Base: All-purpose flour, baking powder, unsalted butter, granulated sugar, eggs, whole milk, vanilla extract
- Frosting: Unsalted butter, powdered sugar, heavy cream or milk, salt, vanilla extract
- Coloring: Gel-based food colors (pink, purple, teal, rose gold luster dust), alcohol or clear extract for mixing
- Decorations: Edible gold leaf, rose gold sprinkles, fresh flowers, metallic dragees
Step-by-Step Recipe
- Preheat oven to 350°F (175°C). Grease and line three 8-inch round cake pans.
- In a large bowl, cream together butter and sugar until light and fluffy.
- Add eggs one at a time, mixing well after each addition.
- In a separate bowl, whisk together flour, baking powder, and salt.
- Alternate adding dry ingredients and milk to the butter mixture, beginning and ending with dry ingredients.
- Mix in vanilla extract, then divide batter evenly into pans.
- Bake for 25–30 minutes or until a toothpick inserted comes out clean.
- Let cakes cool completely before frosting.
- Prepare your frosting by beating butter until creamy, gradually adding powdered sugar, then incorporating heavy cream and vanilla.
- Tint portions of the frosting with gel colors to create soft pink, lavender, and teal shades for the watercolor effect.
- Stack and frost each layer, applying a crumb coat first and chilling before final frosting.
- Use an offset spatula or palette knife to spread colored frosting in soft, flowing strokes, blending edges gently for a watercolor look.
- Dust with rose gold luster dust using a dry brush for a shimmering finish.
- Add final decorations like gold leaf, edible pearls, or fresh blooms.
Tips
- Use room temperature ingredients for a smoother batter and frosting.
- Chill cake layers before assembling to prevent crumbling.
- Apply a crumb coat and refrigerate for 20–30 minutes before final frosting to keep the design clean.
- Work quickly when blending colors on the cake to maintain a soft, seamless transition.
- Use high-quality gel food coloring for vibrant yet soft watercolor tones.
Variations and Customizations
- Flavor Variations: Try lemon, almond, or champagne-infused versions of the basic cake recipe.
- Dietary Options: Use gluten-free flour blends or vegan butter and egg substitutes for alternative diets.
- Theme Adaptation: Change the color palette for holidays – turquoise and silver for winter, coral and mint for summer.
- Layer Options: Add fillings between layers like raspberry jam, strawberry compote, or rose petal curd.
- Topper Ideas: Replace fresh flowers with metallic monogram toppers or geometric wire designs for a modern twist.
Health Considerations and Nutritional Value
This rich cake is best enjoyed in moderation. Each slice typically contains around 400–600 calories, depending on size and frosting amount. It’s high in carbohydrates and sugars due to the flour and powdered sugar content. To lighten it up, consider using reduced-fat dairy, natural sweeteners like honey or maple syrup, and whole grain flour substitutions. Always be mindful of food allergies – common allergens include dairy, eggs, and wheat.
Ingredients
Cake:
- 2 and ½ cups all-purpose flour
- 2 and ½ tsp baking powder
- ½ tsp salt
- 1 cup unsalted butter, softened
- 2 cups granulated sugar
- 4 large eggs
- 1 cup whole milk
- 1 tbsp vanilla extract
Frosting:
- 1 cup unsalted butter, softened
- 4 cups powdered sugar
- 2–3 tbsp heavy cream or milk
- 1 tsp vanilla extract
- Pinch of salt
Coloring & Decoration:
- Gel food colors (pink, purple, teal)
- Rose gold luster dust
- Edible gold leaf or flakes
- Sprinkles or edible pearls
- Fresh flowers (optional)
Directions
- Preheat oven to 350°F (175°C). Prepare three 8-inch round cake pans with parchment paper and non-stick spray.
- In a large bowl, beat butter and sugar together until light and fluffy (about 3–5 minutes).
- Add eggs one at a time, mixing well after each. Scrape down the sides as needed.
- In another bowl, combine flour, baking powder, and salt. Whisk to mix thoroughly.
- Add the dry ingredients to the butter mixture in thirds, alternating with milk, starting and ending with dry ingredients.
- Stir in vanilla extract. Pour batter evenly into prepared pans.
- Bake for 25–30 minutes or until a toothpick inserted into the center comes out clean.
- Allow cakes to cool in pans for 10 minutes, then turn out onto wire racks to cool completely (at least 1 hour).
- To make the frosting, whip butter for 2–3 minutes until creamy. Gradually add powdered sugar, mixing on low speed to avoid flying powder.
- Add salt, vanilla, and enough cream or milk to reach a smooth spreading consistency.
- Divide frosting into small bowls and tint with gel colors to match your desired watercolor scheme.
- Place one cake layer on a serving plate and spread a layer of frosting. Repeat with remaining layers.
- Apply a thin crumb coat over the entire cake and chill for 20–30 minutes.
- Remove from fridge and begin applying your watercolor frosting design. Use spatulas or brushes to blend colors softly.
- Dust lightly with rose gold luster dust for a shimmering effect.
- Decorate with gold leaf, sprinkles, or fresh flowers just before serving.
FAQ
Can I make this cake ahead of time?
Yes! You can bake the layers up to two days in advance and store them wrapped tightly at room temperature. Frost the cake a day ahead and refrigerate if needed, bringing it to room temperature before serving for best flavor.
How do I store leftover cake?
Store slices in an airtight container in the refrigerator for up to 4 days. Let sit at room temperature for 20–30 minutes before serving again.
Can I freeze this cake?
Absolutely! Wrap unfrosted layers tightly in plastic wrap and foil; freeze for up to 3 months. Thaw overnight in the refrigerator before frosting.
What if my frosting looks too stiff or runny?
If too thick, add more cream or milk one teaspoon at a time.