Introduction
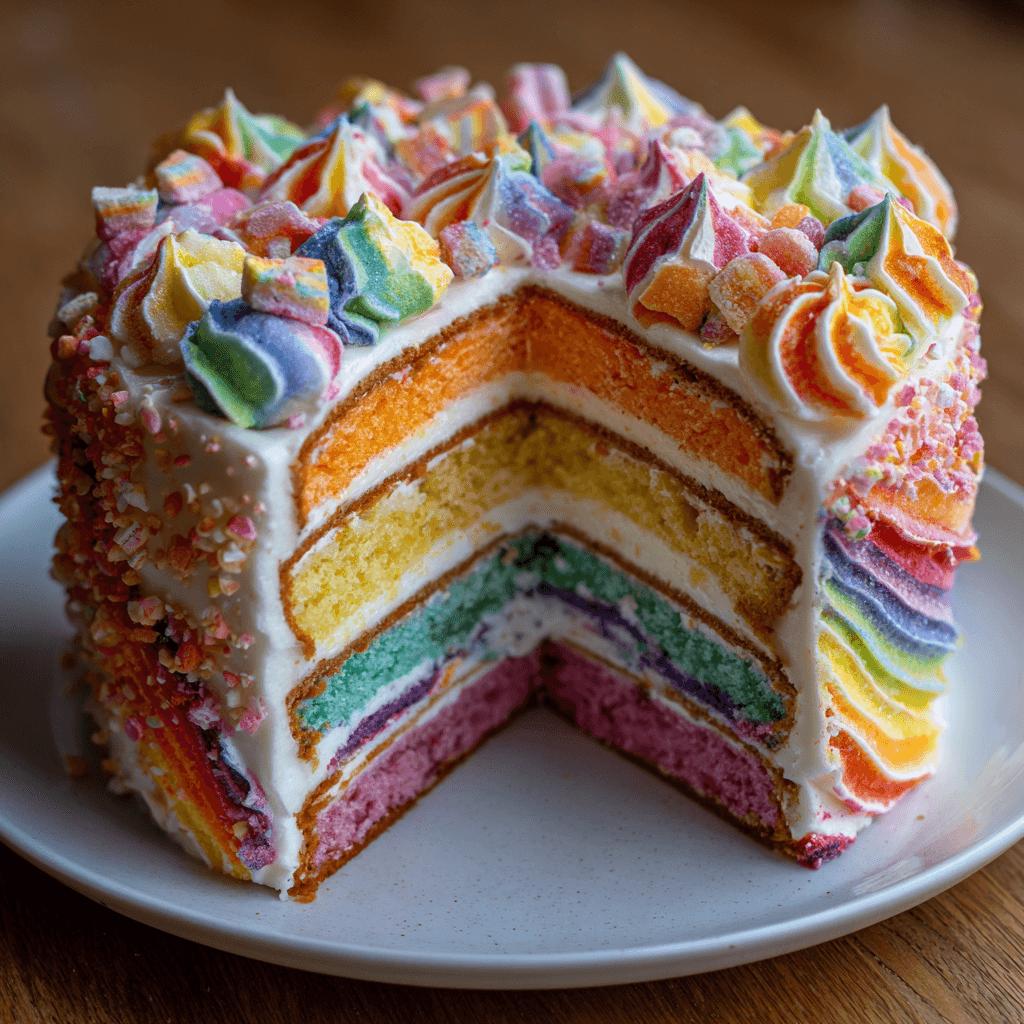
Welcome to the vibrant and joyful world of the Rainbow Candy Burst Cake! This cake isn’t just a dessert—it’s an explosion of colors, textures, and flavors that will bring smiles to both kids and adults alike. Perfect for birthdays, celebrations, or any day you want to add a pop of fun, this cake combines moist layers of rainbow-hued sponge with rich buttercream frosting and is generously filled with crunchy candy pieces for that extra surprise in every bite.
The History
While there’s no single origin story for the Rainbow Candy Burst Cake, its roots can be traced back to the love of colorful desserts that began gaining popularity in the 1950s and 60s. The rainbow layer cake became a symbol of celebration, while the addition of candies to baked goods has long been a favorite among children and candy lovers. Over time, bakers started combining these elements to create cakes that were not only visually stunning but also delightfully unpredictable in taste—thus giving rise to modern versions like the Rainbow Candy Burst Cake we know and love today.
Ingredients Breakdown
- For the cake: All-purpose flour, baking powder, salt, unsalted butter, granulated sugar, eggs, milk, vegetable oil, food coloring (red, orange, yellow, green, blue, purple), vanilla extract
- For the frosting: Unsalted butter, powdered sugar, heavy cream or milk, vanilla extract, a pinch of salt
- For the candy burst: Assorted crushed hard candies (like Jolly Ranchers, candy corn, lollipops), mini chocolate chips, sprinkles, gummy candies, chopped candy bars
Step-by-Step Recipe
- Preheat your oven to 350°F (175°C) and prepare three 8-inch round cake pans by greasing and lining them with parchment paper.
- In a large mixing bowl, combine the dry ingredients: flour, baking powder, and salt.
- In another bowl, cream together the butter and sugar until light and fluffy. Add in eggs one at a time, then mix in the vanilla extract.
- Alternate adding the dry ingredients and milk into the wet mixture, starting and ending with the dry ingredients. Stir until just combined.
- Divide the batter evenly into six bowls and color each with a different food coloring to represent the rainbow spectrum.
- Pour each color into separate piping bags or ziplock bags with the corner snipped off.
- Squeeze the colored batters randomly into the prepared cake pans to create a marbled effect.
- Bake for 25–30 minutes or until a toothpick inserted in the center comes out clean.
- Allow the cakes to cool completely before removing from the pans.
- While the cakes are cooling, prepare the buttercream frosting by beating the butter until creamy, then gradually mixing in powdered sugar, a splash of milk or cream, and vanilla extract until smooth and spreadable.
- Once cooled, level the cake layers if needed, then stack them with a generous layer of frosting between each.
- Frost the top and sides of the assembled cake with the remaining buttercream.
- To finish, press crushed candies and colorful toppings into the sides and top of the cake for that signature “candy burst” look.
Tips
- Use gel-based food coloring for the brightest and most vibrant hues without altering the batter’s consistency.
- Don’t overmix the colored batters when layering in the pan; the marbled effect looks best with minimal blending.
- Cool the cake layers completely before assembling to prevent the frosting from melting.
- Chill the frosted cake for 15–20 minutes before adding the candy toppings to help them stick better.
- If using hard candies, crush them finely so they adhere well to the frosting.
Variations and Customizations
- Theme Variations: Create a birthday-themed version by using themed candies or decorations. For holidays like Halloween, use black and orange candies, or red and green around Christmas.
- Flavor Twists: Infuse each layer with a different flavor extract—strawberry, lemon, coconut, etc.—to match the color and enhance the experience.
- Dietary Adjustments: Make it gluten-free by substituting all-purpose flour with a gluten-free blend, or vegan by using plant-based butter, flax eggs, and non-dairy milk.
- Shape It Up: Use heart-shaped, square, or novelty pans to make the cake even more unique for special occasions.
Health Considerations and Nutritional Value
This Rainbow Candy Burst Cake is undeniably indulgent, so moderation is key when enjoying it. A typical slice may contain around 400–600 calories, depending on portion size and ingredient choices. The cake contains a significant amount of sugar from both the frosting and the candies, so it’s best enjoyed as an occasional treat rather than a regular snack. To lighten it up, consider using natural sweeteners like honey or maple syrup in the frosting, or reduce the overall amount of added sugars. You can also incorporate whole grains in place of some of the flour and opt for lower-fat dairy alternatives to improve its nutritional profile.
Ingredients
- 2 and ½ cups all-purpose flour
- 2 and ½ tsp baking powder
- ½ tsp salt
- 1 cup unsalted butter, softened
- 2 cups granulated sugar
- 4 large eggs
- 1 cup whole milk
- ¼ cup vegetable oil
- 2 tsp vanilla extract
- Gel food coloring in red, orange, yellow, green, blue, and purple
- 1 and ½ cups powdered sugar
- ¾ cup unsalted butter (for frosting)
- 2–3 tbsp heavy cream or milk (for frosting)
- 1 tsp vanilla extract (for frosting)
- Assorted crushed candies (Jolly Ranchers, lollipops, etc.)
- Sprinkles, gummy candies, mini chocolate chips
Directions
- Preheat oven to 350°F (175°C). Prepare three 8-inch round cake pans with parchment paper and non-stick spray.
- In a medium bowl, whisk together flour, baking powder, and salt.
- Cream butter and sugar in a stand mixer until light and fluffy. Beat in eggs one at a time, then stir in vanilla.
- Add the dry ingredients alternately with the milk, beginning and ending with the dry mixture. Stir in vegetable oil.
- Divide the batter into six bowls and color each with food coloring.
- Pipe or spoon the colored batter randomly into the pans to create a rainbow swirl effect.
- Bake for 25–30 minutes until a toothpick comes out clean. Cool completely.
- Beat the butter for the frosting until creamy. Gradually mix in powdered sugar, then add vanilla and enough milk to reach spreading consistency.
- Level and assemble the cake layers with frosting in between. Frost the top and sides.
- Press crushed candies and other toppings into the frosting while it’s still soft.
- Chill the cake briefly before slicing and serving.
FAQ
- Can I make this cake ahead of time? Yes! Bake the layers up to two days in advance and store them wrapped tightly at room temperature. Frost the cake a day ahead and keep it refrigerated.
- Can I freeze the cake layers? Absolutely. Wrap the cooled layers in plastic wrap and foil, then freeze for up to 3 months. Thaw overnight at room temperature before assembling.
- What kind of candies work best for the topping? Crushed hard candies like Jolly Ranchers, lollipops, and candy canes melt slightly into the frosting when chilled, creating a beautiful glossy effect. Gummies and sprinkles add texture and color contrast.
- How do I store leftovers? Keep the cake covered in the refrigerator for up to