Pastel Polka Dot Drip Cake: A Dreamy Confection for Every Occasion
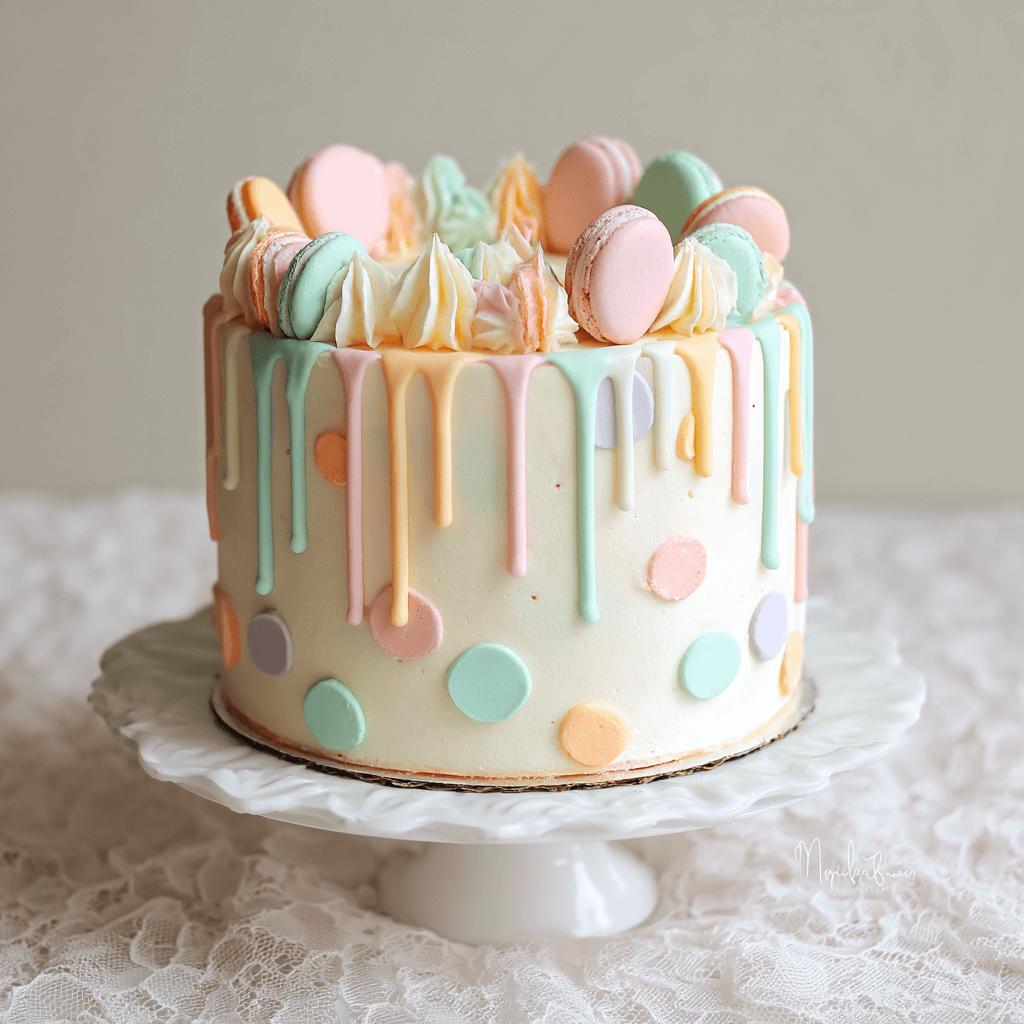
The Pastel Polka Dot Drip Cake is a whimsical and elegant dessert that has captured the hearts of cake lovers and bakers around the world. With its soft pastel colors, playful polka dots, and glossy chocolate or ganache drips, this cake embodies both artistry and taste. Originally inspired by modern cake decorating trends, it combines classic baking with contemporary design to create something truly magical. Whether you’re celebrating a birthday, bridal shower, or baby shower, this cake adds a touch of charm and sophistication.
A Brief History of Decorative Cakes
Cake decorating has evolved significantly over the centuries. From elaborate Victorian wedding cakes to today’s Instagram-worthy masterpieces, each era reflects changing tastes and techniques. The drip cake trend emerged in the early 2010s, popularized by bakeries like Georgetown Cupcake and Sugar Geek Showdown. The addition of polka dots and pastel color schemes brings a nostalgic yet modern twist to this style, appealing to those who love vintage aesthetics mixed with current trends.
Ingredients Breakdown
- For the Cake: All-purpose flour, baking powder, unsalted butter, granulated sugar, eggs, whole milk, vanilla extract, and food coloring (pastel shades like pink, mint, lavender, and yellow).
- For the Frosting: Unsalted butter, powdered sugar, heavy cream or milk, salt, and vanilla extract.
- For the Drip: Semi-sweet chocolate, heavy whipping cream (for chocolate drip), or white chocolate and colored candy melts for colorful drips.
- For the Polka Dots: Black fondant rolled into small balls or edible markers for drawing.
- Optional: Sprinkles, edible gold leaf, or floral accents for added decoration.
Step-by-Step Recipe
- Bake the Cake Layers: Prepare your favorite vanilla or sponge cake batter. Divide the batter into bowls and tint each with pastel gel food coloring. Bake each layer separately at 350°F (175°C) for 25–30 minutes. Let cool completely before assembling.
- Make the Buttercream: In a stand mixer, beat softened butter until creamy. Gradually add powdered sugar, alternating with milk or cream. Add vanilla and continue mixing until light and fluffy.
- Assemble the Cake: Place one cake layer on a turntable, spread a layer of buttercream, and repeat with remaining layers. Crumb coat the cake and chill for 20 minutes.
- Apply the Final Frosting Layer: Smooth the outer frosting using a bench scraper and offset spatula. Keep the sides relatively clean for the drip effect.
- Create the Drips: Warm up melted chocolate or colored candy melts slightly. Spoon or pipe along the edges of the cake, letting it naturally drip down the sides. Chill briefly to set the drips.
- Add the Polka Dots: Roll out black fondant and cut small circles, or use an edible marker to draw dots across the surface. Arrange them evenly for a balanced look.
Tips for Perfect Results
- Use gel-based food coloring for vibrant pastels without altering the cake texture.
- Ensure your cake layers are completely cooled before stacking to prevent melting the frosting.
- Chill the crumb coat to help lock in crumbs before applying the final layer of frosting.
- For even drips, keep the cake chilled while working on the drip sauce, so it sets quickly once applied.
- Use a piping bag or squeeze bottle for precise control when creating the drip effect.
Variations and Customizations
- Flavor Variations: Try strawberry, lemon, almond, or coconut-flavored cake layers instead of vanilla.
- Drip Alternatives: Use caramel, ganache, or fruit coulis for a unique twist on the traditional drip.
- Color Themes: Swap pastels for bold neon colors or metallics for a more dramatic look.
- Design Elements: Add hand-painted details, lace patterns, or ombré effects alongside the polka dots.
- Theme-Based Designs: Customize the cake for holidays, weddings, or gender-reveal parties with themed decorations.
Health Considerations and Nutritional Value
While undeniably delicious, this cake should be enjoyed as a special treat due to its high sugar and fat content. Each slice can range from 400–600 calories depending on size and ingredients used. To make a healthier version:
- Use whole wheat flour or almond flour.
- Substitute natural sweeteners like honey or maple syrup for part of the sugar.
- Opt for low-fat dairy products in the frosting.
- Incorporate vegetable purees like zucchini or applesauce into the batter.
Ingredients List
For the Cake:
- 2 ½ cups all-purpose flour
- 2 ½ tsp baking powder
- 1 cup unsalted butter, softened
- 2 cups granulated sugar
- 4 large eggs
- 1 cup whole milk
- 1 tbsp vanilla extract
- Gel food coloring (pastel pink, mint, lavender, yellow)
For the Frosting:
- 1 cup unsalted butter, softened
- 4 cups powdered sugar
- 2–3 tbsp heavy cream or milk
- ½ tsp salt
- 1 tsp vanilla extract
For the Drip:
- 1 cup semi-sweet chocolate chips
- ¼ cup heavy whipping cream
- Colored candy melts (optional)
For Decoration:
- Black fondant or edible marker
- Sprinkles or edible flowers (optional)
Directions
- Preheat oven to 350°F (175°C). Grease and flour three 8-inch round pans.
- Mix dry ingredients: Whisk flour and baking powder together.
- Cream butter and sugar: Beat until light and fluffy. Add eggs one at a time, then mix in vanilla.
- Alternate adding dry ingredients and milk: Begin and end with dry ingredients.
- Divide batter into bowls and tint with pastel colors. Pour into prepared pans.
- Bake for 25–30 minutes, or until a toothpick comes out clean. Cool completely.
- Prepare buttercream: Beat butter, gradually add powdered sugar, then add salt, vanilla, and cream/milk until smooth.
- Assemble cake: Stack layers with buttercream, frost the outside, and chill for crumb coat.
- Apply final frosting: Smooth and chill again.
- Make the drip: Heat chocolate and cream until smooth. Spoon around the top edge, allowing it to drip down.
- Add polka dots: Press fondant circles onto the sides or draw with an edible marker.
Frequently Asked Questions (FAQ)
- Can I make this cake ahead? Yes! Bake and frost the cake up to two days in advance. Store refrigerated and bring to room temperature before serving.
- How do I store leftovers? Cover and refrigerate for up to 5 days. Freeze unfrosted cake layers for up to 3 months.
- <