Introduction
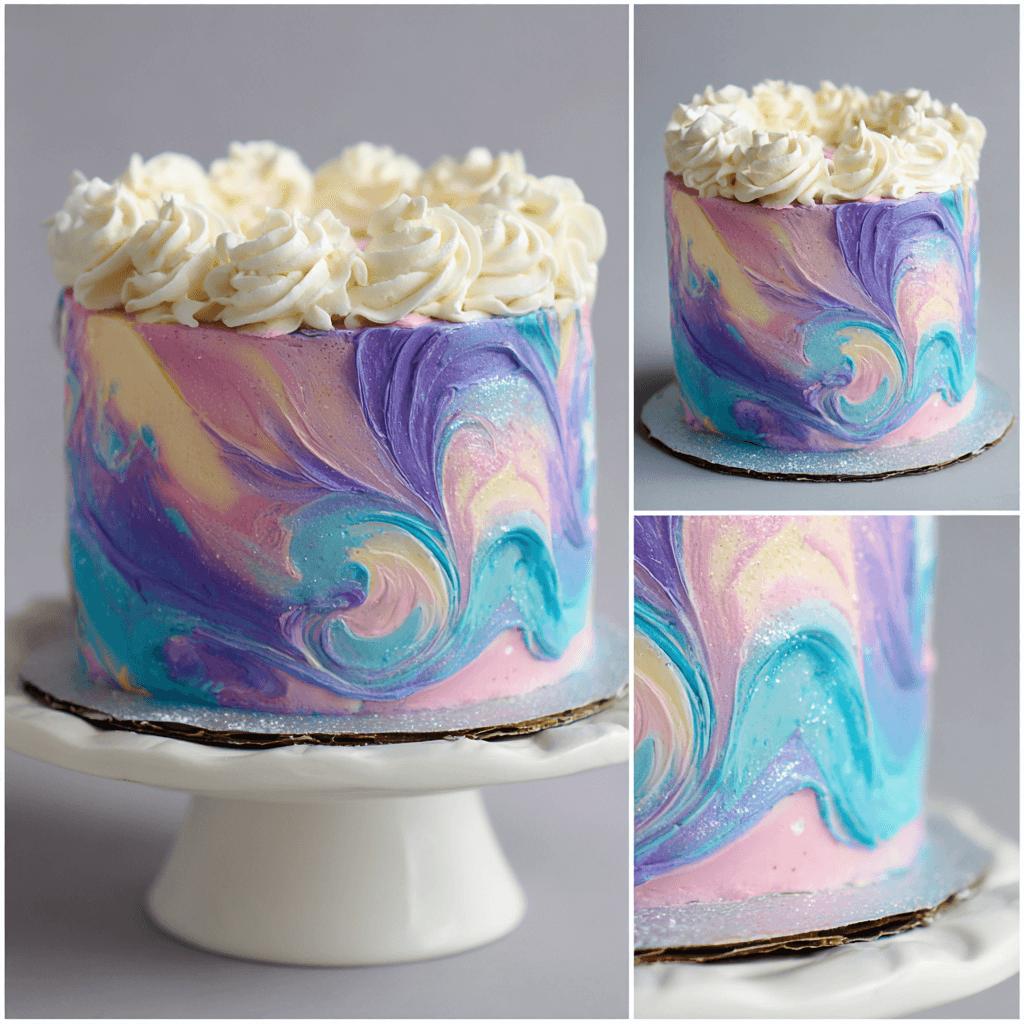
The Painted Pastel Swirls Cake is a breathtakingly beautiful dessert that combines artistry with flavor. This cake features soft, dreamy swirls of pastel colors—think lavender, mint, baby pink, and sky blue—that resemble a painter’s canvas brought to life on your plate. Not only is it visually stunning, but its delicate balance of flavors makes it a crowd-pleaser for birthdays, bridal showers, baby showers, or any special occasion where you want to impress. Whether you’re a baking enthusiast or someone looking to try something new in the kitchen, this cake offers a creative way to express yourself through food.
The History
Swirled cakes have roots in traditional European desserts, particularly in marbled cakes like the German Marmorkuchen, which dates back centuries. The modern twist of using pastel colors and intricate painted swirls emerged more recently with the rise of social media and visual food culture. As platforms like Instagram and Pinterest became hubs for culinary creativity, bakers began experimenting with color palettes and artistic techniques to create edible masterpieces. The Painted Pastel Swirls Cake is a product of this era, blending nostalgia with contemporary aesthetics to appeal to both the eyes and the palate.
Ingredients Breakdown
- All-Purpose Flour – Provides structure and texture.
- Baking Powder – Acts as a leavening agent for a light crumb.
- Unsalted Butter – Adds richness and tenderness.
- Granulated Sugar – Sweetens and contributes to texture.
- Eggs – Bind ingredients and add moisture.
- Milk – Keeps the batter moist and smooth.
- Vanilla Extract – Enhances overall flavor.
- Pastel Gel Food Coloring – Offers vibrant yet soft hues without altering texture.
- Cream Cheese Frosting (Optional) – For a rich, creamy finish.
- Edible Glitter or Pearlescent Dust (Optional) – Adds shimmer to the painted swirls.
Step-by-Step Recipe
- Preheat oven to 350°F (175°C) and prepare two 9-inch round cake pans by greasing and lining with parchment paper.
- Cream butter and sugar together until light and fluffy using an electric mixer.
- Add eggs one at a time, mixing well after each addition. Stir in vanilla extract.
- In a separate bowl, whisk together flour, baking powder, and salt.
- Gradually mix dry ingredients into wet ingredients, alternating with milk, beginning and ending with dry ingredients.
- Divide batter evenly into bowls for each color you plan to use (usually 4–6).
- Add gel food coloring to each bowl and mix until smooth and uniformly colored.
- Layer scoops of different colored batters randomly into the prepared pans.
- Use a toothpick or skewer to gently swirl the colors in a marble pattern.
- Bake for 28–32 minutes or until a toothpick inserted comes out clean.
- Cool completely before frosting and decorating.
Tips
- Use gel-based food coloring instead of liquid for more vibrant colors without affecting the texture.
- Don’t over-swirl—a few gentle strokes will create a beautiful effect without turning the batter muddy.
- For a smoother surface, tap the pan lightly on the counter before baking to settle the batter.
- If making a layered cake, chill layers for 10 minutes before stacking to prevent shifting.
- Let the cake cool fully before slicing to maintain the swirl integrity.
Variations and Customizations
- Chocolate Twist: Add cocoa powder to one portion of batter for a chocolate contrast.
- Lemon or Almond Flavor: Substitute part of the vanilla with lemon zest or almond extract for a flavor twist.
- Cupcake Version: Fill cupcake liners with small amounts of colored batter and swirl individually.
- Theme-Based Colors: Match the swirls to a theme—pastel pinks and purples for unicorn parties, sea blues and greens for ocean themes.
- Glitter Top Finish: Brush edible glitter or luster dust on top for extra sparkle.
Health Considerations and Nutritional Value
This cake is best enjoyed as a treat due to its sugar and fat content from butter and cream cheese frosting. However, you can make healthier adjustments:
- Substitute all-purpose flour with whole wheat pastry flour.
- Replace half the sugar with coconut sugar or maple syrup (adjust liquids accordingly).
- Use low-fat Greek yogurt in place of some of the milk or butter.
- Opt for vegan butter and egg substitutes for a plant-based version.
- Frost with whipped coconut cream or mascarpone for a lighter topping.
A typical slice (without frosting) contains approximately 250–300 calories, depending on modifications.
Ingredients
- 2 and 1/2 cups all-purpose flour
- 2 and 1/2 tsp baking powder
- 1/2 tsp salt
- 1 cup unsalted butter, softened
- 2 cups granulated sugar
- 4 large eggs
- 1 cup whole milk
- 1 tbsp vanilla extract
- Gel food coloring in pastel shades (lavender, mint, baby pink, sky blue, etc.)
- Cream cheese frosting (optional)
Directions
- Preheat oven to 350°F (175°C). Grease and line two 9-inch round cake pans.
- In a large bowl, beat butter and sugar together until pale and fluffy (about 3–4 minutes).
- Add eggs one at a time, beating well after each addition. Mix in vanilla extract.
- In another bowl, whisk flour, baking powder, and salt together.
- Gradually add dry ingredients to the butter mixture in three parts, alternating with milk, starting and ending with dry ingredients.
- Divide batter into 4–6 bowls, depending on how many colors you’d like.
- Add a few drops of gel food coloring to each bowl and mix thoroughly.
- Scoop spoonfuls of colored batter randomly into cake pans.
- Gently swirl the colors with a toothpick or knife in a figure-eight motion.
- Bake for 28–32 minutes or until a toothpick inserted in the center comes out clean.
- Cool in pans for 10 minutes, then remove and transfer to wire racks to cool completely.
- Frost with cream cheese frosting or other desired topping once cooled.
FAQ
Can I use liquid food coloring?
While possible, liquid coloring may dilute the batter and affect the texture. Gel-based colors are recommended for optimal results.
How do I store the cake?
Store in an airtight container at room temperature for up to 2 days, or refrigerate if frosted with cream cheese. Bring to room temperature before serving.
Can I freeze this cake?
Yes! Wrap unfrosted layers tightly in plastic wrap and aluminum foil. Freeze for up to 3 months. Thaw overnight in the refrigerator before frosting.
What if the colors blend too much?
This can happen if the batters are too thin or if