Introduction
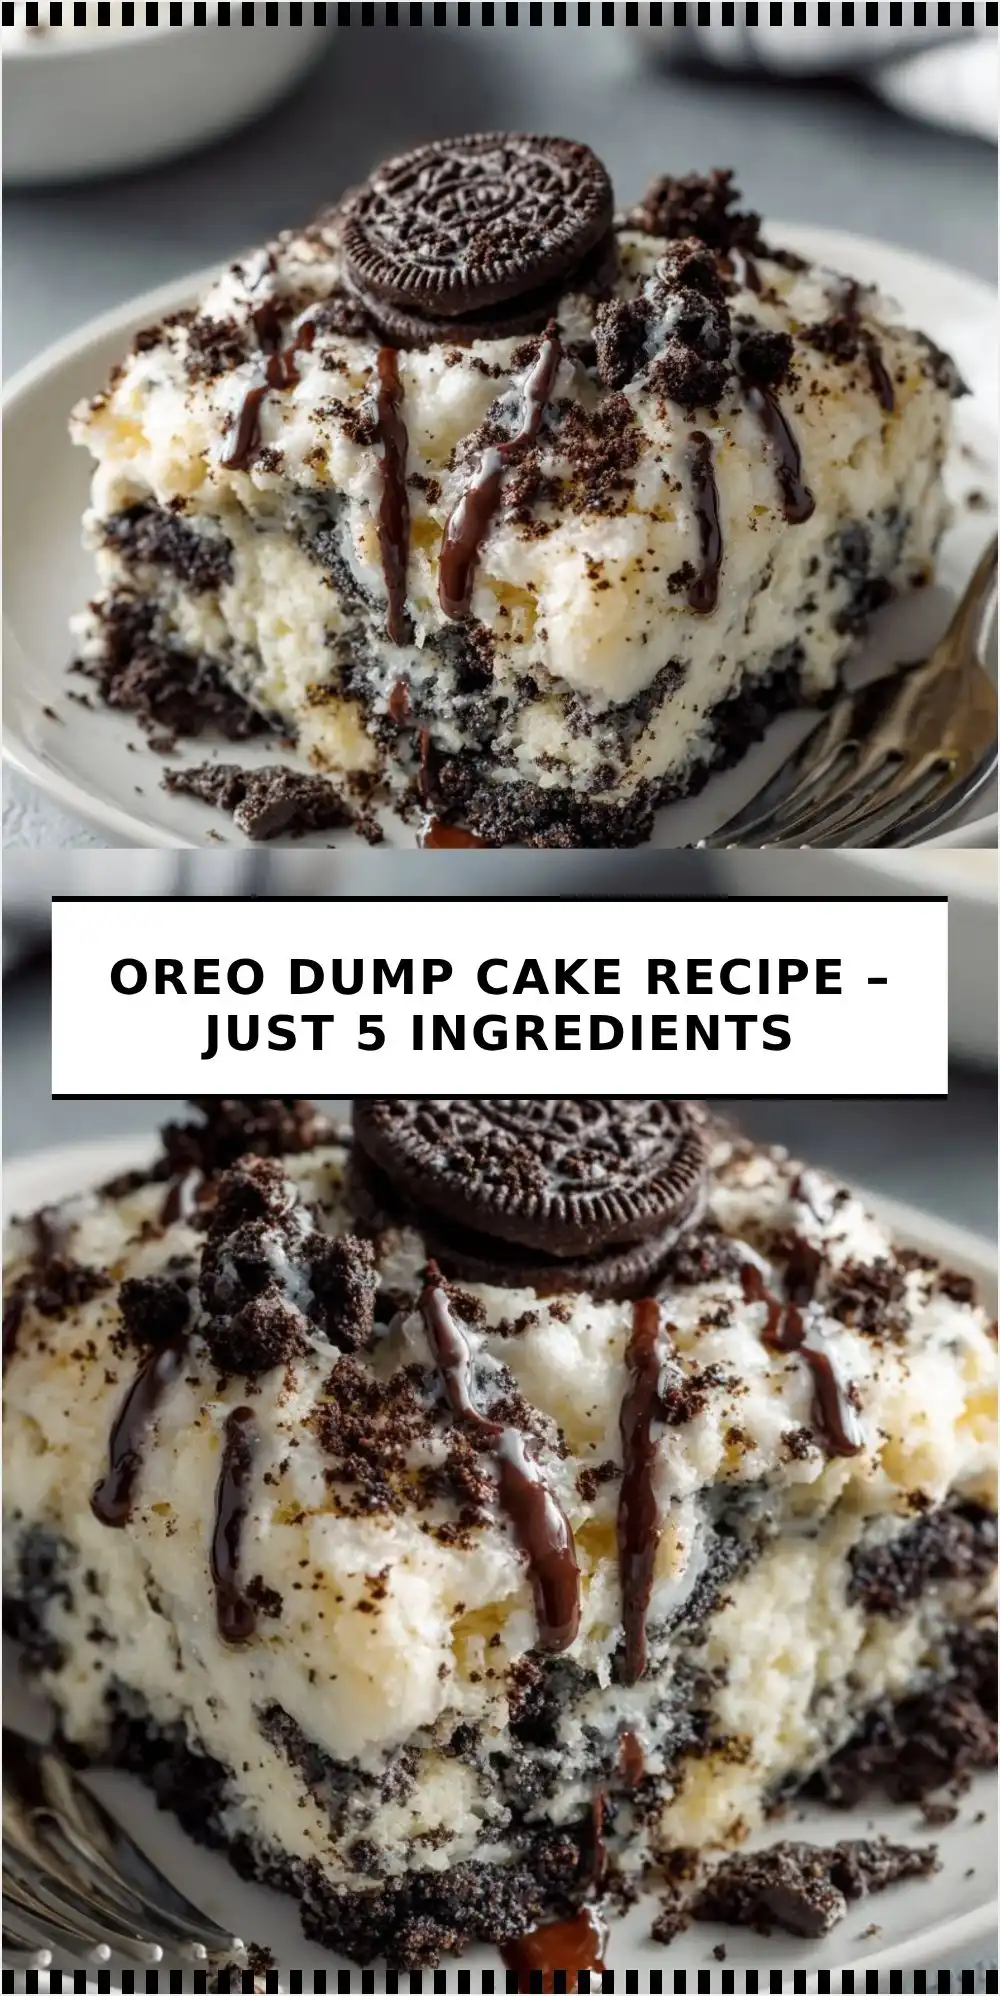
The Oreo Dump Cake is the ultimate no-fuss, crowd-pleasing dessert that embodies effortless elegance and nostalgic indulgence. Born from the beloved “dump cake” tradition—where ingredients are simply layered (not mixed) and baked to magical, self-saucing perfection—this version swaps fruit fillings for the iconic chocolate-and-cream magic of Oreos. It requires zero baking expertise, minimal prep time, and delivers maximum flavor: crisp, caramelized top; soft, gooey middle; and rich, cookie-infused depth in every bite. Whether you’re hosting last-minute guests, soothing post-work stress, or surprising kids after school, this 5-ingredient wonder proves decadence doesn’t demand complexity—it just needs Oreos, butter, and a little oven love.
The History
Dump cakes trace their roots to mid-20th-century American home kitchens, where resourceful bakers sought shortcuts without sacrificing satisfaction. Early versions appeared in community cookbooks and church pamphlets in the 1950s and ’60s—often using canned fruit, boxed cake mix, and melted butter layered directly in a pan and baked until bubbly and golden. The method capitalized on pantry staples and minimal cleanup, aligning perfectly with postwar domestic ideals of efficiency and comfort. While classic dump cakes leaned on cherry pie filling or peach slices, the Oreo iteration emerged organically in the late 2000s and exploded across food blogs and Pinterest by the early 2010s—fueled by America’s enduring obsession with Oreos and the viral appeal of “5-ingredient” recipes. It wasn’t invented in a test kitchen but evolved through collective experimentation: someone swapped the fruit for crushed cookies, another added a splash of milk (then realized it wasn’t needed), and soon, a new icon was born—not just a dessert, but a cultural shorthand for joyful, unpretentious baking.
Ingredients Breakdown
What makes this recipe extraordinary isn’t what’s included—but what’s left out. No eggs. No flour. No leaveners. No vanilla extract. No sugar beyond what’s already in the cookies and condensed milk. Just five thoughtfully chosen, synergistic components:
- Oreo Cookies (Family Size, 14.3 oz): The star—and sole source of structure, sweetness, cocoa, and signature cream filling. Standard Oreos (not Double Stuf or Thins) provide the ideal balance of crunch and melt-in-the-mouth texture. Their high sugar and fat content caramelizes beautifully under heat, forming the cake’s crust and infusing the entire dish with unmistakable “Ore-o-ness.”
- Sweetened Condensed Milk (14 oz can): The secret binding agent and moisture engine. Its thick, syrupy consistency—packed with concentrated milk solids and sugar—creates a luscious, fudgy layer beneath the crust while preventing dryness. Unlike evaporated milk or heavy cream, it adds richness *and* natural browning power thanks to Maillard-reactive lactose and proteins.
- Unsalted Butter (½ cup / 1 stick / 4 oz): Melted and poured over the top, it melts into the cookie layer during baking, lubricating the crumbs, amplifying aroma, and promoting deep golden-brown color and delicate crispness. Unsalted ensures precise control over sodium—critical since Oreos already contain ~180mg sodium per serving.
- Vanilla Extract (1 tsp): Though seemingly minor, this single teaspoon bridges all flavors: enhancing the roasted notes in the cocoa, rounding the sharp sweetness of condensed milk, and adding aromatic warmth that lifts the entire profile. Pure extract—not imitation—is non-negotiable for depth and authenticity.
- Coarse Sea Salt (¼ tsp, flaky preferred): The quiet hero. A tiny, intentional sprinkle over the butter layer before baking creates a stunning contrast—balancing cloying sweetness, intensifying chocolate flavor via salt’s flavor-enhancing properties, and delivering a sophisticated finish reminiscent of gourmet salted caramel. It transforms dessert into *experience*.
Every ingredient pulls double (or triple) duty—no filler, no redundancy. That’s the genius of restraint.
Step-by-Step Recipe
- Preheat & Prep: Position oven rack in the center. Preheat oven to 350°F (175°C). Grease a 9×13-inch metal or glass baking pan generously with butter or nonstick spray—don’t skip this; the caramelized bottom clings fiercely if under-greased.
- Crush the Oreos (The Right Way): Place 36 standard Oreos (about 2¼ cups crushed) into a large zip-top bag. Seal tightly, removing excess air. Use a rolling pin or heavy-bottomed glass to crush them into a mix of fine crumbs and small, pea-sized chunks—do not pulverize into dust. You want texture! Transfer to the prepared pan and spread evenly. Gently press down with the back of a spoon to form a cohesive, slightly compacted base layer (~¼-inch thick).
- Add Condensed Milk: Pour the entire 14-oz can of sweetened condensed milk evenly over the Oreo layer. Tilt and rotate the pan gently to ensure full coverage—let it seep naturally into the crevices. Do not stir or mix; this preserves the layered integrity essential for proper texture development.
- Melt & Drizzle Butter: In a small saucepan or microwave-safe bowl, melt the ½ cup unsalted butter until fully liquid and shimmering (about 45 seconds in microwave; stir halfway). Carefully pour the hot melted butter evenly over the condensed milk layer. Again—no stirring. Let gravity and heat do the work.
- Finish with Flavor: Sprinkle the 1 teaspoon of pure vanilla extract evenly across the surface. Follow immediately with the ¼ teaspoon of flaky sea salt, distributing it as evenly as possible—especially along the edges where caramelization concentrates.
- Bake with Precision: Place pan in preheated oven. Bake for 42–48 minutes. Look for visual cues—not just time: the top should be deeply golden brown with visible bubbling around the edges, and the center should look set (jiggle only slightly when gently shaken). Avoid opening the oven before 38 minutes—the steam buildup is crucial for tender crumb formation.
- Cool Completely (Non-Negotiable Step): Remove pan from oven and place on a wire rack. Let cool *undisturbed* for at least 2 hours—ideally 3–4 hours or overnight. This resting period allows residual heat to finish cooking the center, the condensed milk to fully set into a fudgy custard-like layer, and the crust to firm into its signature shatter-crisp texture. Cutting too soon yields a soupy, messy result.
- Serve & Savor: Once fully cooled, cut into 12–16 squares using a sharp, hot knife (dip blade in hot water and wipe dry between cuts for clean edges). Serve plain or elevate with optional garnishes: a scoop of vanilla bean ice cream, a drizzle of extra virgin olive oil (surprisingly harmonious with cocoa), a dusting of cocoa nibs, or a few whole mini Oreos on top.
Tips
- Crushing Consistency Matters: Too fine = dense, pasty cake. Too chunky = uneven baking. Aim for “breadcrumb-meets-pebble”—a rustic mix that gives both melt-in-the-mouth and satisfying crunch.
- Pan Choice Impacts Results: A light-colored aluminum 9×13 pan yields the most even browning and crispiest top. Dark nonstick pans bake faster and may over-brown edges—reduce time by 3–5 minutes if using one. Glass pans retain heat longer; let cool an extra 30 minutes before cutting.
- Butter Temperature is Key: Melt butter until hot and shimmering—not lukewarm. The thermal shock helps the butter penetrate the condensed milk layer and encourages rapid surface caramelization.
- Salt Timing is Critical: Adding salt *after* butter ensures it stays on top where it enhances crust flavor and provides textural pop. Stirring it in would dilute its impact.
- Resist the Peek: Opening the oven door before 38 minutes releases steam and drops temperature, risking a gummy center and pale top. Trust the timer and visual cues.
- Cooling Isn’t Optional—It’s Alchemical: That 2+ hour rest transforms liquid layers into cohesive, sliceable magic. Set a timer. Walk away. Your patience will be rewarded in texture and flavor intensity.
- Knife Technique: For flawless squares: heat a long, thin knife in hot water, dry thoroughly, cut firmly in one motion, then reheat/wipe before each cut. Cold cake + hot knife = bakery-perfect edges.
- Storage Wisdom: Keep covered at room temperature for up to 2 days (the crust stays crisp!). Refrigerate for up to 5 days—though chilled cake firms up significantly (delicious, but denser). Re-crisp leftovers by warming individual squares in a toaster oven at 325°F for 3–4 minutes.
Variations and Customizations
While the original 5-ingredient version is revered for its purity, creative bakers have expanded its universe—always respecting the core “dump-and-bake” philosophy and keeping additions *truly optional*, never essential:
- Double Chocolate Intensity: Add ¼ cup unsweetened cocoa powder to the crushed Oreos before spreading. Or swap 6 Oreos for 6 dark chocolate sandwich cookies (like Newman-O’s) for deeper, less sweet cocoa notes.
- Peppermint Swirl: After pouring condensed milk, drizzle 2 tbsp peppermint extract (not oil!) and swirl gently with a toothpick before adding butter. Finish with crushed candy cane on top in last 5 minutes of baking.
- Espresso Kick: Dissolve 1 tbsp instant espresso powder in the melted butter before drizzling. Adds sophisticated bitterness that cuts sweetness and elevates chocolate.
- Sea Salt Caramel Ripple: Before baking, dollop ⅓ cup thick salted caramel sauce over condensed milk layer and lightly swirl with a knife—creates stunning ribbons and gooey pockets.
- Mini Marshmallow Top: In the last 8 minutes of baking, scatter 1 cup miniature marshmallows over the hot, bubbly surface. They’ll puff, toast golden, and melt into a dreamy, s’mores-inspired crown.
- Streusel Upgrade: Mix ¼ cup crushed Oreos + 1 tbsp melted butter + pinch of salt; sprinkle over top *before* baking for extra crunch and visual appeal.
- Vegan Adaptation (6 Ingredients): Use vegan Oreos (certified dairy-free), coconut-based sweetened condensed milk (like Nature’s Charm), plant-based butter (Miyoko’s or Earth Balance), pure maple extract instead of vanilla, and flaky sea salt. Note: texture will be slightly softer; chill 4+ hours before slicing.
- Gluten-Free Version (5 Ingredients): Substitute certified GF chocolate sandwich cookies (like Kinnikinnick or Glutino), ensuring all other ingredients are GF-certified (some condensed milks contain barley derivatives—check labels).
Remember: Each variation should enhance—not obscure—the Oreo’s soul. If it tastes more like the add-in than the cookie, you’ve gone too far.
Health Considerations and Nutritional Value
This dessert is unapologetically indulgent—and that’s its virtue. Understanding its nutritional profile empowers mindful enjoyment, not guilt:
- Per Serving (1/16 of recipe, ~2.5″x2.5″ square): Approximately 245–260 calories | 13–15g total fat (8–9g saturated) | 28–31g carbohydrates | 22–24g sugars (naturally occurring lactose + added sugars) | 3–4g protein | 110–130mg sodium.
- Sugar Reality Check: The majority of sugar comes from Oreos (≈13g per 3 cookies) and sweetened condensed milk (≈22g per ¼ cup). There is no “low-sugar” version without compromising the fundamental chemistry—condensed milk’s sugar is essential for caramelization and texture.
- Fat Profile: Primarily saturated fat from butter and Oreo cream filling. While excessive saturated fat intake is linked to cardiovascular concerns, enjoying this cake occasionally (e.g., 1–2 servings monthly) fits comfortably within balanced dietary patterns per American Heart Association guidelines.
- No Hidden “Health Halo”: Claims like “protein-rich” or “calcium-boosted” are misleading. While condensed milk contributes modest calcium (≈8% DV per serving) and protein, it’s negligible next to daily needs. This is dessert—not nutrition.
- Dietary Restrictions Notes: Contains dairy (milk, butter), wheat (Oreos), soy (Oreo lecithin), and egg (Oreo albumen). Not suitable for vegan, strict dairy-free, or egg-allergic individuals without verified substitutions. Gluten-free only with certified GF cookies.
- Mindful Enjoyment Tips: Serve smaller portions (cut into 20 squares instead of 16). Pair with a tall glass of cold unsweetened almond milk or herbal tea. Savor slowly—focus on texture, aroma, and flavor release. Share generously—it’s more delicious when shared.
Nutrition isn’t about restriction—it’s about context, balance, and celebrating real food, made simply and eaten joyfully.
Ingredients
- 36 standard Oreo cookies (14.3 oz family-size package), crushed into coarse crumbs and small chunks
- 1 (14 oz) can sweetened condensed milk
- ½ cup (1 stick / 4 oz) unsalted butter, melted until hot and shimmering
- 1 teaspoon pure vanilla extract
- ¼ teaspoon flaky sea salt (such as Maldon or Jacobsen)
Directions
- Preheat oven to 350°F (175°C). Generously grease a 9×13-inch baking pan.
- In a large zip-top bag, crush Oreos until mixture resembles coarse breadcrumbs with some small chunks. Transfer to prepared pan and press into an even layer.
- Pour sweetened condensed milk evenly over Oreo layer. Tilt pan gently to spread.
- Drizzle hot melted butter evenly over condensed milk layer.
- Sprinkle vanilla extract, then sea salt, evenly over the top.
- Bake 42–48 minutes, until top is deeply golden brown and edges are bubbling vigorously.
- Remove from oven and cool completely on a wire rack—minimum 2 hours, ideally 3–4 hours or overnight.
- Cut into squares with a hot, clean knife. Serve at room temperature.
FAQ
- Can I use Double Stuf Oreos?
- Yes—but expect a softer, less structured cake. Double Stuf has higher fat and moisture, which can make the center overly gooey and hinder crust formation. Standard Oreos deliver optimal texture balance.
- What if I only have a 9×9 pan?
- Halve the recipe precisely. Use 18 Oreos, ½ can (7 oz) condensed milk, ¼ cup butter, ½ tsp vanilla, and 1/8 tsp salt. Bake in an 8×8 or 9×9 pan for 32–38 minutes. Watch closely—the smaller volume bakes faster.
- Why can’t I stir the layers together?
- Stirring destroys the “dump cake” principle. The unmixed layers create distinct textures: the butter crisps the top, the condensed milk steams and sets the middle, and the Oreos hydrate and soften below—all without gluten development or density. Stirring = dense, uniform, muffin-like results.
- My cake came out too wet in the center. What went wrong?
- Most likely causes: 1) Underbaking—use visual cues (bubbling edges, set center) over strict timing; 2) Cutting too soon—cooling is mandatory for setting; 3) Altitude—above 3,000 ft, add 2–3 minutes to bake time; 4) Pan too large—ensure exact 9×13 dimensions.
- Can I make this ahead for a party?
- Absolutely—and it’s recommended! Bake and cool completely 1–2 days ahead. Store covered at room temperature. It actually improves as flavors meld. Warm individual squares in a toaster oven before serving for peak freshness.
- Is there a lower-sugar option?
- Not without fundamentally changing the recipe. Sugar-free condensed milk lacks lactose needed for caramelization and yields a rubbery, unpleasant texture. “Light” Oreos reduce sugar slightly but compromise creaminess and flavor. Embrace it as occasional joy—not daily fare.
- Can I freeze leftovers?
- Yes! Wrap tightly in plastic wrap, then foil, and freeze for up to 3 months. Thaw overnight in fridge, then bring to room temperature or re-warm in a 325°F oven for 8–10 minutes. Texture remains excellent.
- What’s the best way to crush Oreos without a food processor?
- A heavy-duty zip-top bag + rolling pin is ideal. Place cookies inside, seal tightly, and roll firmly using back-and-forth motions—not smashing. Rotate the bag 90° every 15 seconds for even crushing. A meat mallet works too!
Summary
The Oreo Dump Cake is a masterclass in minimalist magic: five humble ingredients—Oreos, sweetened condensed milk, butter, vanilla, and sea salt—transform through heat and time into a dessert of astonishing depth, contrast, and nostalgia.
With zero mixing, no eggs, and no flour, it delivers crackling crust, fudgy center, and bold chocolate-cream harmony—proving that extraordinary flavor doesn’t require complexity, just thoughtful simplicity and the courage to let Oreos shine.