Introduction
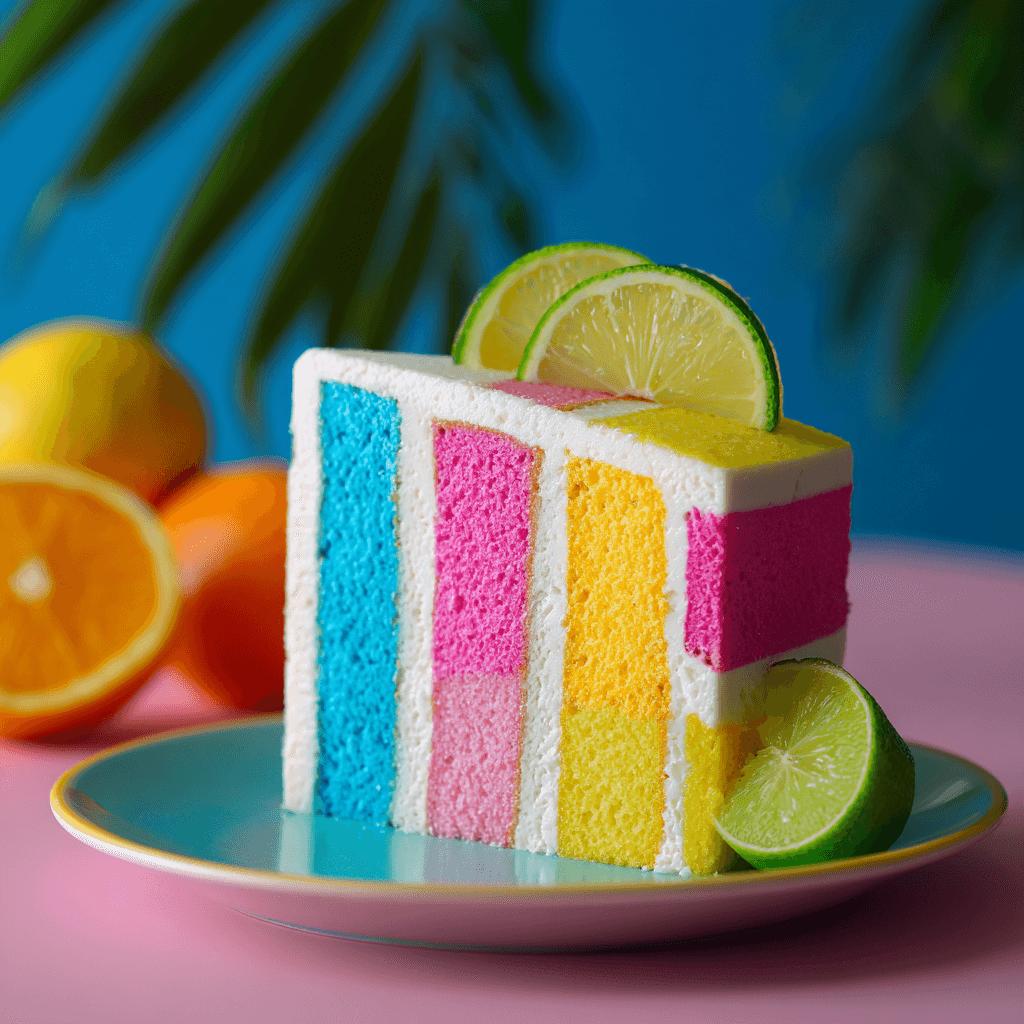
Welcome to the vibrant world of the Neon Colorblock Cake—a visually stunning and flavor-packed dessert that’s perfect for any celebration. Whether you’re throwing a birthday party, hosting a baby shower, or just looking to impress your friends with something unique, this cake will surely steal the show. The bold neon colors not only make it Instagram-worthy but also add a fun twist to a classic treat.
The History
While cakes have been around for centuries, colorful layer cakes gained popularity in the 20th century with the rise of boxed cake mixes and food coloring innovations. The “Colorblock” trend took off in the fashion world before making its way into baking, where bold blocks of color are used to create eye-catching designs. Neon hues, in particular, bring a modern, playful energy to traditional layer cakes, making them a favorite among bakers and decorators alike.
Ingredients Breakdown
This cake combines soft, moist layers with rich frosting and vivid colors. You’ll need:
- All-purpose flour
- Baking powder
- Salt
- Unsalted butter (softened)
- Granulated sugar
- Eggs
- Milk
- Vanilla extract
- Fondant or buttercream frosting
- Neon gel food coloring (pink, green, blue, yellow, orange)
- Optional: edible glitter or sprinkles for decoration
Step-by-Step Recipe
- Preheat oven to 350°F (175°C). Grease and line three 8-inch round cake pans.
- In a medium bowl, sift together flour, baking powder, and salt. Set aside.
- Cream butter and sugar together until light and fluffy.
- Add eggs one at a time, beating well after each addition. Stir in vanilla.
- Alternately mix in dry ingredients and milk, starting and ending with dry ingredients. Mix until just combined.
- Divide batter evenly into bowls equal to the number of colors you’re using (typically 4–6).
- Add generous amounts of neon gel food coloring to each bowl until desired vibrancy is achieved.
- Pour each colored batter into prepared pans and bake for 25–30 minutes or until a toothpick inserted in the center comes out clean.
- Cool completely before frosting.
- Frost each layer with buttercream or fondant, stacking carefully to maintain color separation.
Tips
- Use gel-based food coloring instead of liquid for more intense neon effects without altering the texture.
- For sharp color separation, frost each layer with a crumb coat before applying the final coat.
- Chill layers in the fridge for 15–20 minutes before assembling to prevent smudging.
- If using fondant, roll it out thinly and apply to a crusted buttercream base for better adhesion.
- Work quickly when mixing neon-colored batter—gel colors can fade slightly over time.
Variations and Customizations
Make this cake your own by trying these creative twists:
- Flavor variations: Add lemon zest, almond extract, or cocoa powder to individual layers for a surprise flavor punch.
- Chocolate colorblock: Make one or two layers chocolate and keep others vanilla for contrast.
- Themed decorations: Top with candy gems, metallic dragees, or edible gold leaf for a luxury look.
- Mini version: Bake as cupcakes for a portable take on the colorblock theme.
- Ombre effect: Gradually shift from one neon shade to another for a gradient appearance.
Health Considerations and Nutritional Value
While the Neon Colorblock Cake is undeniably indulgent, moderation is key when enjoying such desserts. A typical slice (1/12 of an 8-inch cake) may contain approximately:
- Calories: 400–500
- Total Fat: 15–20g
- Carbohydrates: 60–70g
- Protein: 4–6g
- Sugar: 40–50g
To lighten things up, consider using reduced-fat dairy, natural sweeteners like honey or maple syrup, and whole wheat flour substitutions. Also, be mindful of artificial food dyes—some studies suggest potential hyperactivity effects in children, so opt for natural alternatives if preferred.
Ingredients
- 2 and ½ cups all-purpose flour
- 2 and ½ tsp baking powder
- ½ tsp salt
- 1 cup unsalted butter, softened
- 2 cups granulated sugar
- 4 large eggs
- 1 cup milk
- 1 tbsp vanilla extract
- Buttercream or fondant frosting
- Neon gel food coloring (pink, green, blue, yellow, orange)
- Optional: edible glitter, sprinkles, or luster dust
Directions
- Preheat oven to 350°F (175°C). Grease and line three 8-inch cake pans with parchment paper.
- In a medium bowl, sift flour, baking powder, and salt. Set aside.
- In a stand mixer, beat butter and sugar until light and fluffy (about 3–4 minutes).
- Add eggs one at a time, mixing well after each. Stir in vanilla extract.
- Gradually alternate adding dry ingredients and milk, beginning and ending with dry ingredients.
- Divide batter evenly into 4–6 separate bowls depending on how many colors you want.
- Add a different neon gel color to each bowl, stirring thoroughly until fully incorporated.
- Pour each colored batter into a prepared pan and bake for 25–30 minutes or until a toothpick comes out clean.
- Cool cakes completely on wire racks before frosting.
- Frost each layer with buttercream or fondant and stack carefully to preserve distinct color layers.
- Decorate with optional glitter or sprinkles for added flair.
FAQ
Can I use regular food coloring?
It’s best to use gel-based food coloring for neon shades, as liquid coloring can dilute the batter and result in muted tones.
How do I store the cake?
Store covered in the refrigerator for up to 3 days or at room temperature for 1–2 days. Bring to room temperature before serving for best texture.
Can I freeze the cake layers?
Yes! Wrap cooled layers tightly in plastic wrap and foil; freeze for up to 2 months. Thaw completely before frosting.
What if my colors bleed into each other?
Ensure each layer is fully cooled and chilled before stacking. Apply a thin crumb coat between layers to help maintain separation.
Is it safe to eat neon-colored cake?
Most gel food colorings are FDA-approved and safe for consumption. Always check labels and use food-grade products specifically designed for baking.
Summary
The Neon Colorblock Cake is a vibrant, flavorful dessert that combines bold neon layers with creamy frosting for a show-stopping centerpiece. Perfect for birthdays, celebrations, or just because—it brings joy, creativity, and deliciousness to every slice.