Magical Galaxy Cake
Introduction
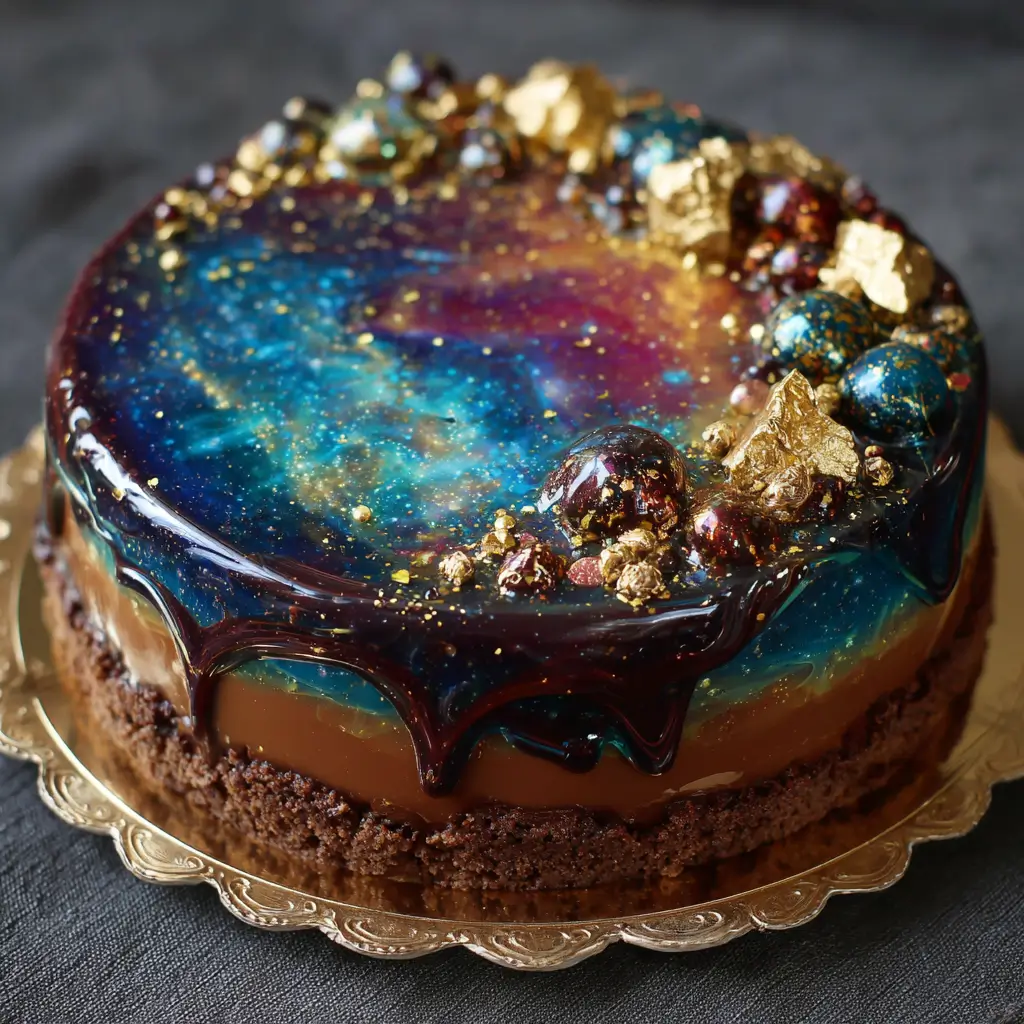
Welcome to the enchanting world of the Magical Galaxy Cake—a dessert that’s as mesmerizing to look at as it is delightful to taste. This cake is a visual masterpiece, inspired by the swirling colors and cosmic beauty of distant galaxies. Perfect for birthdays, parties, or any celestial celebration, this cake transforms the ordinary into the extraordinary with its vibrant hues and dreamy design.
The History
While the exact origin of the galaxy cake is hard to pinpoint, it gained massive popularity around 2015 with the rise of visually striking desserts on social media platforms like Pinterest and Instagram. Bakers worldwide began experimenting with food coloring and marbling techniques to recreate the ethereal beauty of space. The galaxy cake quickly became a favorite among cake decorators for its artistic freedom and eye-catching appeal.
Ingredients Breakdown
Creating a Magical Galaxy Cake involves more than just baking—it’s about layering flavors, textures, and colors in harmony. Here’s what you’ll need:
- All-purpose flour – provides structure
- Baking powder – helps the cake rise
- Butter (unsalted) – adds richness and moisture
- Sugar – sweetens and creates tenderness
- Eggs – bind and add body
- Milk – adds moisture and softness
- Vanilla extract – enhances flavor
- Fondant or buttercream – for smooth outer finish
- Gel food coloring (violet, blue, pink, teal, black) – to create galaxy swirls
- Edible glitter or luster dust – for a starry sparkle
- Optional: silver dragees or candy stars – for extra cosmic flair
Step-by-Step Recipe
- Bake the cake layers: Prepare your favorite vanilla or chocolate cake batter and divide it evenly into 4–6 bowls.
- Color each bowl: Add different gel colors to each portion—think deep purples, blues, pinks, and teals.
- Layer the batter: Pour each colored batter randomly into the cake pan to create a marbled effect.
- Bake: Bake at 350°F (175°C) until a toothpick comes out clean.
- Cool and level: Let the cakes cool completely, then trim the tops for even stacking.
- Frost and stack: Spread buttercream between each layer and stack them carefully.
- Crumbs coat: Apply a thin crumb coat and chill for 30 minutes.
- Final frosting: Cover the entire cake with a thick layer of white buttercream or fondant.
- Create the galaxy effect: Use gel colors and a spatula or brush to blend shades into a cosmic swirl.
- Add shimmer: Dust with edible glitter and decorate with optional candies or stars.
Tips
- Use gel-based food coloring for vibrant results without altering texture.
- Chill your cake before applying the final color coat to avoid melting.
- Work quickly when blending colors to maintain sharp contrasts.
- If using fondant, roll it out smoothly and drape over the cake for a flawless base.
- Use a dry paintbrush to flick edible glitter onto the surface for a star-dust effect.
Variations and Customizations
The beauty of the Magical Galaxy Cake lies in its versatility. You can customize it in countless ways:
- Theme variations: Space ships, planets, or astronaut figurines for added decor.
- Flavor swaps: Try red velvet, lemon, or coconut cake instead of vanilla.
- Dietary adaptations: Make it gluten-free or vegan with alternative ingredients.
- Color themes: Pastel galaxies, neon galaxies, or monochrome cosmic designs.
- Shape options: Round, square, hexagonal, or shaped pans for creative silhouettes.
Health Considerations and Nutritional Value
While the Magical Galaxy Cake is a treat best enjoyed in moderation, here are some nutritional insights and health tips:
- High in sugar and saturated fats due to butter, cream, and fondant.
- Calories per slice can range from 300–600 depending on size and frosting.
- To reduce calories: use low-fat milk, applesauce instead of oil, and light buttercream.
- Consider allergen-free alternatives if serving guests with dietary restrictions.
- Portion control is key to enjoying this indulgent dessert responsibly.
Ingredients
- 2 ½ cups all-purpose flour
- 2 ½ tsp baking powder
- 1 cup unsalted butter, softened
- 2 cups granulated sugar
- 4 large eggs
- 1 cup whole milk
- 1 tbsp vanilla extract
- Gel food coloring: violet, royal blue, hot pink, teal
- 1 batch buttercream frosting (or store-bought)
- Edible glitter or luster dust (silver, gold, pearl)
- Candy stars or silver dragees (optional)
Directions
- Preheat oven to 350°F (175°C). Grease and flour three 8-inch round cake pans.
- In a medium bowl, whisk together flour and baking powder. Set aside.
- In a large bowl, beat butter and sugar until light and fluffy (about 3–4 minutes).
- Add eggs one at a time, mixing well after each addition. Stir in vanilla extract.
- Alternately mix in flour mixture and milk, beginning and ending with flour.
- Divide batter evenly into 4–5 separate bowls. Add different gel colors to each bowl.
- Randomly pour colored batters into prepared pans. Swirl gently with a knife for marbling.
- Bake for 25–30 minutes or until a toothpick inserted in the center comes out clean.
- Cool cakes in pans for 10 minutes, then remove and place on wire racks to cool completely.
- Level the tops of each cake layer with a serrated knife or cake leveler.
- Place the first layer on a cake board or plate. Spread a layer of buttercream on top.
- Repeat with remaining layers, stacking carefully.
- Apply a thin crumb coat to seal in crumbs and chill for 30 minutes.
- Cover the cake with a final layer of buttercream or fondant.
- Using gel colors and a small spatula or brush, blend colors in a swirling galaxy pattern.
- Dust the cake with edible glitter for a sparkling galaxy effect.
- Garnish with candy stars or dragees if desired.
- Chill the cake for at least 1 hour before serving to set the colors.
FAQ
Q: Can I make this cake ahead of time?
A: Yes! Bake and frost the cake up to two days in advance. Store in the fridge and bring to room temperature before serving.
Q: Can I freeze galaxy cake layers?
A: Absolutely! Wrap the cooled layers tightly in plastic wrap and foil. Freeze for up to 3 months. Thaw overnight before assembling.
Q: What if my colors bleed together too much?
A: Chill the frosted cake between color applications. Work in small sections and use minimal pressure.
Q: Is fondant necessary for the galaxy effect?
A: No. A thick layer of buttercream works just as well and is easier to work with for beginners.
Q: Are there kid-friendly versions?
A: