Instant Pot Chocolate Lava Cake
Introduction
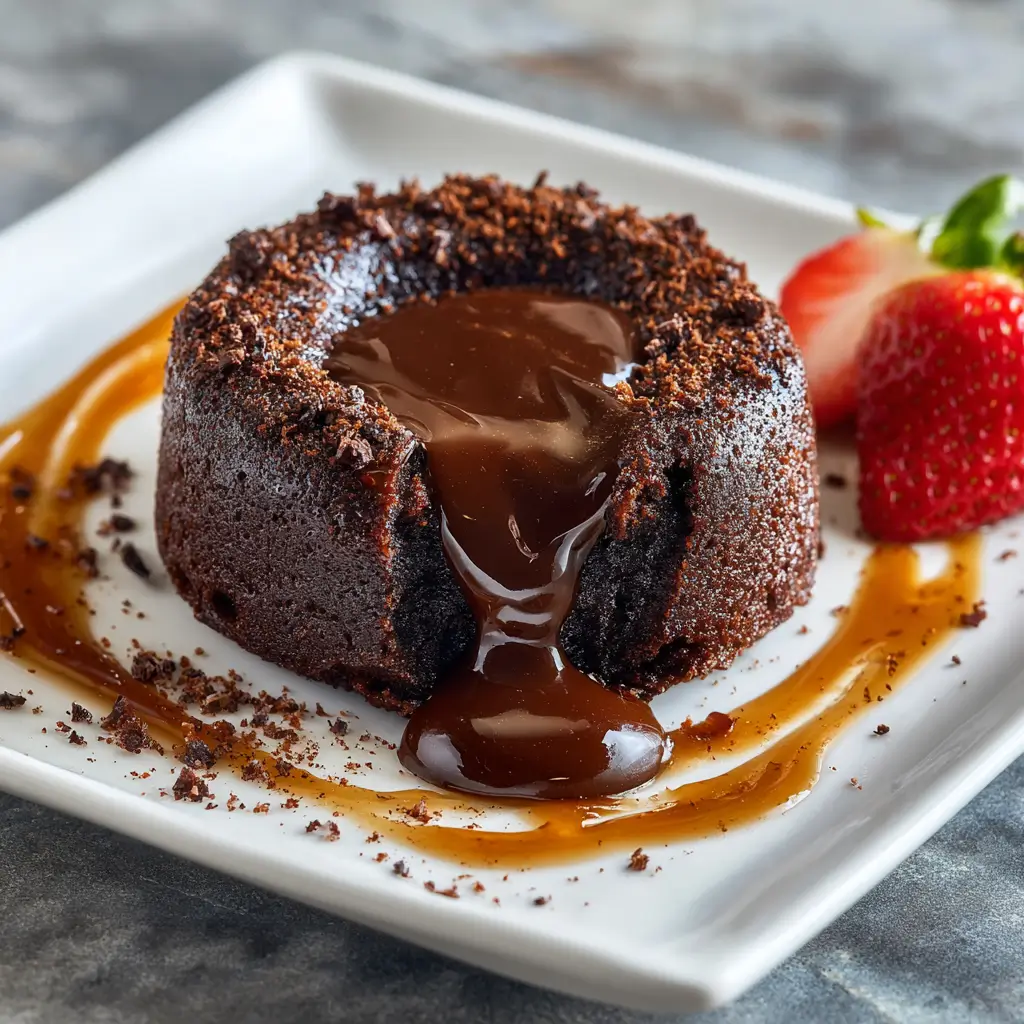
The Instant Pot Chocolate Lava Cake is a modern twist on the classic dessert that has delighted diners for decades. Known for its rich, gooey center and chocolatey flavor, this cake is a showstopper that’s surprisingly simple to make at home. With the help of an Instant Pot or any electric pressure cooker, you can enjoy a restaurant-quality dessert in under an hour—no fancy techniques or equipment needed. This version is perfect for chocolate lovers and busy home cooks alike, offering a foolproof method to achieve that signature molten center every time.
The History
Chocolate lava cake, also known as “molten chocolate cake” or “chocolate fondant,” was invented in the 1960s by French chef Jean-Georges Vongerichten. While experimenting with chocolate soufflés, he accidentally undercooked one, discovering the deliciously runny center that would later become a sensation. Since then, it has become a staple in fine dining and home kitchens alike. The Instant Pot version is a recent innovation, allowing for a hands-off cooking process that delivers consistent results without the need for an oven, making this indulgent dessert even more accessible.
Ingredients Breakdown
This rich dessert is made with simple, high-quality ingredients that come together to create a luxurious texture and flavor:
- Dark Chocolate: Provides depth and richness; choose a high-quality bar for the best melt and flavor.
- Unsalted Butter: Adds moisture and enhances the smoothness of the chocolate.
- Granulated Sugar: Sweetens the mixture and contributes to the cake’s structure.
- Eggs: Act as a binding agent and help create the cake’s dense yet tender texture.
- Egg Yolks: Extra yolks add to the richness and help create that gooey center.
- All-Purpose Flour: Gives the cake structure while keeping it light enough to allow the center to stay molten.
- Vanilla Extract: Enhances the overall flavor profile with a warm, aromatic note.
- Salt: Balances the sweetness and enhances the chocolate flavor.
- Optional Toppings: Powdered sugar, whipped cream, vanilla ice cream, fresh berries, or a drizzle of caramel or chocolate sauce.
Step-by-Step Recipe
- Prepare the Instant Pot: Add 1 cup of water to the inner pot of your Instant Pot. Place a trivet or steaming rack inside.
- Grease Ramekins: Select heatproof ramekins (about 6 oz each). Grease the inside thoroughly with butter to help the cakes release easily and promote the molten center.
- Melt Chocolate and Butter: In a microwave-safe bowl or over a double boiler, melt the chocolate and butter together until smooth. Stir frequently to avoid burning.
- Combine Wet Ingredients: In a mixing bowl, whisk together sugar, eggs, egg yolks, vanilla, and salt until fully incorporated and slightly thickened.
- Blend Wet and Dry: Slowly whisk the melted chocolate into the egg mixture. Then gently fold in the flour until just combined—do not overmix.
- Fill Ramekins: Divide the batter evenly among the greased ramekins. Place them on a heat-safe trivet or directly on the rack in the Instant Pot.
- Cook: Secure the lid, set the valve to sealing, and cook on high pressure for 7 minutes.
- Quick Release: After cooking, do a quick release of the pressure. Carefully remove the ramekins using oven mitts or silicone tongs.
- Rest and Serve: Let the cakes sit for 2–3 minutes before gently loosening the edges with a knife and inverting onto a serving plate.
Tips
- Use Room-Temperature Eggs: They blend more easily with the melted chocolate and butter, ensuring a smooth batter.
- Don’t Overmix: Once flour is added, mix just until combined to avoid a tough texture.
- Let It Rest: Allowing the cakes to rest for a couple of minutes after cooking helps the molten center settle and makes inversion easier.
- Test the Timing: Depending on your Instant Pot model and ramekin size, you may need to adjust the cooking time by 1–2 minutes to achieve the perfect lava center.
- Double Batch: You can stack ramekins using a foil sling to make multiple servings at once.
Variations and Customizations
- Flavor Additions: Add a splash of espresso powder, orange zest, or peppermint extract to enhance the chocolate flavor.
- Fillings: Drop a spoonful of peanut butter, caramel, or Nutella into the center of the batter before cooking for a surprise filling.
- Flourless Option: For a denser, richer cake, omit the flour entirely for a gluten-free, flourless version (may require slightly less cooking time).
- Mini Lava Cakes: Use smaller ramekins or silicone molds and reduce the cooking time to 5–6 minutes.
- White or Milk Chocolate: Substitute dark chocolate with white or milk chocolate for a different flavor profile.
Health Considerations and Nutritional Value
While this dessert is indulgent by nature, there are ways to make it a bit healthier without sacrificing flavor:
- Use Dark Chocolate: Opt for chocolate with at least 70% cocoa for antioxidants and less sugar.
- Reduce Sugar: You can cut the sugar by up to 25% without affecting the texture too much.
- Gluten-Free Option: This cake is naturally gluten-free when made without flour or using a gluten-free flour blend.
- Portion Control: Serve with a small scoop of low-fat ice cream or fresh berries to balance the richness.
Per serving (1 ramekin), this dessert typically contains around 350–450 calories, depending on the size and ingredients used, with most of the fat coming from butter and chocolate.
Ingredients
- 4 oz (115g) dark chocolate (70% cocoa or higher)
- 4 tbsp (60g) unsalted butter
- 1/2 cup (100g) granulated sugar
- 2 large eggs
- 2 large egg yolks
- 1 tsp vanilla extract
- 1/8 tsp salt
- 1/4 cup (30g) all-purpose flour (or gluten-free alternative)
- Optional: powdered sugar or ice cream for serving
Directions
- Place 1 cup of water in the Instant Pot and insert a trivet or steaming rack.
- Grease 2–3 heatproof 6-oz ramekins with butter and set aside.
- In a microwave-safe bowl, melt the chocolate and butter together in 30-second intervals, stirring until smooth.
- In a separate bowl, whisk together sugar, eggs, egg yolks, vanilla, and salt until thick and pale yellow.
- Gradually whisk the melted chocolate into the egg mixture until fully combined.
- Fold in the flour gently until just incorporated—no lumps, no overmixing.
- Divide the batter evenly among the ramekins, filling each about 3/4 full.
- Place the ramekins on the trivet, close the lid, and set the valve to sealing.
- Cook on high pressure for 7 minutes.
- Once done, quick-release the pressure and carefully remove the ramekins.
- Let the cakes cool for 2–3 minutes, then run a