Geode Crystal Cake
Introduction
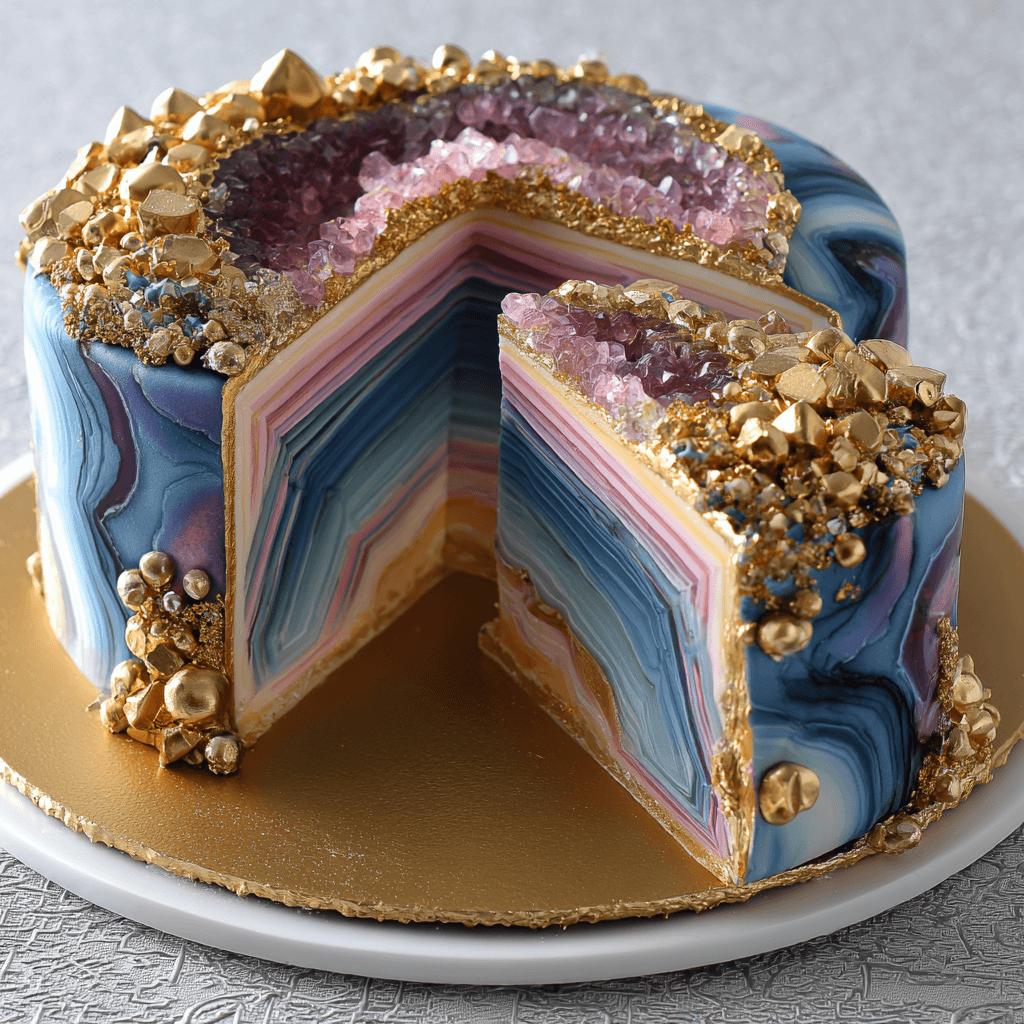
The Geode Crystal Cake is a stunning and artistic dessert that mimics the look of natural geodes—those beautiful rock formations filled with sparkling crystals. This cake has taken the baking and cake decorating world by storm, especially among sugar artists and pastry chefs who love to blend visual artistry with flavor. Whether for birthdays, weddings, or special events, a geode cake makes a show-stopping centerpiece that wows guests with its realistic crystalline appearance.
The History
While the exact origin of the geode cake is unclear, it emerged as part of the broader trend in hyper-realistic cake design. As fondant and sugar work techniques advanced, bakers began experimenting with intricate designs inspired by nature. The first documented geode cakes appeared around 2015–2016, gaining popularity through social media platforms like Instagram and Pinterest. These cakes quickly became symbols of modern cake artistry, blending science, nature, and confectionery craftsmanship into one delicious masterpiece.
Ingredients Breakdown
- Cake Base: Vanilla or chocolate sponge cake layers
- Filling: Buttercream, ganache, or jam
- Fondant: For covering the cake and creating the geode shape
- Gel Food Coloring: Icing colors like teal, purple, blue, pink, etc.
- Isomalt or Rock Candy: To create the crystal formations
- Edible Glitter or Luster Dust: For sparkle effect
- Shortening & Corn Syrup: For painting and shine
- Glucose or Corn Syrup: For making isomalt crystals
Step-by-Step Recipe
- Bake your preferred cake layers (vanilla, chocolate, red velvet, etc.) and let them cool completely.
- Frost and stack the layers using buttercream or ganache.
- Crumb coat the cake and chill until firm.
- Cover the cake with a smooth layer of fondant, preferably white or light gray for contrast.
- Carve out a hollow space on one side of the cake where the geode will appear.
- Using colored fondant, mold jagged “crystals” in various shades; allow them to dry.
- Create isomalt crystals by melting isomalt with glucose syrup and pouring into molds.
- Paint the fondant geode area with shortening mixed with luster dust for shimmer.
- Attach both fondant and isomalt crystals inside the carved-out section.
- Add final touches like edible glitter or pearl dust for extra sparkle.
Tips
- Use modeling chocolate or gum paste for more durable crystals if you’re not using isomalt.
- Let isomalt cool slightly before shaping to avoid burns.
- Apply a thin layer of piping gel or corn syrup on crystals to make them shiny.
- Work in a clean, dry environment—humidity can ruin isomalt and fondant details.
- Plan your color palette beforehand for a cohesive and realistic crystal effect.
Variations and Customizations
- Theme-Based Cakes: Space-themed geodes with black fondant and glowing crystals.
- Flavor Combinations: Lemon, raspberry, coconut, or even matcha fillings.
- Mini Geode Cakes: Create individual cupcakes with mini geode tops.
- Non-Edible Crystals: For display-only cakes, use resin or glass crystals.
- Seasonal Themes: Use pastels for Easter, deep purples and golds for New Year’s Eve.
Health Considerations and Nutritional Value
A typical slice of geode crystal cake contains between 400–700 calories, depending on size, filling, and decoration. The majority of calories come from sugar and fat in the frosting, fondant, and isomalt. While visually stunning, these cakes are best enjoyed occasionally due to their high sugar content. Isomalt is low-glycemic and tooth-friendly, making it a better option than regular sugar for decorations. Those with dietary restrictions can opt for gluten-free flour, vegan buttercream, and dairy-free chocolate alternatives.
Ingredients
Cake: All-purpose flour, sugar, eggs, milk, baking powder, oil, vanilla extract.
Frosting: Butter, powdered sugar, heavy cream or milk, vanilla extract.
Fondant: Store-bought or homemade fondant (marshmallow-based).
Crystals: Isomalt, food coloring, glucose syrup.
Optional: Edible glitter, luster dust, piping gel, corn syrup, shortening.
Directions
- Preheat oven to 350°F (175°C). Grease and line two 8-inch round pans.
- Mix cake ingredients and bake for 25–30 minutes until golden and springy.
- Let cakes cool completely before leveling and stacking with frosting.
- Apply a crumb coat, chill, then cover with fondant.
- Carve out a geode-shaped cavity using a sharp knife or spoon.
- Color small portions of fondant and shape into jagged crystals.
- Melt isomalt with glucose, pour into silicone gemstone molds, and let cool.
- Paint the carved area with shimmer mixture and insert fondant and isomalt crystals.
- Dust lightly with edible glitter and finish with optional drizzles or accents.
FAQ
Can I eat the isomalt crystals?
Yes, they’re edible and safe to consume, though they’re quite hard and not meant to be chewed.
How far in advance can I make a geode cake?
You can prepare the cake up to 2 days ahead and store it refrigerated. Crystals can be made a week in advance.
What if I don’t have isomalt?
Rock candy or hard candies can be melted and reshaped, though they won’t be as clear or stable as isomalt.
How do I keep the crystals from melting?
Store the cake in a cool, dry place away from humidity to prevent crystal softening.
Is this cake suitable for beginners?
It’s intermediate-level but manageable with patience and practice. Start with smaller versions!
Summary
The Geode Crystal Cake is a breathtaking blend of culinary skill and artistic expression, featuring lifelike crystal formations made from isomalt and fondant. It’s as delicious as it is dazzling, perfect for impressing guests at any special occasion.