Introduction
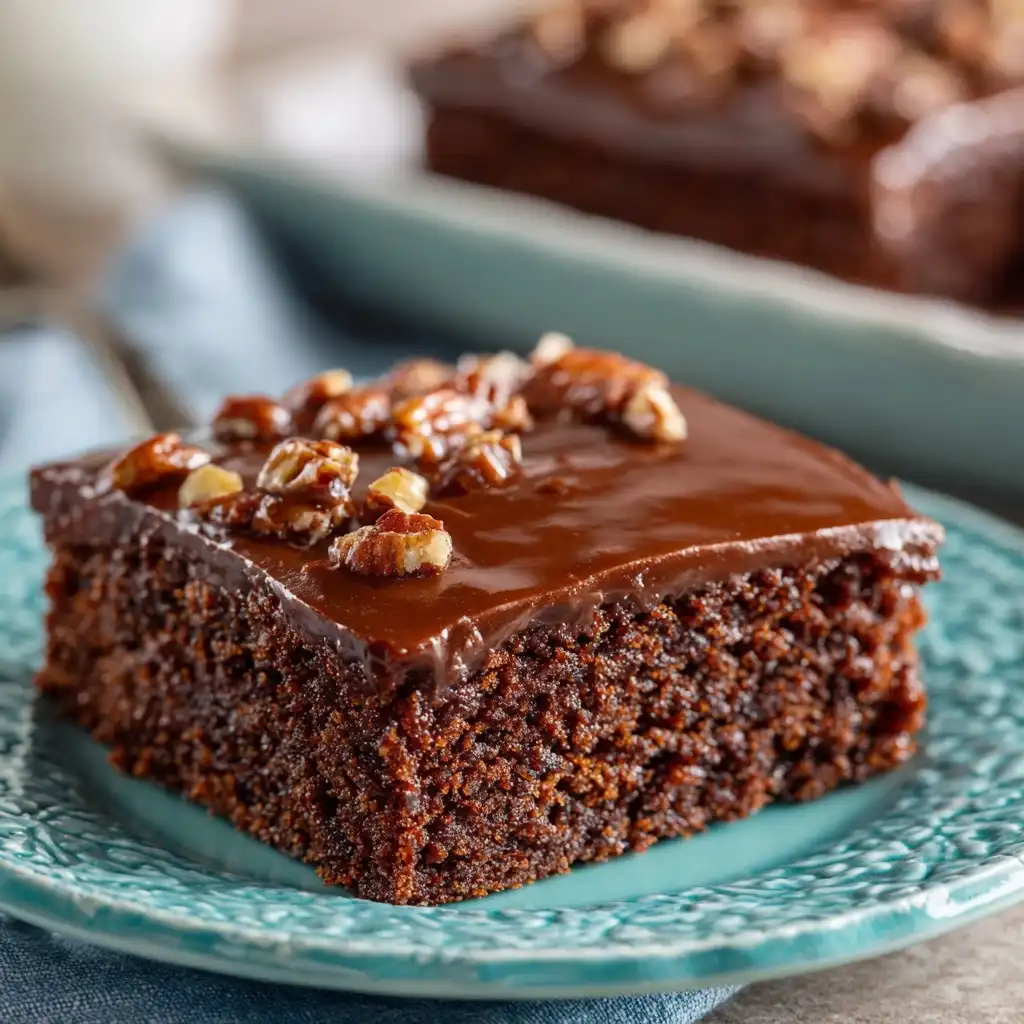
Welcome to the definitive, no-nonsense, deeply authentic guide to the Classic Texas Sheet Cake—a beloved American dessert that’s equal parts humble and heroic. More than just a cake, it’s a cultural institution: served at church potlucks, birthday bashes, family reunions, county fairs, and even high school homecoming tailgates across the Lone Star State and beyond. With its ultra-moist crumb, rich cocoa-infused base, and famously decadent, warm-poured chocolate glaze that seeps luxuriously into every crevice, this isn’t *just* dessert—it’s comfort, nostalgia, generosity, and Southern hospitality baked into one generous 13×9-inch pan. Whether you’re a first-time baker or a seasoned pastry pro, this recipe delivers foolproof results, crowd-pleasing flavor, and that unmistakable “Wait—how is this *so* good and *so* easy?” magic. Consider this not merely a recipe—but your new lifelong baking cornerstone.
The History
The origins of the Texas Sheet Cake are as layered and nuanced as the dessert itself—steeped in mid-20th-century American ingenuity, wartime resourcefulness, and regional pride. While sheet cakes existed long before the 1950s, the *Texas* iteration rose to prominence in the postwar era, buoyed by the widespread availability of boxed cake mixes, evaporated milk, and the growing popularity of community-based gatherings where large-format desserts were essential. Early printed versions appeared in Texas newspapers like the Dallas Morning News and community cookbooks such as the iconic Junior League of Houston’s The Settlement Cookbook (1957), often credited with codifying the now-classic method: boiling butter, cocoa, and water together before mixing into dry ingredients—a technique borrowed from German chocolate cake traditions but uniquely adapted for speed, scale, and shelf-stable pantry staples. The use of buttermilk (or soured milk) instead of plain milk added tenderness and subtle tang; the warm glaze poured directly onto the hot cake allowed deep absorption and created that signature sticky-sweet, fudgy top layer. Over decades, the recipe became a point of Texan culinary identity—distinct from Midwestern “jelly roll” sheet cakes or Northeastern “party cakes”—celebrated for its unpretentious elegance, make-ahead flexibility, and ability to feed 24–30 people without breaking a sweat. Today, it’s enshrined in the Texas Department of Agriculture’s “Official State Dessert” shortlist (though officially uncodified, it remains de facto royalty), and generations of grandmothers, aunts, and home economists have passed down handwritten index cards bearing notes like “Don’t skip the coffee—it *makes* the chocolate” and “Glaze must go on HOT or you’ll cry.” This history isn’t folklore—it’s edible legacy.
Ingredients Breakdown
Every ingredient in this Classic Texas Sheet Cake has earned its place—not by tradition alone, but by precise functional purpose. Here’s why each matters:
- All-Purpose Flour (2 cups): Provides essential structure without toughness. We use unbleached for optimal protein balance (10–11% gluten); bleached flour can yield a slightly drier crumb.
- Granulated Sugar (2 cups): Sweetness, moisture retention, and caramelization. Reducing sugar compromises both texture and shelf life—this cake stays moist for up to 5 days *because* of the sugar content.
- Unsweetened Natural Cocoa Powder (¾ cup): Non-alkalized (natural) cocoa delivers bright, fruity acidity and robust chocolate flavor that pairs perfectly with the glaze’s richness. Dutch-process cocoa alters pH and can mute complexity—stick with Hershey’s, Ghirardelli Natural, or generic natural cocoa.
- Baking Soda (1 tsp): Reacts with the acidic components (cocoa, buttermilk, vinegar) to create lift—and crucially, enhances browning and deepens chocolate flavor through Maillard reactions.
- Salt (1 tsp): Not just for seasoning: salt balances sweetness, sharpens chocolate notes, and strengthens gluten for better crumb integrity.
- Buttermilk (1 cup): Adds acidity for tenderness, subtle tang, and moisture. If unavailable, make a substitute: 1 cup whole milk + 1 tbsp white vinegar or lemon juice, rested 5 minutes until curdled.
- Vegetable Oil (½ cup): Ensures unparalleled moistness and shelf stability. Butter adds flavor but shortens freshness—oil yields a finer, more resilient crumb ideal for sheet cakes meant to be served over multiple days.
- Eggs (2 large, room temperature): Binders and emulsifiers; room temperature ensures even incorporation and prevents batter splitting.
- Vanilla Extract (2 tsp): Pure, not imitation—adds aromatic warmth and rounds out chocolate’s bitterness.
- Distilled White Vinegar (1 tsp): Boosts acidity to fully activate baking soda—critical for maximum rise and tenderness. Don’t omit, even if you have buttermilk; it’s a dual-acid safety net.
- Strong Hot Coffee (1 cup, brewed & near-boiling): The secret weapon. Coffee doesn’t make the cake taste like coffee—it intensifies, deepens, and brightens chocolate flavor exponentially. Use dark roast or espresso-strength brew. Decaf works fine if preferred.
For the Glaze:
- Unsalted Butter (½ cup / 1 stick): Provides richness, sheen, and mouthfeel. Salted butter risks oversalting—control seasoning precisely.
- Unsweetened Natural Cocoa Powder (⅓ cup): Same rationale as in the cake—bright, assertive chocolate backbone.
- Evaporated Milk (½ cup): Concentrated, creamy, and slightly caramelized—far superior to regular milk or cream for glaze body, gloss, and fudge-like texture. Do not substitute sweetened condensed milk (too sweet) or heavy cream (too thin when cooled).
- Powdered Sugar (3 cups, sifted): Dissolves instantly into warm liquid; sifting prevents lumps. Use a quality brand (like Domino or C&H) with cornstarch—this stabilizes the glaze and prevents graininess.
- Vanilla Extract (1 tsp): Reinforces aroma and balances sweetness.
- Pinch of Salt (⅛ tsp): Critical for flavor contrast—elevates sweetness without tasting salty.
Step-by-Step Recipe
- Preheat & Prep: Position oven rack in center position. Preheat oven to 350°F (177°C). Generously grease a 13×9-inch metal baking pan (light-colored aluminum recommended—not dark nonstick, which can over-brown edges). Line the bottom with parchment paper, leaving 1-inch overhang on two opposite sides for easy removal later. Lightly grease parchment.
- Boil Wet Base: In a medium saucepan over medium heat, combine ½ cup unsalted butter, ¾ cup natural cocoa powder, and 1 cup strong hot coffee. Bring to a gentle boil, whisking constantly for 1 full minute—do not walk away. The mixture will thicken slightly and become glossy. Remove from heat immediately and set aside to cool slightly (about 2 minutes). This step blooms the cocoa and creates the foundation for deep flavor.
- Mix Dry Ingredients: In a large heatproof bowl (glass or stainless steel), whisk together 2 cups all-purpose flour, 2 cups granulated sugar, 1 tsp baking soda, and 1 tsp salt until fully homogenous and no streaks remain. Ensure cocoa is evenly distributed—no clumps!
- Combine Wet & Dry: Carefully pour the hot cocoa-coffee mixture over the dry ingredients. Whisk vigorously for 30 seconds until smooth and fully combined. Mixture will be thick and shiny.
- Add Remaining Wet Ingredients: Add 1 cup buttermilk, ½ cup vegetable oil, 2 large room-temperature eggs, 2 tsp pure vanilla extract, and 1 tsp distilled white vinegar. Whisk by hand (not mixer!) for 2 full minutes—this develops just enough gluten for structure while keeping the crumb tender. Batter will be fluid but not runny—similar to pancake batter.
- Pour & Bake: Immediately pour batter into prepared pan, spreading evenly with a silicone spatula. Tap pan firmly twice on counter to release air bubbles. Bake for 25–29 minutes—or until a wooden toothpick inserted into the center comes out with *moist crumbs* (not wet batter, not completely clean). Edges should be set and beginning to pull gently from pan sides. Avoid overbaking—this cake dries out faster than round-layer cakes due to surface-area ratio.
- Prepare Glaze During Final Minutes: While cake bakes, prepare glaze: In same saucepan used earlier (no need to wash), combine ½ cup unsalted butter, ⅓ cup natural cocoa powder, and ½ cup evaporated milk. Heat over medium-low heat, whisking constantly, until butter melts and mixture is smooth and simmering gently (about 3–4 minutes). Do not boil vigorously. Remove from heat.
- Sift & Finish Glaze: Sift 3 cups powdered sugar into a large heatproof bowl. Pour hot cocoa-milk mixture over sugar. Add 1 tsp vanilla and ⅛ tsp salt. Whisk vigorously for 1 full minute until completely smooth, glossy, and lump-free. Let stand 1–2 minutes to thicken slightly (it should coat the back of a spoon).
- Glaze While HOT: Within 2 minutes of removing cake from oven, pour warm glaze evenly over the hot cake. Use an offset spatula to gently spread into corners if needed—but do *not* scrape or press. Let glaze sink in naturally. The steam from the cake will help absorption and create that signature crackly, fudgy top layer.
- Cool & Set: Let cake cool completely in pan on a wire rack—minimum 2 hours, ideally 3–4 hours. The glaze sets as it cools; cutting too soon causes smearing. For clean slices, refrigerate uncovered for 30 minutes before cutting.
Tips
- Room Temperature Matters: Cold eggs or buttermilk can cause the hot cocoa mixture to seize or separate. Pull them from the fridge 60+ minutes ahead.
- No Mixer Needed: Hand-whisking ensures perfect texture—mixers overdevelop gluten or incorporate too much air, leading to tunnels or uneven rise.
- Coffee Is Non-Negotiable: Even if you don’t drink coffee, use it. Try cold-brew concentrate diluted 1:1 with hot water for even deeper flavor.
- Pan Choice Is Critical: Use light-gauge aluminum. Dark or insulated pans require reducing temp to 325°F and adding 3–5 minutes—risk uneven baking.
- Timing Is Everything: Glaze must hit cake within 90–120 seconds of coming out of oven. Set a timer. Too early = splatter. Too late = glaze pools on top without absorption.
- Measure Flour Correctly: Spoon flour into measuring cup and level with knife—don’t scoop! 1 cup should weigh 120–125g. Over-measuring = dense, dry cake.
- Test Doneness Properly: Insert toothpick in *center*, not near edges. A few moist crumbs = perfect. Clean = overbaked. Wet batter = underbaked.
- Make-Ahead Friendly: Bake cake 1 day ahead; cool completely, cover tightly with plastic wrap, and store at room temp. Glaze *just before serving*. Or glaze and refrigerate up to 3 days—bring to room temp 1 hour before slicing.
- Cutting Clean Slices: Use a sharp, thin-bladed knife dipped in hot water and wiped dry between cuts. Wipe after *every* slice.
- Storage Secret: Keep covered at room temperature for up to 4 days. Refrigeration is optional but extends life to 6 days—though texture is best at room temp.
Variations and Customizations
This foundational recipe is gloriously adaptable—without sacrificing authenticity. Here’s how to personalize it, Texas-style:
- Nutty Texas: Stir 1 cup chopped toasted pecans or walnuts into batter before pouring. Or sprinkle ½ cup over hot glaze—press gently so they adhere.
- Orange-Zest Spark: Add 1 tbsp finely grated orange zest to glaze along with vanilla. Complements chocolate’s bitterness beautifully—very popular in Hill Country kitchens.
- Spiced Cowboy: Add 1 tsp ground cinnamon + ¼ tsp cayenne pepper to dry ingredients. Warm, complex, and subtly fiery.
- Espresso Intensity: Replace ¼ cup of the hot coffee with ¼ cup strongly brewed espresso. Deepens chocolate notes further—ideal for serious chocoholics.
- Coconut Swirl: Fold ¾ cup flaked sweetened coconut into batter. Or stir ½ cup into warm glaze before pouring.
- Stout-Infused: Substitute ½ cup of the hot coffee with room-temperature stout beer (Guinness works brilliantly). Adds molasses-like depth and velvety mouthfeel.
- Gluten-Free Texas: Swap flour 1:1 with King Arthur Gluten-Free Measure-for-Measure Flour (contains xanthan gum). Add ½ tsp additional xanthan gum if your blend doesn’t include it. Results are indistinguishable to most tasters.
- Vegan Texas (Authentically Texan!): Replace eggs with 2 tbsp flaxseed meal + 5 tbsp water (rest 5 min); swap buttermilk for 1 cup soy milk + 1 tbsp vinegar; use vegan butter (Miyoko’s or Earth Balance) in both cake and glaze; ensure cocoa and sugar are vegan-certified. Texture remains lush—just as generous.
- Mini Sheet Twist: Bake in two 9×9-inch pans for thicker, portion-controlled servings. Reduce bake time to 20–23 minutes.
- “Breakfast Texas”: Omit glaze. After baking, dust generously with powdered sugar and serve warm with a scoop of vanilla ice cream and fresh berries—breakfast, brunch, or dessert, all in one.
Health Considerations and Nutritional Value
We believe in joyful, mindful indulgence—not guilt or restriction. That said, understanding this cake’s nutritional profile empowers informed choices. Per standard slice (1/24th of recipe, approx. 2″×3″):
- Calories: ~320–340 kcal
- Total Fat: 14–16g (8–9g unsaturated, 5–6g saturated)
- Carbohydrates: 48–51g (42–44g sugars, 1g fiber)
- Protein: 3–4g
- Sodium: 210–240mg
- Cholesterol: 35–40mg
Key Notes:
- This cake contains zero trans fats and no artificial preservatives, colors, or flavors when made with whole-food ingredients.
- Cocoa powder contributes flavonoids—antioxidants linked to cardiovascular and cognitive benefits—especially when using natural (non-alkalized) cocoa, which retains higher levels.
- Buttermilk provides calcium, potassium, and probiotics (if cultured); vinegar adds trace minerals and aids digestion.
- While high in added sugars (as expected for a celebratory dessert), it contains *no refined corn syrup* and relies on sucrose’s natural humectant properties to retain moisture—meaning less need for artificial additives.
- For reduced-sugar adaptation: You may reduce granulated sugar to 1¾ cups without major texture loss—but do *not* go below 1½ cups, or cake becomes brittle and overly bitter. Compensate with 1 extra tbsp oil and 1 extra tsp vinegar for tenderness.
- Those managing blood sugar may enjoy smaller portions (1.5″×2″) paired with a protein source (e.g., Greek yogurt or almonds) to slow glucose response.
- Always consult a registered dietitian for personalized guidance—especially for allergies (eggs, dairy, gluten) or medical conditions (diabetes, hypertension).
Remember: Nutrition is only one facet of wellness. Shared meals, intergenerational cooking, laughter around the table, and the pride of making something beautiful from scratch—these are vital nutrients, too.
Ingredients
Makes one 13×9-inch cake (24 servings)
For the Cake:
- ½ cup (1 stick / 113g) unsalted butter
- ¾ cup (65g) natural unsweetened cocoa powder (not Dutch-process)
- 1 cup (240ml) strong hot coffee (brewed, near-boiling)
- 2 cups (250g) all-purpose flour (spooned & leveled)
- 2 cups (400g) granulated sugar
- 1 teaspoon (6g) baking soda
- 1 teaspoon (6g) fine sea salt or table salt
- 1 cup (240ml) buttermilk, room temperature (or substitute: 1 cup whole milk + 1 tbsp vinegar, rested 5 min)
- ½ cup (120ml) neutral vegetable oil (canola, grapeseed, or sunflower)
- 2 large eggs, room temperature
- 2 teaspoons (10ml) pure vanilla extract
- 1 teaspoon (5ml) distilled white vinegar
For the Glaze:
- ½ cup (1 stick / 113g) unsalted butter
- ⅓ cup (30g) natural unsweetened cocoa powder
- ½ cup (120ml) evaporated milk
- 3 cups (360g) powdered sugar, sifted
- 1 teaspoon (5ml) pure vanilla extract
- ⅛ teaspoon (pinch) fine salt
Directions
- Preheat oven to 350°F (177°C). Grease a 13×9-inch light-colored metal baking pan and line bottom with parchment paper; grease parchment.
- In a medium saucepan over medium heat, combine butter, ¾ cup cocoa, and hot coffee. Bring to a gentle boil, whisking constantly for 1 full minute. Remove from heat and set aside for 2 minutes.
- In a large heatproof bowl, whisk together flour, sugar, baking soda, and salt until uniform.
- Pour hot cocoa mixture over dry ingredients. Whisk vigorously 30 seconds until smooth.
- Add buttermilk, oil, eggs, vanilla, and vinegar. Whisk by hand for 2 full minutes until batter is homogeneous and slightly aerated.
- Pour batter into prepared pan, smoothing top. Tap pan firmly twice on counter.
- Bake 25–29 minutes, until toothpick inserted in center shows moist crumbs. Rotate pan halfway through for even baking.
- While cake bakes, make glaze: In same saucepan, combine butter, ⅓ cup cocoa, and evaporated milk. Heat over medium-low, whisking constantly, until simmering gently (~3–4 min). Remove from heat.
- Sift powdered sugar into bowl. Pour hot cocoa mixture over sugar; add vanilla and salt. Whisk 1 minute until smooth and glossy. Let stand 1–2 minutes to thicken.
- Within 2 minutes of removing cake from oven, pour glaze evenly over hot cake. Do not spread aggressively—let it settle naturally.
- Cool cake completely in pan on wire rack (2–4 hours). For clean slices, refrigerate uncovered 30 minutes before cutting with hot, wiped knife.
FAQ
- Can I make this cake ahead?
- Absolutely! Bake cake up to 24 hours ahead. Cool completely, cover tightly with plastic wrap, and store at room temperature. Glaze *just before serving*. Or glaze and refrigerate up to 3 days—bring to room temperature 1 hour before slicing.
- Why does my glaze look dull or grainy?
- Two likely causes: (1) Powdered sugar wasn’t sifted—always sift to prevent lumps; (2) Glaze was whisked too little or cooled too much before pouring. Whisk 60 seconds *after* adding hot liquid, and pour while still fluid and warm (but not scalding).
- Can I freeze Texas Sheet Cake?
- Yes! Freeze *unglazed* cake layers: Cool completely, wrap tightly in plastic + foil, freeze up to 3 months. Thaw overnight in fridge, bring to room temp, then glaze. Glazed cake freezes less ideally—the glaze can weep or cloud—but is possible for up to 2 months if wrapped impeccably.
- My cake sank in the middle—what went wrong?
- Sinking usually means underbaking (toothpick had wet batter), opening oven too early (causing temperature shock), or inaccurate measuring (too much leavening or too little flour). Always test in true center—and avoid opening oven before 20 minutes.
- Is there a way to make this dairy-free?
- Yes! Use plant-based butter (e.g., Miyoko’s), unsweetened almond or soy milk + vinegar for buttermilk, and coconut or oat milk-based evaporated milk alternative (like Nature’s Charm Evaporated Coconut Milk). Ensure cocoa and sugar are dairy-free certified.
- Can I use a different pan size?
- You can bake in a 12×17-inch jelly roll pan—but reduce bake time to 18–22 minutes and watch closely. Do *not* use a 9×13-inch glass or ceramic dish unless reducing temp to 325°F and increasing time by 3–5 minutes—metal conducts heat more efficiently and yields the ideal texture.
- Why does the recipe call for vinegar *and* buttermilk?
- Double acidity ensures full activation of baking soda for optimal rise, tenderness, and flavor development—even if your buttermilk is slightly less acidic. It’s a fail-safe built into generations of Texas kitchens.
- What’s the best way to transport this cake?
- Once fully cooled and glazed, leave in pan. Cover tightly with plastic wrap, then slide into a sturdy cardboard box or cake carrier. Transport flat and level—no tilting! For longer trips, chill 30 minutes first so glaze firms.
- Can kids help make this cake?
- Entirely! Children can measure dry ingredients, whisk glaze (with supervision near heat), pour batter, and decorate with sprinkles or nuts. It’s a fantastic teaching tool for chemistry (leavening!), fractions, and food culture.
- How do I fix a cracked glaze surface?
- A slight crackle is traditional and desirable! But if it’s overly fissured, your cake was too hot or glaze too cool. Next time, let cake rest 60 seconds—not 120—before glazing, and ensure glaze is fluid (reheat 5 seconds in microwave if needed).
Summary
This Classic Texas Sheet Cake is the ultimate expression of generous, grounded, deeply flavorful American baking—boasting a supremely moist, cocoa-rich crumb crowned with a warm-poured, fudgy-chocolate glaze that sinks in like a promise kept.
It’s historically rooted, scientifically sound, endlessly customizable, and reliably spectacular—truly the only Texas sheet cake recipe you’ll ever need to master, cherish, and share across generations.