Christmas Cookie Board or Dessert Charcuterie: A Festive Feast for the Senses
The holiday season is a time of joy, warmth, and indulgence—none more delightful than gathering around a beautifully arranged Christmas Cookie Board or Dessert Charcuterie. This modern twist on traditional charcuterie has taken the festive culinary world by storm, transforming sweet spreads into artistic centerpieces perfect for holiday parties, family gatherings, or cozy nights by the fire. More than just a collection of desserts, a dessert charcuterie board combines flavors, textures, and visual appeal to create an edible masterpiece that delights both the eyes and the palate.
The History of the Christmas Cookie Board and Dessert Charcuterie
While charcuterie boards have long been associated with cured meats, cheeses, and savory accompaniments in European traditions, the concept of a “dessert charcuterie” is a relatively recent innovation. Rooted in the American love for grazing platters and snack boards, dessert versions began gaining popularity in the early 2010s as food bloggers and home entertainers sought creative ways to present sweets at celebrations. The idea was simple yet brilliant: apply the same principles of balance, variety, and presentation used in savory charcuterie to a sweet format.
The Christmas Cookie Board evolved naturally from this trend, especially given the longstanding tradition of baking and sharing cookies during the holidays. In many cultures, from German Plätzchen to Italian cookiescotti, families have passed down generations of cookie recipes meant for gifting and display. Combining these beloved treats with other confections, fruits, and dips on a single board transformed a humble plate of cookies into a grand, shareable centerpiece. Today, the Christmas Cookie Board stands as a symbol of holiday hospitality, creativity, and the spirit of giving through food.
Ingredients Breakdown: What Makes a Perfect Dessert Charcuterie Board?
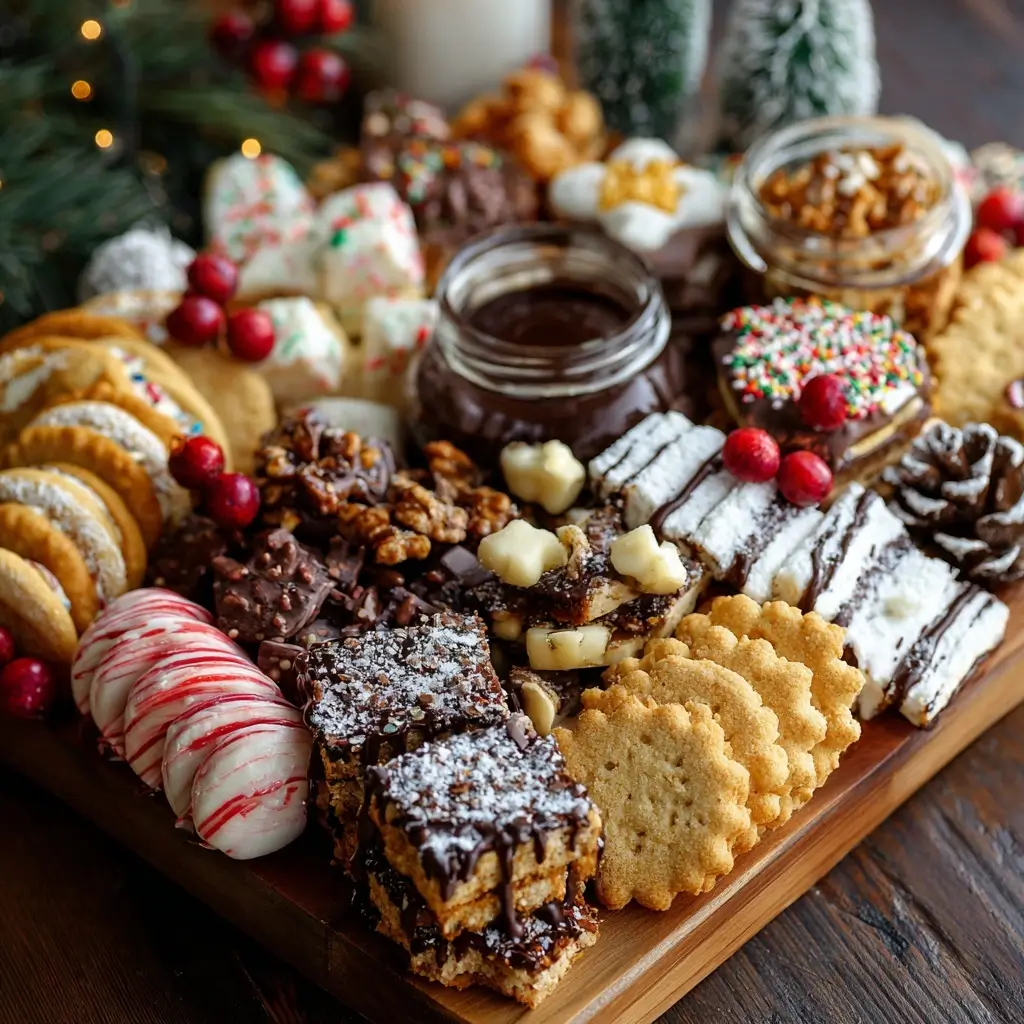
A successful Christmas Cookie Board balances color, flavor, texture, and theme. It’s not just about piling on sweets—it’s about thoughtful curation. Here’s a breakdown of essential components:
- Cookies: The star of the show. Include a mix of classic favorites like sugar cookies, gingerbread men, chocolate crinkles, shortbread, snickerdoodles, and peppermint bark cookies. Consider homemade vs. store-bought based on time and skill.
- Brownies & Bars: Fudgy brownies, lemon bars, blondies, or seven-layer bars add rich, chewy contrast to lighter cookies.
- Candies: Festive candies such as candy canes, malt balls, gummy bears, chocolate-covered pretzels, or holiday M&M’s bring pops of color and fun.
- Fresh & Dried Fruits: Red grapes, sliced strawberries, kiwi, apple slices, dried cranberries, apricots, or dates offer freshness, tartness, and natural sweetness.
- Dips & Spreads: Chocolate fondue, caramel sauce, peanut butter dip, vanilla yogurt, or cream cheese frosting in small ramekins invite dipping and interactive eating.
- Cheese (Yes, Cheese!): Mild mascarpone, brie, or flavored cream cheese pairs surprisingly well with sweet elements, adding creamy richness.
- Nuts & Crunch: Candied pecans, roasted almonds, or honey-roasted cashews provide satisfying crunch.
- Decorative Elements: Edible glitter, sprinkles, mini marshmallows, or themed picks (snowmen, reindeer) elevate the visual appeal.
- Accompaniments: Mini spoons, spreaders, parchment liners, and festive napkins complete the experience.
Step-by-Step Recipe: Building Your Christmas Cookie Board
- Choose Your Board: Select a large wooden cutting board, marble slab, ceramic platter, or even a festive tray. Ensure it’s clean and dry. Round, rectangular, or oval shapes work well depending on space.
- Prepare Ingredients in Advance: Bake cookies 1–2 days ahead and store in airtight containers. Chop fruits just before assembly to prevent browning. Chill dips and set up ramekins.
- Start with Anchors: Place larger items first—bowls of dip, clusters of brownies, or cheese wedges—to establish structure.
- Arrange Cookies Strategically: Group similar cookies together but vary colors and shapes. Use mini cupcake liners to separate delicate cookies.
- Add Height and Dimension: Stack some cookies, prop up candy canes, or use small glasses to hold lollipop sticks. Elevate with cake stands or inverted bowls covered with cloths.
- Incorporate Color Zones: Create sections—red and green with berries and mint chocolates, gold and silver with metallic-wrapped truffles, white with macarons and marshmallows.
- Fill Gaps with Small Items: Scatter candies, nuts, or sprinkles in empty spaces for a lush, abundant look.
- Garnish Thoughtfully: Add fresh rosemary sprigs (non-edible but festive), cinnamon sticks, star anise, or holly leaves for a wintery touch.
- Label if Needed: Use mini chalkboard signs or printed tags to identify homemade treats or allergens.
- Serve Immediately or Chill Briefly: If using perishable dips or fruits, assemble no more than 1–2 hours before serving. Keep refrigerated until ready if needed.
Tips for a Stunning and Functional Christmas Cookie Board
- Theme It: Choose a color scheme—traditional red/green, winter white/silver, rustic wood tones, or whimsical rainbow. Match napkins, board, and decorations accordingly.
- Balance Flavors: Mix sweet, tart, salty, and creamy. Include a lemon tart slice or sour gummies to cut through rich chocolate.
- Consider Dietary Needs: Label gluten-free, nut-free, or vegan items. Offer alternatives like oat-based cookies or sunflower seed butter dips.
- Use Reusable Dividers: Silicone cups, mini mason jars, or folded parchment paper help organize without cluttering.
- Don’t Overcrowd: Leave breathing room between items so each treat stands out. A crowded board looks messy.
- Kids-Friendly Touches: Add cookie decorating stations nearby with icing and sprinkles for interactive fun.
- Lit Candles or Fairy Lights: For evening events, surround the board (safely) with battery-operated string lights for magical ambiance.
- Photography First: Take pictures before guests dig in—the board is a work of art!
Variations and Customizations
Your dessert charcuterie doesn’t have to follow a strict formula. Here are creative spins to suit different tastes and occasions:
- Regional Twist: Feature cookies from around the world—Italian amaretti, French madeleines, Mexican wedding cookies, Scandinavian thumbprint jam cookies.
- All-Chocolate Board: Dedicate the entire spread to chocolate: truffles, chocolate-dipped fruit, cocoa-dusted meringues, and dark chocolate bark.
- Mini Desserts: Replace cookies with tiny pies, cupcakes, donut holes, or éclairs for a bakery-style board.
- Breakfast Charcuterie: Serve pancakes, waffles, pastries, jams, and syrups on a board for a holiday brunch.
- Kid-Centric Board: Focus on colorful candies, animal crackers, fruit leather, and popsicles. Use toy figurines as decor.
- Adult-Only Sweet Board: Pair desserts with wine, champagne, or cocktails. Include wine-infused chocolates, prosecco gummies, or bourbon fudge.
- Cookie Decorating Board: Set out plain sugar cookies, small bowls of icing, and sprinkle stations for DIY fun.
- Edible Ornament Board: Hang cookies or candy canes on a miniature tree-shaped board or wire frame.
Health Considerations and Nutritional Value
While a Christmas Cookie Board is inherently indulgent, mindful choices can make it more balanced:
- Portion Control: Small bites encourage sampling without overeating. The board format naturally supports moderation.
- Add Nutrient-Dense Options: Fresh fruit provides vitamins and fiber. Nuts offer healthy fats and protein to offset sugar spikes.
- Limit Added Sugars: Choose dark chocolate (>70%), reduce candied items, or use natural sweeteners in homemade treats.
- Gluten-Free & Allergy-Safe: Use almond flour, oat flour, or gluten-free mixes. Avoid cross-contamination when preparing.
- Dairy Alternatives: Opt for plant-based dips (coconut yogurt, almond butter) and non-dairy chocolate.
- Hydration Station: Serve alongside infused water, herbal tea, or sparkling cider to aid digestion.
On average, a moderate portion from a dessert board might range from 200–400 calories depending on selections. The key is enjoyment in balance—not deprivation, but celebration with awareness.
Ingredients
Makes one large Christmas Cookie Board (serves 8–12)
- 2 dozen assorted cookies (e.g., sugar, gingerbread, chocolate chip, shortbread)
- 12 brownie or blondie squares
- 1 cup festive candies (candy canes broken, holiday M&Ms, gumdrops)
- 1 cup fresh fruit (grapes, strawberries, apple slices, banana coins)
- ½ cup dried fruit (cranberries, cherries, apricots)
- ¾ cup nuts (almonds, pecans, walnuts – candied or plain)
- 4 oz cream cheese or mascarpone (flavored optional: peppermint, vanilla)
- ½ cup chocolate ganache or melted chocolate
- ⅓ cup caramel sauce
- ¼ cup peanut butter or Nutella (optional)
- Mini ramekins (4–6)
- Edible garnishes: sprinkles, crushed candy canes, gold leaf, etc.
- Festive accents: rosemary sprigs, cinnamon sticks, decorative picks
Directions
- Gather all ingredients and ensure cookies and bars are cooled completely.
- Wipe down your serving board or platter. Optionally line with parchment or a silicone mat for easy cleanup.
- Place 3–4 small ramekins on the board. Fill with chocolate ganache, caramel, cream cheese, and peanut butter. Drizzle tops with melted chocolate or sea salt if desired.
- Position brownies or bars in one corner, slightly overlapping for dimension.
- Arrange cookies in clusters by type. Alternate colors and sizes—gingerbread next to white-chocolate-dipped for contrast.
- Nestle fresh fruit around the board, using grapes as “vines” and apple slices as fans.
- Scatter dried fruit and nuts in gaps. Use mini cups if loose items roll.
- Insert candy canes upright using clay or dough at the base for stability, or lay them across corners.
- Sprinkle festive touches: crushed peppermint on chocolate, red sprinkles near strawberries.
- Place cheese wedge opposite sweet dips to balance the layout.
- Add final garnishes: a sprig of rosemary, cinnamon sticks fanned out, or tiny ornaments on picks.
- Set out small tongs, spoons, or decorative forks for serving.
- Serve within 1–2 hours. Store leftovers separately: cookies in airtight containers, fruit refrigerated.
FAQ
Q: Can I prepare a Christmas Cookie Board the night before?
A: Yes, but assemble fresh. You can prep components ahead—bake cookies, make dips, chop fruit—but assemble the board no more than 4 hours before serving to maintain freshness and texture.
Q: How do I keep fruits from browning?
A: Toss apple or banana slices in a bit of lemon juice. Add them just before serving or cover with plastic wrap until then.
Q: Can I make a vegan or gluten-free version?
A: Absolutely. Use plant-based cookies, dairy-free chocolate, nut-based dips, and gluten-free flours. Label clearly for guests.
Q: What board size should I use?
A: For 8–12 people, aim for a board at least 18–24 inches in diameter or length. Larger gatherings may require two boards or tiered stands.
Q: How do I store leftovers?
A: Remove perishables (fruit, dips, cheese) and refrigerate. Store cookies in airtight containers at room temperature for up to 5 days or freeze for longer storage.
Q: Can kids help build the board?
A: Definitely! Let them place candies, arrange cookies, or add sprinkles. It’s a fun, festive family activity.
Q: What can I use instead of a wooden board?
A: Marble slabs, slate trays, ceramic platters, or even a clean baking sheet lined with festive paper work beautifully.
Summary
A Christmas Cookie Board or Dessert Charcuterie is a joyful, customizable centerpiece that brings holiday cheer to any gathering. Packed with flavor, color, and creativity, it turns sweet treats into a shared experience.