Chocolate Lava Mug Cake: A Decadent Single-Serving Delight
The History of the Chocolate Lava Mug Cake
The chocolate lava mug cake, also known as a molten chocolate microwave cake or simply a “mug cake,” is a modern twist on the classic French dessert, le moelleux au chocolat, invented by chef Michel Bras in the 1980s. This rich, warm dessert features a soft, cake-like exterior with a flowing, molten chocolate center—a sensation that quickly gained international acclaim. While the original was baked in an oven and served in fine dining restaurants, the concept evolved during the early 2000s into a quick, single-serving treat made in a coffee mug using a microwave.
The rise of the mug cake coincided with the growing demand for fast, convenient desserts that didn’t sacrifice flavor—especially among students, busy professionals, and late-night snackers. Social media platforms like Pinterest and YouTube played a significant role in popularizing the chocolate lava mug cake, making it one of the most shared and recreated recipes online. Its simplicity, minimal ingredient list, and rapid preparation time (under 5 minutes) turned it into a viral sensation, symbolizing comfort, indulgence, and accessibility in home cooking.
Ingredients Breakdown: What Makes It Irresistible
The magic of a perfect chocolate lava mug cake lies in its carefully balanced ingredients. Each component plays a crucial role in creating the signature gooey center, moist crumb, and deep chocolate flavor.
- Flour (All-Purpose): Provides structure to the cake. Too much can make it dry; too little and it won’t hold together. A small amount ensures a tender texture while allowing the molten center to flow freely.
- Granulated Sugar: Adds sweetness and helps with browning. It also contributes to the cake’s softness and helps stabilize the batter during microwaving.
- Cocoa Powder (Unsweetened, High-Quality): The star of the show. Opt for Dutch-processed cocoa for a richer, smoother chocolate flavor, or natural cocoa for a slightly more acidic kick. It delivers intense chocolate depth without needing melted chocolate bars.
- Baking Powder: A leavening agent that gives the cake a slight rise and airy texture. Since microwaves cook quickly, only a pinch is needed to avoid over-expansion or collapse.
- Salt: Enhances all the flavors, especially the chocolate, balancing sweetness and bringing complexity.
- Milk: Adds moisture and helps bind the ingredients. Whole milk yields a richer result, but any milk (dairy or plant-based) works well.
- Vegetable Oil or Melted Butter: Contributes to the cake’s moistness and richness. Oil keeps it tender, while butter adds a deeper, nutty flavor.
- Vanilla Extract: A hint of vanilla enhances the overall aroma and complements the chocolate beautifully.
- Egg (or Egg Substitute): Acts as a binder and provides structure and lift. For egg-free versions, alternatives like flaxseed meal or applesauce can be used, though the texture may vary slightly.
- Dark Chocolate (Optional Center Filling): To intensify the lava effect, many recipes include a chunk of dark chocolate placed in the center before microwaving. As it melts slowly, it creates an ultra-rich, flowing core.
- Mini Chocolate Chips (Optional): Can be folded into the batter or added to the center for extra melty pockets.
Step-by-Step Recipe: How to Make the Perfect Chocolate Lava Mug Cake
Follow this detailed guide to create a restaurant-quality chocolate lava mug cake in minutes—right in your kitchen.
- Gather Your Equipment: You’ll need a large microwave-safe mug or ramekin (at least 12 oz capacity), a small mixing bowl, a whisk or fork, and measuring spoons.
- Preheat (Optional): While not required, warming the mug slightly can help with even cooking. Avoid preheating if your microwave tends to run hot.
- Mix Dry Ingredients: In the mug, combine 4 tablespoons all-purpose flour, 3 tablespoons granulated sugar, 2 tablespoons unsweetened cocoa powder, 1/4 teaspoon baking powder, and a pinch of salt. Whisk thoroughly until no lumps remain and the mixture is uniform.
- Add Wet Ingredients: Pour in 3 tablespoons milk, 1.5 tablespoons vegetable oil or melted butter, 1/4 teaspoon vanilla extract, and 1 large egg. Stir vigorously for about 30 seconds until the batter is smooth and fully combined. Scrape the sides to ensure everything is incorporated.
- Enhance the Lava Center (Optional): Push a square of dark chocolate (about 1/2 oz) or a spoonful of chocolate chips into the center of the batter. Do not stir—it should remain at the bottom to melt slowly and form the lava core.
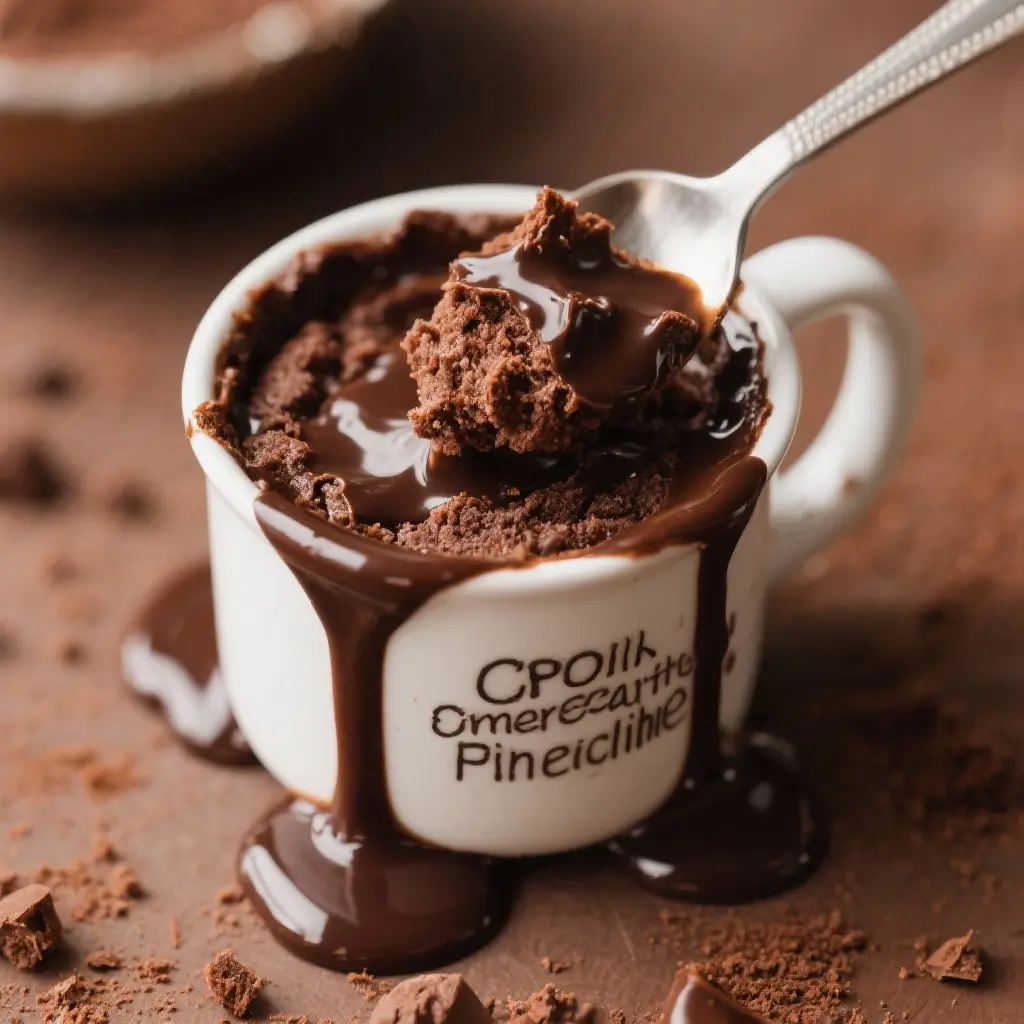
- Microwave: Place the mug in the center of the microwave. Cook on high for 70 to 90 seconds. Cooking time varies based on microwave wattage (see tips below). The cake should rise and look set on the edges but still slightly soft in the center.
- Test Doneness: Gently touch the top. It should spring back slightly. If it feels wet or sinks, microwave in 10-second increments until just set. Overcooking will eliminate the molten center.
- Cool Briefly: Let the cake sit for 1–2 minutes. It will continue to cook slightly from residual heat, and this prevents burns when eating.
- Serve Immediately: Carefully remove the mug (it will be hot!) and serve with optional toppings like whipped cream, vanilla ice cream, powdered sugar, fresh berries, or a drizzle of caramel or chocolate sauce.
Tips for the Best Chocolate Lava Mug Cake
- Use the Right Mug: Choose a wide, straight-sided mug rather than a narrow or tapered one. This allows for even cooking and proper rising.
- Know Your Microwave: Most recipes are tested in 1000-watt microwaves. If yours is weaker (700–800W), add 10–20 seconds. If stronger (1200W+), start with 60 seconds and adjust.
- Don’t Overmix: Mix just until smooth. Overmixing can develop gluten, leading to a tough texture.
- Room Temperature Ingredients: Especially the egg and milk. Cold ingredients can cause uneven cooking and a denser cake.
- Seal the Chocolate Center: When adding a chocolate chunk, press it gently into the center so it’s fully submerged. This prevents it from floating and melting too quickly.
- Avoid Overbaking: The cake should look slightly underdone in the middle when you take it out. It finishes cooking as it rests.
- Double-Check Measurements: Use proper measuring spoons and level off dry ingredients for accuracy.
- Let It Rest: Allowing the cake to sit for a minute after microwaving stabilizes the lava center and makes it safer to eat.
- Grease the Mug (Optional): Lightly buttering the mug makes removal easier if you plan to plate it, though it’s usually eaten straight from the mug.
- Customize Sweetness: Reduce sugar by 1 tablespoon for a less sweet, more sophisticated chocolate flavor.
Variations and Customizations
One of the greatest advantages of the chocolate lava mug cake is its versatility. Here are creative ways to personalize your dessert:
- Peanut Butter Swirl: Add a spoonful of peanut butter to the center before microwaving, or swirl it into the batter for a Reese’s-inspired treat.
- White Chocolate Raspberry: Replace cocoa powder with white chocolate chips in the batter and add fresh or frozen raspberries on top before cooking.
- mint Chocolate: Add a drop of peppermint extract to the batter and include a piece of mint chocolate or Andes candy in the center.
- Salted Caramel: Drizzle caramel sauce into the mug before adding batter, or place a soft caramel candy in the middle for a gooey surprise.
- Gluten-Free: Substitute all-purpose flour with a 1:1 gluten-free flour blend. Ensure cocoa powder and other ingredients are certified gluten-free.
- Vegan Version: Replace egg with 1 tablespoon ground flaxseed mixed with 3 tablespoons water. Use plant-based milk and vegan butter or oil. Choose dairy-free chocolate.
- Protein Boost: Add a scoop of chocolate protein powder and reduce flour by 1 tablespoon. May require an extra splash of milk for consistency.
- Spiced Chocolate: Add a pinch of cinnamon, cayenne pepper, or espresso powder to deepen the chocolate flavor and add warmth.
- Fruit-Infused: Fold in diced bananas, cherries, or orange zest for a fruity twist.
- Alcoholic Twist: Mix in 1 teaspoon of Baileys, Kahlúa, or Grand Marnier for an adult version (ensure alcohol cooks off slightly in microwave).
- Dessert Plating: For an elegant presentation, invert the cake onto a plate after cooling slightly. Dust with powdered sugar and garnish with mint leaves or edible gold flakes.
Health Considerations and Nutritional Value
While undeniably indulgent, the chocolate lava mug cake can be adapted to fit various dietary needs and health goals.
Nutritional Profile (Approximate per serving, standard recipe):
- Calories: 320–380 kcal
- Total Fat: 14–18g (including 5–7g saturated fat)
- Carbohydrates: 45–50g (including 25–30g sugar)
- Protein: 6–8g
- Fiber: 2–3g
- Sodium: 150–200mg
Health Notes:
- Portion Control: Unlike traditional cakes, the mug cake is inherently portion-controlled, making it a smarter choice for occasional indulgence.
- Heart-Healthy Fats: Using heart-healthy oils like avocado or coconut oil can improve the fat profile.
- Antioxidants: Dark cocoa powder is rich in flavonoids, which have antioxidant and anti-inflammatory properties.
- Blood Sugar Impact: High in simple sugars; diabetics should consider low-sugar substitutes like erythritol or monk fruit and monitor portions.
- Weight Management: Can be part of a balanced diet when enjoyed occasionally. Modifications like reducing sugar, adding protein, or using whole grain flour can enhance satiety.
- Allergen Awareness: Contains common allergens: gluten, eggs, dairy (unless substituted). Always check labels for cross-contamination if allergies are severe.
- Kid-Friendly: A great way to satisfy chocolate cravings without baking a full cake. Can be made healthier with fruit purees and less sugar.
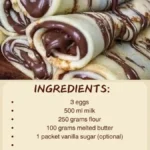
Ingredients
- 4 tablespoons all-purpose flour (or gluten-free alternative)
- 3 tablespoons granulated sugar (or preferred sweetener)
- 2 tablespoons unsweetened cocoa powder (Dutch-processed or natural)
- 1/4 teaspoon baking powder
- Pinch of salt
- 3 tablespoons milk (dairy or plant-based)
- 1.5 tablespoons vegetable oil or melted butter
- 1/4 teaspoon vanilla extract
- 1 large egg (or egg substitute for vegan option)
- 1/2 ounce dark chocolate chunk or 1 tablespoon chocolate chips (optional, for lava center)
Directions
- In a microwave-safe mug, combine flour, sugar, cocoa powder, baking powder, and salt. Whisk until well blended.
- Add milk, oil (or melted butter), vanilla extract, and egg. Stir vigorously until smooth and no streaks remain.
- If using, gently push the chocolate chunk or chips into the center of the batter without stirring.
- Microwave on high for 70 to 90 seconds, depending on your microwave’s power. The cake should rise and appear set around the edges but slightly soft in the center.
- Allow to cool for 1–2 minutes before serving. The center will remain warm and molten.
- Serve directly from the mug with your favorite toppings: ice cream, whipped cream, berries, or a dusting of powdered sugar.
FAQ
Q: Can I make this without a microwave?
A: Yes! Bake in a preheated oven at 350°F (175°C) for 12–15 minutes in an oven-safe ramekin.
Q: Why did my cake overflow or explode?
A: Likely due to overfilling the mug or overcooking. Use a large mug and stick to recommended times.
Q: My cake came out dry. What went wrong?
A: Overcooking is the most common cause. Try reducing time by 10–15 seconds. Also, check your microwave’s wattage.
Q: Can I double the recipe?
A: Not recommended. Doubling changes cooking dynamics. Make two separate mug cakes instead.
Q: Is it safe to eat raw egg in the batter?
A: The microwave fully cooks the egg. If concerned, use pasteurized eggs or an egg substitute.
Q: Can I prepare the dry mix ahead of time?
A: Yes! Store in a sealed container or bag. Just add wet ingredients when ready to cook.
Q: How do I store leftovers?
A: Mug cakes are best eaten fresh. They don’t reheat well and lose the lava texture. Do not refrigerate for later consumption.
Q: Can I use chocolate syrup instead of cocoa?
A: Not ideal. Syrup adds excess liquid and sugar. Stick to cocoa powder for proper texture.
Q: Why isn’t my lava center flowing?
A: The chocolate may have been stirred in or overcooked. Ensure the chunk is centered and undisturbed, and don’t exceed 90 seconds.
Q: Can I freeze mug cake batter?
A: Not recommended. The leavening agents react immediately. Best made fresh.
Summary
The chocolate lava mug cake is a quick, indulgent dessert that brings gourmet joy to your kitchen in under five minutes. With a rich, molten center and endless customization options, it’s the ultimate single-serving treat for chocolate lovers.