Introduction
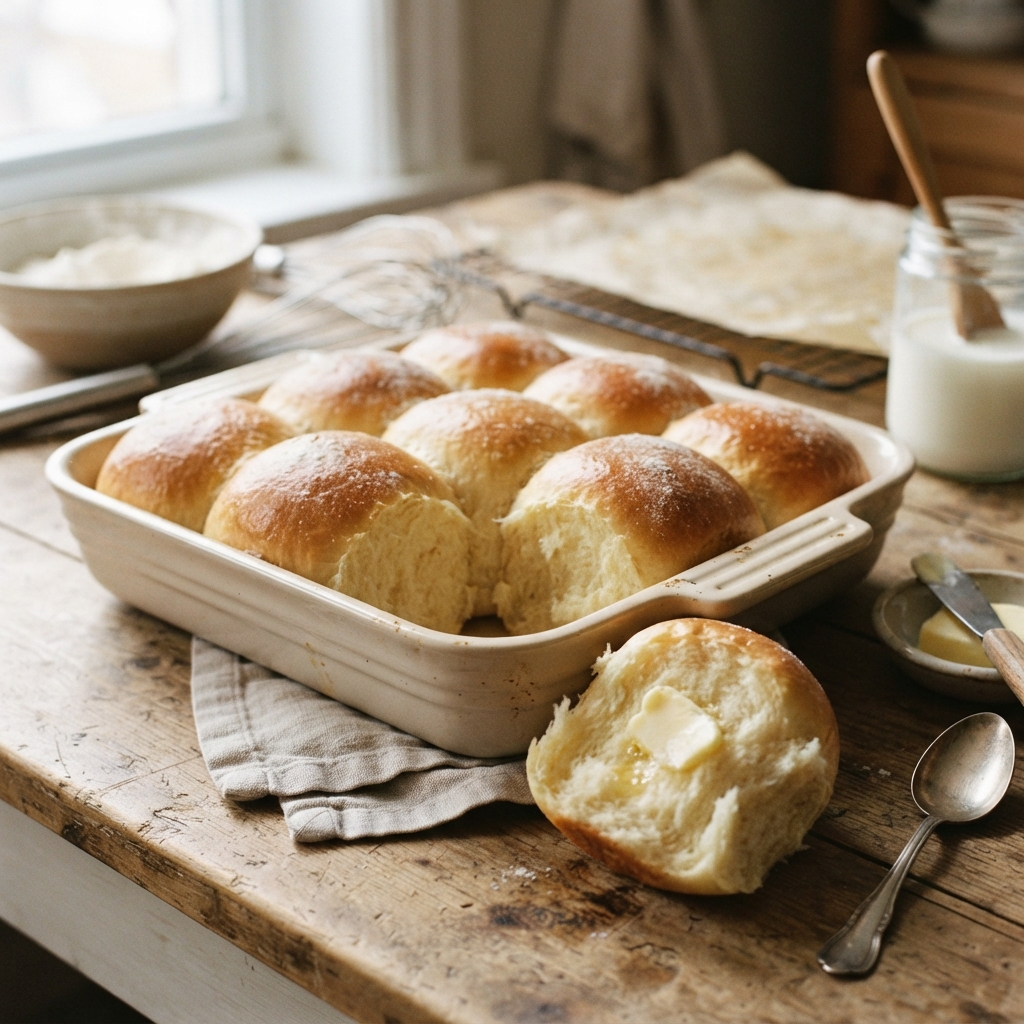
Japanese Milk Buns, often celebrated globally under the moniker “Hokkaido Milk Bread,” represent the pinnacle of soft, fluffy, and cloud-like bread baking. Unlike traditional Western sandwich loaves that can be somewhat dense or crusty, these buns are renowned for their incredibly tender crumb, distinct milky sweetness, and a texture that feels as though it could melt in your mouth. They are a staple in Japanese bakeries (pan-ya) and a favorite for breakfast or afternoon tea. The secret to their ethereal quality lies in a unique pre-cooked flour mixture called “Tangzhong,” which allows the bread to retain significantly more moisture than standard recipes, resulting in a loaf that stays fresh and soft for days.
The History
The lineage of Japanese Milk Bread is a fascinating intersection of culinary innovation and cultural exchange. While bread is not indigenous to Japan, it was introduced by Portuguese traders in the 16th century and later popularized during the Meiji Restoration in the late 19th century as Japan opened up to Western influence. However, the specific “milk bread” texture we know today is a more modern invention.
The technique relies heavily on the “Tangzhong” method (a roux made of flour and water/milk), which has roots in Chinese baking but was perfected and popularized by Japanese bakers, particularly those in the Hokkaido region. Hokkaido is Japan’s northernmost island, famous for its high-quality dairy farming. Bakers in this region sought to utilize their rich, creamy milk to create a bread that was softer and sweeter than the standard French or German styles prevalent at the time. By gelatinizing the starches before mixing the dough, they created a bread that defied the typical staling process, creating a legacy of softness that has since conquered the global baking community.
Ingredients Breakdown
Understanding the chemistry behind the ingredients is crucial for mastering Japanese Milk Buns. Each component plays a specific structural or flavor role:
- Bread Flour (High-Protein Flour): This is non-negotiable. You need a high protein content (around 12-14%) to develop a strong gluten network. This network traps the gases produced by the yeast, giving the buns their height and chewy-yet-soft structure.
- Milk Powder: While liquid milk provides hydration, milk powder intensifies the dairy flavor without adding excess water that could throw off the hydration balance. It contributes to the browning of the crust and adds a subtle sweetness.
- The Tangzhong (Water Roux): This is the magic ingredient. By cooking a portion of the flour and liquid until it thickens into a paste, the starches absorb water and gelatinize. This prevents the water from evaporating quickly during baking, keeping the crumb moist.
- Fat (Butter): Fat coats the gluten strands, shortening them slightly. This “shortening” effect tenderizes the crumb, ensuring the bread isn’t too rubbery. Unsalted butter is preferred to control the salt levels precisely.
- Yeast: Instant yeast is generally preferred for its reliability and ease of use, though active dry yeast can be used if activated in warm milk first. It is the engine that makes the dough rise.
- Sugar and Salt: Sugar feeds the yeast and aids in browning (Maillard reaction), while salt strengthens the gluten and balances the sweetness.
Step-by-Step Recipe Narrative
Making these buns is a journey of patience and technique. It begins the day before or a few hours before mixing, by creating the Tangzhong. You simply whisk flour and milk (or water) in a small saucepan over low heat. You must stir constantly until the mixture thickens into a pudding-like consistency. Once it reaches roughly 65°C (149°F), remove it from the heat and let it cool completely. This paste is the hydration anchor of your dough.
Next comes the mixing phase. In the bowl of a stand mixer, combine your bread flour, milk powder, sugar, salt, and yeast. Add the cooled Tangzhong, an egg, and cold milk. Begin mixing on low speed to bring the ingredients together, then increase to medium speed. This is where the gluten develops. You are looking for the dough to pull away from the sides of the bowl. Once the dough is cohesive, begin adding your softened butter in small cubes, one at a time. Do not rush this; wait until each cube is fully incorporated before adding the next. This process can take 10 to 15 minutes of machine kneading.
The goal is the “Windowpane Test.” Take a small piece of dough and stretch it gently between your fingers. If it stretches thin enough to let light pass through without tearing, your gluten is perfectly developed. If it tears immediately, keep kneading. Once achieved, shape the dough into a smooth ball and place it in a greased bowl for the first proof (bulk fermentation). Cover it and let it rise in a warm, draft-free spot until it has doubled in size, usually about 60 to 90 minutes.
Punch the dough down gently to release large air bubbles, then divide it into equal portions (usually 6 to 9 pieces for a standard pan). Roll each piece into a tight ball and let them rest for 15 minutes to relax the gluten. Finally, shape the buns. You can keep them as round rolls or roll them into logs and place them in a loaf pan for the classic pull-apart style. Arrange them in your baking tin, cover, and allow them to proof again until they have risen significantly, crowding the pan. Brush with an egg wash for a glossy, golden finish before baking at a moderate temperature until golden brown.
Tips for Perfection
- Temperature Control: Dough temperature is vital. If your kitchen is hot, use ice-cold milk to keep the dough cool during kneading. Overheated dough can kill the yeast or cause the butter to melt out, ruining the texture.
- The Windowpane Test: Do not skip this. Under-kneaded dough will result in dense, brick-like buns. Over-kneaded dough can become tough. Stop exactly when the windowpane forms.
- Proofing Environment: If your kitchen is cold, create a proofing box by placing your dough in the oven (turned off) with a bowl of boiling water next to it. The steam and warmth create the perfect humidity for rising.
- Don’t Over-Bake: Japanese milk buns should be soft, not crusty. Remove them from the oven as soon as they reach a deep golden brown. Internal temperature should be around 190°F (88°C).
- Brushing: Brush the buns with melted butter immediately after taking them out of the oven. This softens the crust and adds an incredible aroma.
Variations and Customizations
While the classic milk bun is perfect on its own, it serves as an excellent canvas for creativity:
- Savory Garlic Butter Buns: Before baking, slice the top of the buns slightly and pipe in a mixture of softened butter, minced garlic, parsley, and salt.
- Red Bean Paste (Anpan): Flatten the dough balls, place a scoop of sweet red bean paste in the center, and seal them up before the final proof.
- Cream Cheese Filled: Similar to the red bean variation, use a sweetened cream cheese filling for a rich, tangy contrast.
- Matcha Swirl: Add 1-2 teaspoons of high-quality matcha powder to half of the dough. Layer the white and green doughs together before rolling for a marbled effect.
- Cinnamon Sugar Rolls: Roll the dough flat, brush with butter, sprinkle with cinnamon sugar, roll up, and slice into pinwheels.
Health Considerations and Nutritional Value
Japanese Milk Buns are an indulgent treat rather than a health food. Because they rely on enriched dough (high in fat and sugar) and refined white flour, they are calorie-dense. A single bun can range from 150 to 200 calories depending on size. However, they do offer some nutritional benefits. The dairy content provides calcium and protein, essential for bone health. The fermentation process can also make the nutrients in the flour slightly more bioavailable and easier to digest for some people compared to unleavened breads. For those monitoring blood sugar, the high glycemic index of white flour and added sugar should be considered. To make a slightly healthier version, one can substitute a portion of the bread flour with whole wheat flour, though this will compromise the signature fluffy texture.
Ingredients
For the Tangzhong:
- 3 tablespoons Bread Flour
- 1/2 cup Whole Milk (or water)
For the Dough:
- 2 1/2 cups Bread Flour (approx. 300g)
- 3 tablespoons Sugar
- 1 teaspoon Instant Yeast
- 1/2 teaspoon Salt
- 1 Large Egg (room temperature)
- 1/2 cup Whole Milk (cold)
- 3 tablespoons Unsalted Butter (softened)
- 1 tablespoon Milk Powder (optional, for extra richness)
For the Glaze:
- 1 Egg yolk beaten with 1 teaspoon milk
- Melted butter (for brushing after baking)
Directions
- Make the Tangzhong: Whisk the 3 tablespoons of flour and 1/2 cup milk in a small saucepan over low heat. Stir constantly until the mixture thickens to a pudding consistency (about 3-5 minutes). Remove from heat, transfer to a small bowl, cover with plastic wrap touching the surface to prevent a skin from forming, and let cool to room temperature.
- Combine Dry Ingredients: In the bowl of a stand mixer fitted with a dough hook, combine the bread flour, sugar, yeast, salt, and milk powder.
- Add Wet Ingredients: Add the cooled Tangzhong, the egg, and the cold milk to the dry ingredients.
- Knead: Mix on low speed until the dough comes together, then increase to medium-low speed. Knead for about 5-7 minutes until the dough is smooth and pulls away from the sides of the bowl.
- Add Butter: Add the softened butter one cube at a time, waiting for each to incorporate before adding the next. Continue kneading on medium speed for another 5-8 minutes. Perform the windowpane test; the dough should be stretchy and elastic.
- First Proof: Shape the dough into a ball and place it in a lightly greased bowl. Cover with a damp cloth or plastic wrap. Let rise in a warm place for 60-90 minutes, or until doubled in size.
- Shape: Punch down the dough to release air. Divide into 6-9 equal pieces. Roll each piece into a smooth ball. Place them in a greased 9×5 inch loaf pan or a round cake pan, leaving space between them.
- Second Proof: Cover the pan and let the buns rise again for 45-60 minutes. They should look puffy and nearly fill the pan.
- Bake: Preheat oven to 350°F (175°C). Gently brush the tops of the buns with the egg wash. Bake for 20-25 minutes until the tops are golden brown.
- Finish: Remove from oven. Immediately brush with melted butter. Let cool in the pan for 5 minutes, then transfer to a wire rack.
FAQ
Can I make this dough by hand?
Yes, but it requires significant effort. Hand kneading can take 20-30 minutes to achieve the necessary gluten development. Use a “slap and fold” technique to incorporate the butter effectively.
Why did my buns turn out dense?
This is usually due to old yeast, water that was too hot (killing the yeast), or under-kneading. Ensure your yeast is active and you achieve the windowpane stage.
Can I freeze Japanese Milk Buns?
Absolutely. Let them cool completely, wrap them tightly in plastic wrap and foil, and freeze for up to 3 months. Thaw at room temperature or warm briefly in the oven.
My dough is too sticky to handle. What do I do?
High hydration doughs can be sticky. Chill the dough in the refrigerator for 20 minutes before shaping; this firms up the butter and makes the dough easier to handle without adding extra flour.
Summary
Japanese Milk Buns utilize a Tangzhong starter to create an incredibly soft, moist, and cloud-like texture that stays fresh for days. Mastering the gluten development and proofing times is the key to achieving the signature pull-apart richness of this Hokkaido-inspired treat.