Introduction
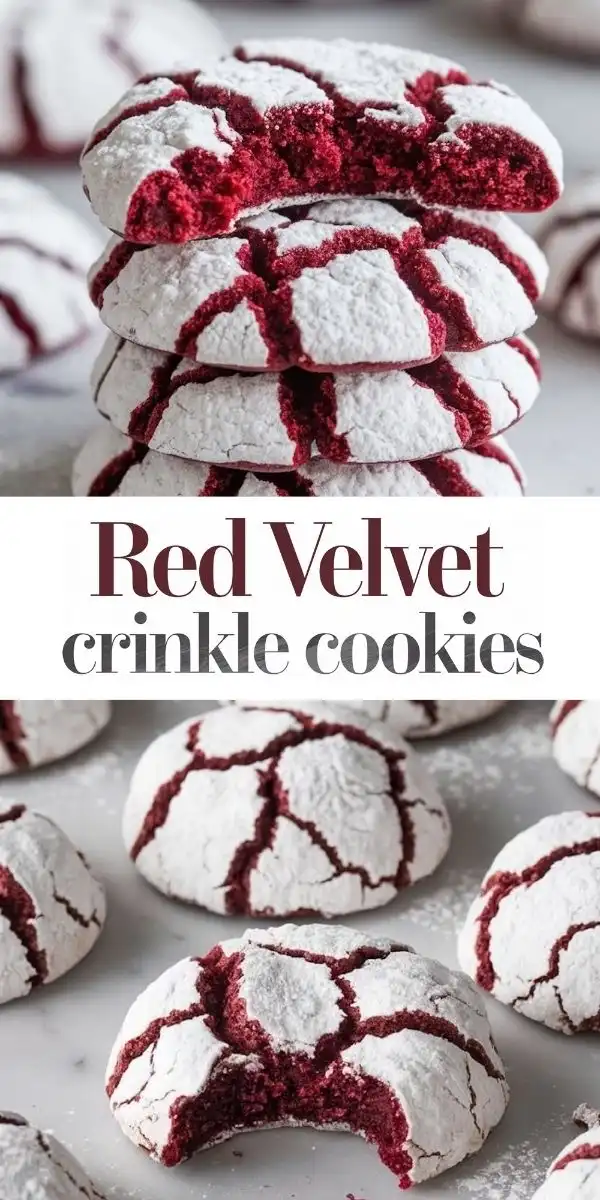
Red Velvet Crinkle Cookies are the dazzling, decadent lovechild of classic red velvet cake and beloved crinkle cookies—melding rich cocoa depth, vibrant crimson hue, tangy buttermilk brightness, and that irresistible cracked, sugar-dusted exterior with a luxuriously fudgy, melt-in-your-mouth center. More than just a holiday staple (though they shine brilliantly on Christmas cookie trays), these cookies embody celebration in every bite: festive without being cloying, elegant without sacrificing comfort, and indulgent while still retaining a subtle sophistication. Whether you’re hosting a Valentine’s Day soirée, decking the halls for winter festivities, or simply craving a moment of joyful baking therapy, Red Velvet Crinkle Cookies deliver visual drama, nostalgic flavor, and textural perfection—all wrapped in snowy confectioners’ sugar.
The History
The origins of Red Velvet Crinkle Cookies are delightfully layered—much like the cookies themselves—tracing back through several iconic American dessert lineages. The red velvet cake tradition dates to the early 20th century, possibly evolving from “red cocoa cakes” where natural cocoa reacted with acidic ingredients (like buttermilk or vinegar) to produce a subtle reddish tint—later amplified by beet juice or, eventually, food coloring. By the 1940s, the Waldorf Astoria popularized the modern red velvet cake, cementing its status as a Southern and celebratory classic. Meanwhile, crinkle cookies—characterized by their signature cracked, wrinkled surface achieved through high-sugar, low-flour batters rolled in powdered sugar before baking—gained popularity in the mid-century home-baking boom, often appearing in community cookbooks under names like “Black-and-White Cookies” or “Cocoa Crinkles.” The fusion of these two beloved concepts likely emerged organically in the 2000s, accelerated by food bloggers experimenting with red velvet flavor profiles beyond cake—cupcakes, pancakes, brownies—and culminating in the now-ubiquitous Red Velvet Crinkle Cookie. Its rise coincided with the artisanal cookie movement and social media’s hunger for photogenic, share-worthy treats—making it a mainstay on Pinterest boards, Instagram feeds, and gourmet bakery menus alike.
Ingredients Breakdown
Every ingredient in this recipe plays a precise, synergistic role—not merely for flavor, but for chemistry, texture, and visual impact:
- Unsweetened Natural Cocoa Powder (Dutch-process optional but not recommended): Provides deep chocolate backbone and reacts with acid to enhance both color and tenderness. Natural cocoa is essential for the proper pH balance with buttermilk and vinegar.
- Granulated Sugar & Brown Sugar (light or dark): Granulated sugar promotes spread and crispness at the edges; brown sugar adds moisture, chew, and molasses depth—critical for fudginess. The ratio ensures structural integrity without dryness.
- Unsalted Butter (softened, not melted): Adds richness and flakiness potential. Softened (65–68°F) butter creams optimally with sugars to trap air—key for lift and tenderness. Melted butter would yield flat, greasy cookies.
- Large Eggs (room temperature): Act as emulsifiers and binders. Room temperature eggs incorporate more evenly into the batter, preventing curdling and ensuring uniform texture.
- Buttermilk (or DIY buttermilk substitute): The star acidulant—tangy, creamy, and tenderizing. Its lactic acid activates baking soda, enhances cocoa’s red hue, and contributes to the moist, dense crumb. Never skip or substitute with plain milk.
- Distilled White Vinegar: A secondary acid that works synergistically with buttermilk to maximize anthocyanin pigment activation in cocoa—intensifying the vibrant red without artificial dye overload. Also helps control gluten development.
- Red Food Coloring (gel preferred): While traditional red velvet relies partly on cocoa-acid reactions, achieving that signature *festive* crimson demands concentrated color. Gel food coloring delivers intense hue without adding excess liquid (which would thin the batter and compromise crinkles). Liquid food coloring is discouraged—it dilutes consistency and fades in oven heat.
- All-Purpose Flour: Measured by weight (recommended) or spoon-and-level method—too much flour = cakey, dry cookies; too little = excessive spread and loss of structure. Provides just enough gluten for cohesion without toughness.
- Baking Soda: The sole leavener. Reacts instantly with acids (buttermilk + vinegar) to create carbon dioxide bubbles—giving gentle lift while preserving density. Baking powder is unnecessary and counterproductive here.
- Fine Sea Salt: Balances sweetness, heightens cocoa and vanilla notes, and controls yeast-like activity in dough (even without yeast).
- Premium Pure Vanilla Extract: Adds warmth and aromatic complexity—avoid imitation, which tastes harsh and synthetic when baked.
- Confectioners’ Sugar (for rolling): Must be unsifted and used generously. Its fine crystals melt slightly upon contact with warm dough, then recrystallize in the oven’s heat—creating the iconic crackle pattern. Sifting removes essential starches that aid adhesion and cracking.
Step-by-Step Recipe
- Prep & Chill (Non-Negotiable Step): Line two large baking sheets with parchment paper or silicone mats. Place 1½ cups (180g) confectioners’ sugar in a wide, shallow bowl. Chill dough for *at least 2 hours*, preferably 4–24 hours. Chilling solidifies butter, prevents overspread, intensifies flavor development, and makes dough easier to handle.
- Whisk Dry Ingredients: In a medium bowl, sift together 1¾ cups (210g) all-purpose flour, ¾ cup (65g) natural unsweetened cocoa powder, 1 tsp baking soda, and ½ tsp fine sea salt. Whisk thoroughly to aerate and fully combine—no lumps!
- Cream Butter & Sugars: In a large stand mixer fitted with paddle attachment (or using hand mixer), beat ¾ cup (170g) softened unsalted butter, 1 cup (200g) granulated sugar, and ½ cup (100g) packed light or dark brown sugar on medium-high speed for 3–4 minutes until pale, fluffy, and completely smooth—scraping bowl frequently. This step incorporates vital air for delicate structure.
- Add Wet Ingredients Gradually: Beat in 2 large room-temperature eggs one at a time, ensuring each is fully incorporated before adding the next (about 30 seconds per egg). Add 2 tsp pure vanilla extract and mix until combined.
- Incorporate Acids & Color: Whisk together ½ cup (120ml) full-fat buttermilk, 1 tsp distilled white vinegar, and 1½–2 tsp high-quality red gel food coloring (start with 1½ tsp; add more drop-by-drop until desired intensity is reached) in a small measuring cup. With mixer on low, slowly drizzle this mixture into butter-sugar-egg mixture—just until combined (do not overmix).
- Combine Wet & Dry: Reduce mixer speed to low. Gradually add dry ingredients in three additions, mixing only until *no streaks remain*. Overmixing develops gluten → tough, cakey cookies. Batter will be thick, glossy, and slightly sticky—like soft fudge.
- Chill Thoroughly: Cover bowl tightly with plastic wrap and refrigerate for minimum 2 hours (up to 72 hours). For best results, chill overnight. Dough firms significantly—this is ideal.
- Preheat & Portion: Preheat oven to 350°F (175°C) at least 20 minutes before baking. Using a 1.5-tablespoon cookie scoop (or #40 scoop), portion chilled dough into 1½-inch balls. Roll each ball firmly between palms to smooth surface—this ensures even cracking.
- Coat Generously: Drop each ball into confectioners’ sugar. Roll gently but thoroughly until fully coated—press lightly to adhere sugar to all sides. Return coated balls to parchment-lined sheet, spacing them at least 3 inches apart (they spread!).
- Bake with Precision: Bake one sheet at a time in center rack for 11–13 minutes. Cookies are done when edges appear set and slightly puffed, tops are deeply cracked, and centers look *just barely* soft and moist—not shiny or wet. They will continue to set as they cool. Rotate sheet halfway through for even baking.
- Cool Completely: Let cookies rest on baking sheet for 5 minutes—this allows structure to stabilize. Then carefully transfer to wire racks using a thin spatula. Cool completely (20+ minutes) before serving. Warm cookies are fragile and overly soft; cooling unlocks the perfect fudgy-yet-resilient texture.
Tips
- Weigh Your Ingredients: Especially flour and cocoa! Volume measurements vary wildly. A kitchen scale ensures consistent, restaurant-quality results every time.
- Room-Temperature Eggs Are Crucial: Cold eggs can cause the creamed butter-sugar mixture to seize or curdle. To warm quickly, place eggs in warm (not hot) water for 5–7 minutes.
- Gel vs. Liquid Food Coloring: Use only professional-grade gel (e.g., Americolor Super Red, Chefmaster Red Velvet). Liquid dyes add water, weaken structure, and fade dramatically—resulting in dull pink cookies instead of bold crimson.
- Don’t Skip the Chill: Warm dough spreads uncontrollably, yielding thin, greasy, non-crinkly discs. Chilling also allows flavors to meld and deepens the red velvet essence.
- Roll Firmly, Coat Generously: Under-rolled dough yields uneven cracks; skimpy sugar coating produces faint or no crinkles. Press sugar in—don’t just dust.
- Oven Thermometer Required: Most home ovens run hot or cold. An accurate thermometer prevents overbaking—a single degree can mean the difference between fudgy and dry.
- Bake One Sheet at a Time: Crowding the oven lowers temperature and blocks airflow, leading to uneven baking and poor crinkling.
- Underbake Slightly: Remove cookies when centers still look soft and slightly underdone—they firm up perfectly during cooling. Overbaked cookies lose fudginess and become crumbly.
- Storage for Maximum Freshness: Keep cooled cookies in an airtight container at room temperature for up to 5 days. For longer storage, freeze unbaked dough balls (coated in sugar!) for up to 3 months—bake straight from frozen, adding 1–2 minutes to bake time.
- Revive Stale Cookies: If cookies sit too long, place them on a parchment-lined sheet and warm in a 300°F oven for 3–4 minutes—they’ll regain softness and aroma.
Variations and Customizations
- White Chocolate Chunk Red Velvet: Fold in 1 cup (170g) high-quality white chocolate chunks after combining wet and dry ingredients. The creamy sweetness beautifully offsets cocoa’s bitterness.
- Double Chocolate Swirl: Before rolling in sugar, swirl 2 tbsp melted dark chocolate (70% cacao) into each dough ball using a toothpick—creates stunning marbled interiors.
- Maple-Infused Velvet: Replace 1 tbsp of buttermilk with pure maple syrup and add ¼ tsp maple extract with the vanilla. Top baked cookies with a delicate maple glaze.
- Spiced Velvet Crinkles: Add 1 tsp ground cinnamon, ¼ tsp ground ginger, and a pinch of freshly grated nutmeg to dry ingredients for a warm, autumnal twist.
- Espresso-Enhanced Depth: Stir 1 tsp instant espresso powder into dry ingredients—amplifies chocolate notes without adding coffee flavor.
- Gluten-Free Adaptation: Substitute flour blend (e.g., Bob’s Red Mill 1-to-1 Baking Flour) + ½ tsp xanthan gum. Ensure cocoa and food coloring are GF-certified. Chill dough 3+ hours.
- Vegan Velvet Crinkles: Use vegan butter (Miyoko’s or Earth Balance), flax eggs (2 tbsp ground flax + 6 tbsp water), almond milk + 1 tsp vinegar (DIY buttermilk), and vegan red dye. Expect slightly more spread—chill extra-long.
- Mini Crinkle Bites: Scoop 1-teaspoon portions—bake 7–9 minutes. Perfect for parties, gift boxes, or portion control.
- Red Velvet Sandwich Cookies: Bake cookies slightly thinner (10 minutes), cool completely, then sandwich with cream cheese frosting or mascarpone ganache.
- Boozy Velvet (Adults Only): Add 1 tbsp high-quality bourbon or Chambord to wet ingredients. Reduce buttermilk by 1 tbsp to compensate.
Health Considerations and Nutritional Value
While undeniably indulgent, Red Velvet Crinkle Cookies can be understood contextually—not as “health food,” but as a mindful, balanced treat within a varied diet. A standard 2.5-inch cookie (approx. 45g) contains roughly:
- Calories: 180–200 kcal
- Total Fat: 9–11g (mostly unsaturated from cocoa butter and natural fats)
- Saturated Fat: 5–6g
- Carbohydrates: 24–26g (including 16–18g added sugars)
- Fiber: 1.5–2g (from cocoa and whole-grain flour substitutions)
- Protein: 2–3g
- Iron & Magnesium: Naturally present in cocoa—1 tbsp cocoa provides ~10% DV iron and 12% DV magnesium
Nutritional Notes & Mindful Modifications:
- Cocoa Benefits: Natural cocoa is rich in flavonoids—antioxidants linked to improved vascular function and reduced inflammation. Opt for minimally processed, non-alkalized (natural) cocoa to preserve polyphenol content.
- Sugar Awareness: While traditional recipes use significant sugar for texture and crinkling, reducing granulated sugar by 25% (to ¾ cup) is possible—but expect less spread and milder cracks. Never reduce confectioners’ sugar coating—it’s structural, not just sweet.
- Butter Alternatives: Replacing up to half the butter with unsweetened applesauce or mashed banana cuts fat and calories but sacrifices richness and fudginess—best reserved for dietary necessity, not preference.
- Flour Options: Whole wheat pastry flour (50/50 blend with AP) adds fiber and nutrients without heaviness. Oat flour adds beta-glucan but requires additional binder (e.g., ¼ tsp xanthan gum).
- Allergen Notes: Contains dairy (butter, buttermilk), eggs, and wheat. Vegan/GF versions require meticulous label-checking on all components—including food coloring and cocoa.
- Mindful Enjoyment: Savor one cookie slowly—with tea or coffee—to maximize satisfaction. Pairing with protein (e.g., Greek yogurt) or fiber (e.g., berries) slows sugar absorption and enhances satiety.
Ingredients
- ¾ cup (170g) unsalted butter, softened to 65–68°F
- 1 cup (200g) granulated sugar
- ½ cup (100g) packed light or dark brown sugar
- 2 large eggs, room temperature
- 2 teaspoons pure vanilla extract
- ½ cup (120ml) full-fat buttermilk, cold
- 1 teaspoon distilled white vinegar
- 1½–2 teaspoons red gel food coloring (e.g., Americolor Super Red)
- 1¾ cups (210g) all-purpose flour, spooned & leveled or weighed
- ¾ cup (65g) natural unsweetened cocoa powder (NOT Dutch-process)
- 1 teaspoon baking soda
- ½ teaspoon fine sea salt
- 1½ cups (180g) confectioners’ sugar, for rolling (unsifted)
Directions
- Line two large baking sheets with parchment paper or silicone baking mats. Place 1½ cups confectioners’ sugar in a wide, shallow bowl. Set aside.
- In a medium bowl, whisk together flour, cocoa powder, baking soda, and salt until no lumps remain. Set aside.
- In the bowl of a stand mixer fitted with paddle attachment, beat softened butter, granulated sugar, and brown sugar on medium-high speed for 3–4 minutes until pale, fluffy, and smooth. Scrape bowl thoroughly.
- Add eggs one at a time, beating well after each addition (about 30 seconds). Add vanilla and mix until combined.
- In a small bowl, whisk together buttermilk, vinegar, and red gel food coloring until uniformly vibrant. With mixer on low, slowly drizzle into butter mixture until just combined.
- Reduce mixer speed to low. Gradually add dry ingredients in three parts, mixing only until no dry streaks remain—do not overmix. Batter will be thick and glossy.
- Cover bowl tightly with plastic wrap and refrigerate for at least 2 hours, or up to 72 hours.
- When ready to bake, preheat oven to 350°F (175°C). Position racks in upper and lower thirds.
- Using a 1.5-tablespoon cookie scoop, portion chilled dough. Roll each portion firmly between palms into smooth balls. Drop into confectioners’ sugar and roll thoroughly to coat all sides.
- Place coated dough balls on prepared sheets, spaced at least 3 inches apart.
- Bake one sheet at a time in center rack for 11–13 minutes, rotating halfway through, until edges are set, tops are deeply cracked, and centers appear soft but not wet.
- Let cookies cool on baking sheet for 5 minutes, then transfer to wire racks to cool completely before serving.
FAQ
- Why did my cookies spread too much?
- Most common causes: butter too warm, insufficient chilling, under-measured flour, or using Dutch-process cocoa (which lacks acidity needed for proper structure). Always chill dough minimum 2 hours—and verify butter temperature.
- My cookies didn’t crack! What went wrong?
- Crinkles rely on three things: 1) generous, unsifted confectioners’ sugar coating, 2) firm, chilled dough rolled smoothly before coating, and 3) proper oven spring (achieved by correct leavening and preheating). If sugar is sifted or dough is too warm, cracks won’t form.
- Can I make these ahead for holidays?
- Absolutely! Baked cookies stay fresh in airtight containers for 5 days. Unbaked, sugar-coated dough balls freeze beautifully for up to 3 months—bake straight from frozen, adding 1–2 minutes.
- Is there a way to reduce the red dye?
- You can cut gel food coloring to 1 tsp—but expect a deeper burgundy/maroon rather than bright red. Beet powder (1 tbsp) adds natural color and earthy sweetness but alters flavor and may mute crinkles.
- Why use buttermilk AND vinegar?
- Dual acids maximize reaction with baking soda for optimal lift and tenderness, while intensifying the cocoa’s natural red pigments. Buttermilk alone provides flavor and moisture; vinegar boosts color and acidity synergy.
- Can I use oil instead of butter?
- Not recommended. Oil yields greasier, flatter, less flavorful cookies lacking the nuanced richness and structure butter provides. Butter is non-negotiable for authentic fudgy texture.
- My batter looks too thick—is that normal?
- Yes! This is a dense, fudgy batter—not a pourable one. If it resembles soft playdough or chilled ganache, you’ve nailed the consistency. Runny batter indicates too much liquid or not enough flour.
- How do I get that ultra-fudgy center every time?
- Chill thoroughly, underbake slightly (centers should look soft), and cool completely on racks. Rushing cooling traps steam, making centers gummy instead of lush.
- Are these safe for kids with allergies?
- Standard recipe contains dairy, eggs, and wheat. Always verify labels on food coloring, cocoa, and butter for hidden allergens (e.g., soy lecithin, milk solids). GF/Vegan adaptations require full ingredient scrutiny.
- Can I add cream cheese to the dough?
- Not advised—cream cheese adds excess moisture and fat, destabilizing the delicate crinkle-forming chemistry. Instead, serve with cream cheese frosting or a dollop of spiced cream cheese dip.
Summary
Red Velvet Crinkle Cookies are a masterclass in festive baking—where vibrant crimson hue, velvety cocoa depth, and tangy buttermilk brightness converge with a crackled, snow-dusted exterior and an impossibly fudgy, tender interior. Every step—from precise ingredient ratios and strategic acid pairing to mandatory chilling and generous sugar coating—is engineered to deliver showstopping texture, nostalgic flavor, and joyful visual impact.
Whether enjoyed as a holiday heirloom, a romantic Valentine’s gesture, or a self-care ritual with a tall glass of cold milk, these cookies transcend trendiness to become timeless—proof that the most memorable treats honor tradition while daring to dazzle.