Introduction
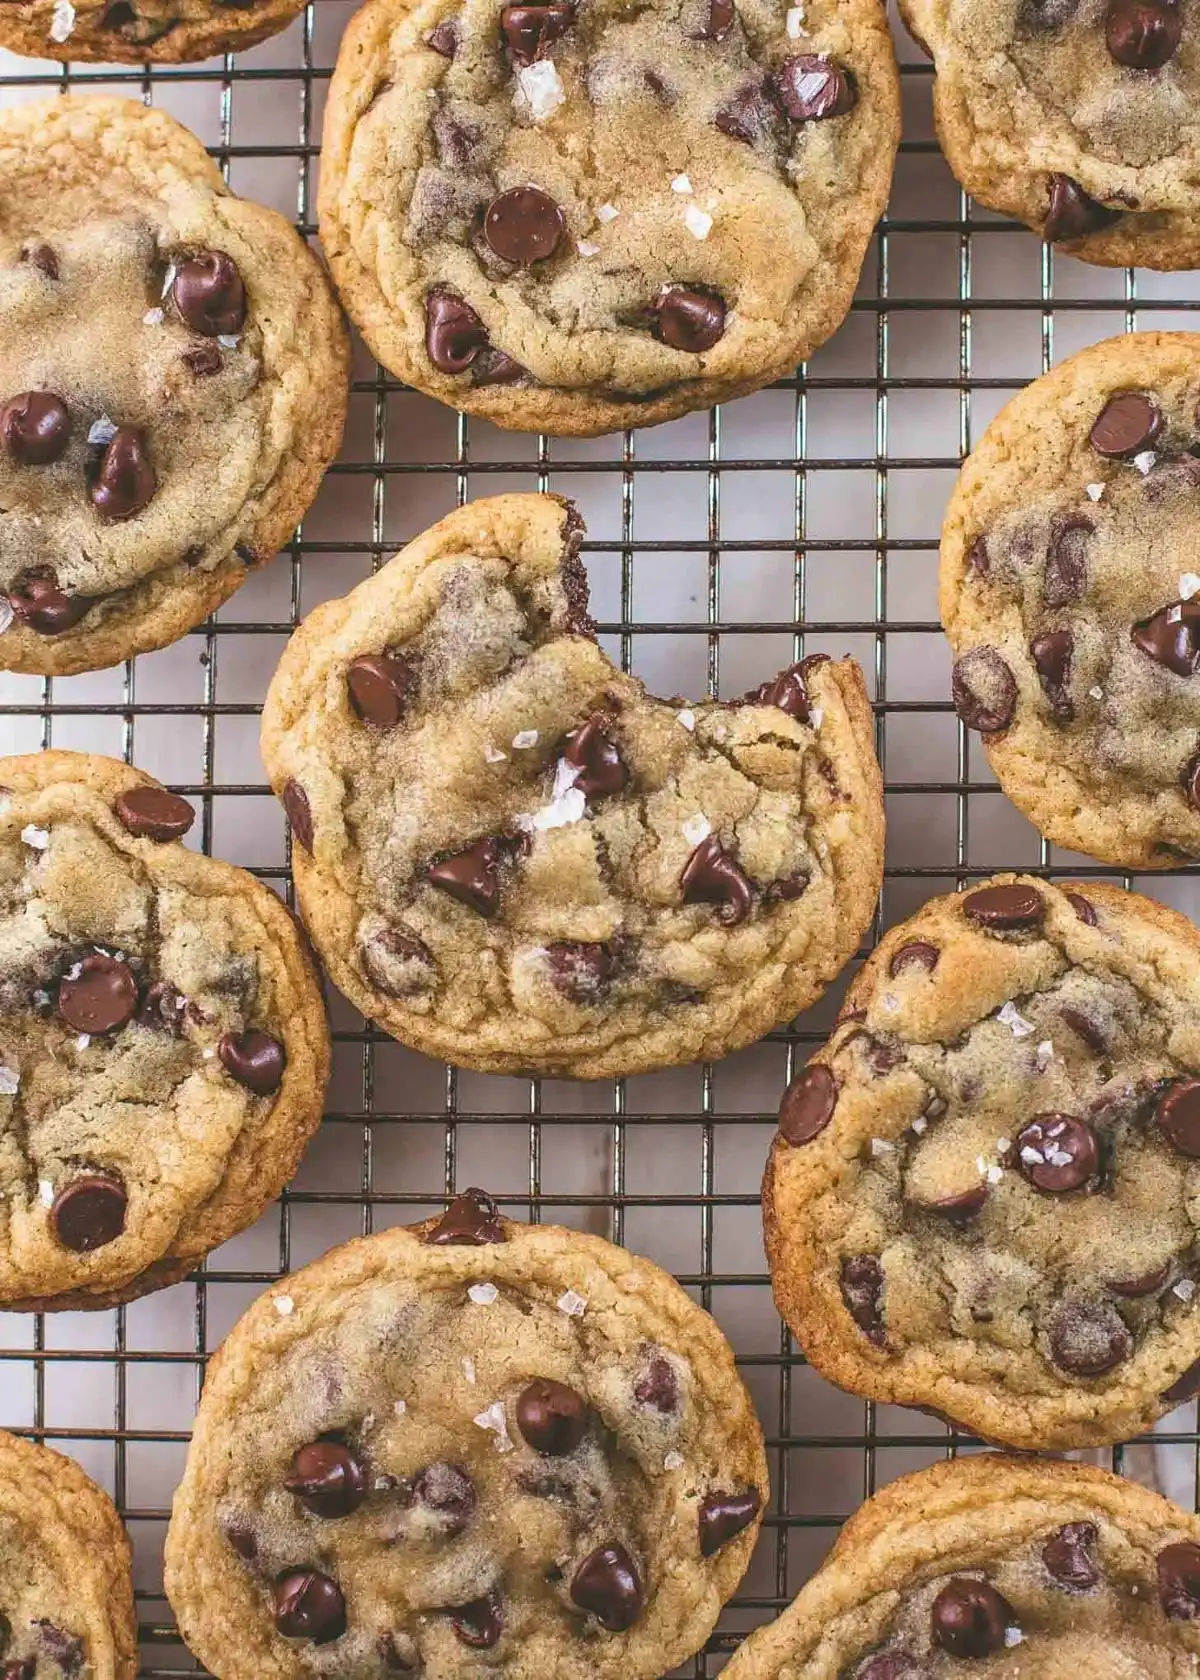
There’s a timeless magic in the perfect chocolate chip cookie—a delicate alchemy of textures and flavors that evokes childhood kitchens, holiday baking marathons, and quiet moments of pure, unadulterated joy. The Crispy and Chewy Chocolate Chip Cookie isn’t just a dessert—it’s a cultural touchstone, a science experiment in your mixing bowl, and a deeply personal canvas for creativity. What sets this version apart is its intentional duality: a shatteringly crisp, golden-brown perimeter that yields to a luxuriously soft, slightly gooey, and tender center—each bite delivering contrast, depth, and richness in perfect harmony. Whether you’re a seasoned baker or a curious beginner, mastering this balance unlocks not only superior cookies but also a deeper understanding of how ingredients interact, temperature governs texture, and patience transforms dough into delight.
The History
The origin story of the chocolate chip cookie is as iconic—and slightly contested—as the cookie itself. In 1938, Ruth Wakefield, owner of the Toll House Inn in Whitman, Massachusetts, was preparing her signature Butter Drop Do cookies when she decided to add chopped pieces of Nestlé’s semi-sweet chocolate bar, expecting them to melt and create a chocolate cookie. To her surprise—and to the delight of generations—the morsels held their shape, creating pockets of rich, melty chocolate embedded in a buttery, crisp-chewy base. She published the recipe in her 1938 cookbook *Toll House Tried and True Recipes*, and Nestlé soon struck a deal with Wakefield: in exchange for a lifetime supply of chocolate, they’d print her recipe on every bag of Nestlé’s newly branded “Toll House Chocolate Chips.” By the 1940s, the cookie had become a national phenomenon—featured in women’s magazines, wartime ration cookbooks, and school lunch programs. Over decades, bakers experimented relentlessly: substituting brown sugar for chewiness, chilling dough for structure, adding corn syrup or bread flour for nuance, and even tweaking oven temperatures to manipulate spread and set. Today’s “crispy and chewy” ideal reflects over 85 years of collective kitchen wisdom—honoring Wakefield’s innovation while refining it through food science, global ingredient access, and evolving taste preferences.
Ingredients Breakdown
Every ingredient in this recipe serves a precise functional and sensory role—not merely flavor, but structure, moisture retention, browning, tenderness, and shelf-life. Understanding why each one is included empowers you to adapt intelligently:
- Unsalted Butter (1 cup / 227g, softened to cool room temperature ~65°F): Provides richness, flakiness, and steam during baking (which creates lift and crisp edges). Using unsalted butter ensures precise control over sodium levels—critical for balancing sweetness and enhancing chocolate flavor. Softened—not melted—butter traps air when creamed, contributing to both spread and chew.
- Granulated Sugar (¾ cup / 150g): Adds sweetness, promotes spreading, and contributes to crispness via caramelization. Its fine crystals dissolve easily and draw moisture from the dough surface, accelerating browning and creating that signature crackled top.
- Packed Light Brown Sugar (¾ cup / 150g): Contains molasses, which adds moisture, acidity (to activate baking soda), deep caramel notes, and chewiness. The molasses also helps retain water during baking, keeping the center soft while supporting edge crispness through Maillard reactions.
- Large Eggs (2, room temperature): Act as emulsifiers, binding fat and water; provide structure via protein coagulation; and add moisture and leavening power. Room-temperature eggs incorporate more evenly and prevent re-hardening of butter.
- Pure Vanilla Extract (2 tsp): Enhances aromatic complexity and rounds out sweetness. Alcohol-based vanilla also aids in gluten development and carries volatile flavor compounds.
- All-Purpose Flour (2¼ cups / 280g, spooned & leveled): Provides gluten for structure—but only enough to hold shape without toughness. Spoon-and-level prevents compaction and over-flouring, which causes dry, cakey cookies.
- Baking Soda (1 tsp): A fast-acting alkali that reacts immediately with acidic components (molasses in brown sugar, yogurt if used in variations) to produce carbon dioxide. This gives an initial lift, spreads the dough slightly pre-set, and promotes browning and crisp edges.
- Fine Sea Salt (1 tsp): Not just for seasoning—salt tightens gluten strands, controls yeast activity (if using fermented doughs), enhances sweetness perception, and balances bitterness in dark chocolate. Fine salt dissolves completely and distributes evenly.
- High-Quality Semi-Sweet Chocolate Chips or Chopped Chocolate (2 cups / 340g): “High-quality” means at least 52–62% cocoa solids with real cocoa butter—not vegetable oil substitutes. Chopped chocolate (from bars like Ghirardelli, Valrhona, or Callebaut) melts more variably than uniform chips, yielding irregular, glossy pools and textural interest. Chocolate with higher cocoa butter content melts silkily and resolidifies with a satisfying snap.
- (Optional but Recommended) Cornstarch (2 tbsp / 16g): Reduces gluten formation, yielding a more tender, melt-in-your-mouth center without sacrificing edge integrity. It also absorbs excess moisture, preventing overspread and enhancing chew.
- (Optional but Recommended) Toasted Walnuts or Pecans (½ cup, chopped): Adds crunch, nutty aroma, and fat that complements chocolate. Toasting deepens flavor and removes raw bitterness.
Step-by-Step Recipe
This method prioritizes precision, timing, and tactile awareness—because texture is forged not just in the oven, but in every step before it.
- Prep & Weigh Ingredients: Use a digital kitchen scale for accuracy—especially for flour and chocolate. Set out butter and eggs 1–1.5 hours ahead to reach true room temperature (cool to the touch, leaves a slight indentation when pressed, no greasy sheen). Line two large baking sheets with parchment paper (never silicone mats for this style—they inhibit bottom crisping).
- Cream Butter & Sugars (3–4 minutes): In a stand mixer fitted with the paddle attachment (or sturdy hand mixer), beat softened butter, granulated sugar, and brown sugar on medium speed until light, fluffy, and pale—scraping the bowl halfway. This incorporates air, builds structure, and begins dissolving sugar crystals. Over-creaming leads to excessive spread; under-creaming yields dense, tough cookies.
- Add Eggs & Vanilla (2 minutes): Add eggs one at a time, beating fully after each (about 30 seconds per egg) until emulsified and smooth. Then add vanilla and mix just until combined. The mixture should be homogenous, glossy, and slightly thickened—not curdled or separated.
- Whisk Dry Ingredients (1 minute): In a separate bowl, whisk together flour, cornstarch (if using), baking soda, and salt until fully aerated and lump-free. Whisking activates the baking soda evenly and prevents clumping.
- Combine Wet & Dry (Just until incorporated): Reduce mixer speed to low. Gradually add dry ingredients in 3 additions, mixing only until no streaks remain—usually 20–30 seconds total after final addition. Do not overmix. Overmixing develops gluten, leading to tough, rubbery centers and reduced chew.
- Fold in Chocolate (by hand, 1 minute): Using a flexible silicone spatula, gently fold in chocolate chips or chopped chocolate until evenly distributed. If adding nuts, fold them in now. You’ll notice the dough is soft, slightly sticky, and holds a gentle peak—this is ideal.
- Chill Dough (Non-negotiable – 24–72 hours): Divide dough into two equal portions. Flatten each into a 1-inch-thick disc, wrap tightly in plastic wrap (press wrap directly onto surface to prevent drying), and refrigerate for minimum 24 hours, up to 72 hours. This is the single most critical step for achieving crispy edges and chewy centers. Chilling solidifies butter, slows spread, allows flour to fully hydrate (reducing grittiness), and concentrates flavors. It also oxidizes sugars slightly, deepening caramel notes.
- Preheat & Portion (Day of Baking): At least 45 minutes before baking, place oven rack in center position and preheat to 375°F (190°C). Remove one dough disc from fridge. Scoop level 3-tablespoon portions (≈ 50g each) using a spring-loaded ice cream scoop. Roll each into a smooth, tight ball—this creates surface tension that encourages even spreading and crisp edges. Place balls at least 3 inches apart on chilled, parchment-lined sheets.
- Bake (11–13 minutes, rotating once): Bake one sheet at a time. At 7 minutes, rotate pan 180° for even browning. Cookies are done when edges are deeply golden brown and appear dry and set, while centers still look soft, puffed, and slightly underdone—no more than 1 inch of visible matte surface in the middle. They will continue cooking on the hot sheet. Do not overbake—even 30 extra seconds yields a uniformly crisp cookie.
- Cool Strategically (15+ minutes): Immediately upon removal from oven, bang the hot baking sheet firmly on the counter twice—this collapses air pockets, enhances chewiness, and sets the crinkled top. Let cookies rest on sheet for exactly 5 minutes, then transfer carefully to a wire rack using a thin metal spatula. Cool completely (10–15 minutes more) before eating. This allows starches to retrograde and fats to re-solidify, locking in chew while preserving crispness.
Tips
- Butter Temperature Is Everything: Too warm? Cookies spread into thin, greasy discs. Too cold? Dough won’t cream properly and yields dense, uneven cookies. Test by pressing thumb into stick—should give slightly but hold shape.
- Weigh Your Flour: A cup of flour can range from 120g (scooped) to 155g (packed)—a 30% difference that ruins texture. Always spoon flour into measuring cup, then level with knife—or better yet, use grams.
- Chill Dough in Discs, Not Balls: Discs chill faster and more evenly than balls. Also, rolling into balls post-chill prevents sticky handling and preserves surface integrity.
- Use an Oven Thermometer: Many ovens run 25–50°F off calibration. An inaccurate temperature is the #1 cause of inconsistent results.
- Bake One Sheet at a Time: Crowding the oven lowers temperature and blocks airflow, causing uneven baking and steamed (not crisp) edges.
- Underbake Intentionally: Remove cookies when centers look soft and slightly shiny—they firm up dramatically during cooling. Err on the side of underdone.
- Rotate Mid-Bake: Ovens have hot spots. Rotating ensures even browning and consistent edge crispness.
- Let Cookies Rest on Sheet: That 5-minute rest allows carryover cooking to finish the center while setting the edges—skipping it makes cookies fragile and overly soft.
- Store Properly: Once completely cool, store in an airtight container at room temperature for up to 5 days. For longer storage, freeze baked cookies (up to 3 months) or unbaked dough balls (up to 3 months—bake frozen, add 1–2 min to bake time).
- Revive Stale Cookies: Place in a 300°F oven for 3–4 minutes—moisture redistributes and crispness returns.
Variations and Customizations
This foundational recipe is endlessly adaptable—without compromising the crispy-chewy ideal—when modifications respect the functional roles of core ingredients:
- Dark Chocolate & Sea Salt: Swap semi-sweet for 70% dark chocolate (chopped) and sprinkle tops with flaky Maldon salt immediately after baking. The salt amplifies chocolate’s fruitiness and cuts richness.
- Double Chocolate: Replace ¼ cup (30g) of flour with unsweetened cocoa powder (Dutch-process preferred). Add ¼ tsp espresso powder to deepen chocolate flavor without bitterness.
- Oatmeal Chocolate Chip: Substitute ¾ cup (75g) of flour with old-fashioned rolled oats (not instant or steel-cut). Toast oats first for nuttier flavor. Reduce bake time by 1 minute—oats absorb moisture and slow spread.
- Brown Butter: Brown ½ cup (113g) of the butter before creaming—cool to room temp first. Adds profound nutty, toffee-like complexity and intensifies chew due to reduced water content.
- Maple Pecan: Replace brown sugar with pure maple syrup (reduce granulated sugar to ½ cup, add 2 tbsp maple) and fold in ½ cup toasted pecans. Syrup increases moisture and chew; reduce chill time to 12 hours to prevent dough from becoming too soft.
- Gluten-Free: Use a 1:1 certified GF flour blend containing xanthan gum (e.g., King Arthur or Bob’s Red Mill). Add 1 extra tbsp cornstarch and chill dough 48+ hours—the blends behave differently and need extra hydration time.
- Vegan: Use vegan butter (Miyoko’s or Earth Balance sticks), flax eggs (2 tbsp ground flax + 5 tbsp water, rested 10 min), and dairy-free chocolate. Add 1 tsp apple cider vinegar to react with baking soda. Chill 48+ hours—vegan fats soften faster.
- Espresso Chip: Add 1 tbsp finely ground espresso beans (or instant espresso powder) with dry ingredients. Pair with milk chocolate for balanced bitterness and creaminess.
- Sour Cream or Greek Yogurt Swirl: Mix ¼ cup full-fat sour cream or plain Greek yogurt into dough at the end. Adds tang, tenderness, and extra chew—reduce brown sugar by 1 tbsp to compensate for added moisture.
- Spiced (Cinnamon-Ginger): Add 1 tsp ground cinnamon + ½ tsp ground ginger + ¼ tsp ground cloves to dry ingredients. Complements dark chocolate beautifully and adds warmth without heat.
Health Considerations and Nutritional Value
A single serving (one 3-inch cookie, approx. 50g) of this Crispy and Chewy Chocolate Chip Cookie contains roughly:
- Calories: 220–240 kcal
- Total Fat: 12–14g (7–8g saturated)
- Carbohydrates: 26–28g (18–20g sugars)
- Protein: 2–3g
- Fiber: 0.5–1g (higher with oats or whole wheat flour substitutions)
- Sodium: 150–180mg
Key Considerations:
- Sugar Content: While high in added sugars (primarily from brown and granulated), the presence of fiber-rich chocolate (especially dark varieties ≥70%), antioxidants (flavanols), and healthy fats offers modest phytonutrient benefits. Moderation remains essential—enjoy 1–2 cookies mindfully as part of a balanced diet.
- Butter vs. Alternatives: Traditional butter provides fat-soluble vitamins (A, D, E, K2) and butyrate, which supports gut health. Substituting with margarine or highly processed oils may introduce trans fats or inflammatory omega-6s.
- Flour Choice: All-purpose flour is refined and low in fiber. For increased satiety and nutrients, substitute up to ½ cup (60g) with white whole wheat flour or oat flour—just increase chill time to 48 hours to manage gluten development and moisture absorption.
- Chocolate Quality Matters: Higher-cocoa chocolate contains more flavonoids and less sugar. Look for bars with minimal ingredients (cocoa mass, cocoa butter, sugar, vanilla) and avoid “chocolatey chips” with palm oil or artificial flavors.
- Portion Control: Using a 3-tablespoon scoop yields consistent size and prevents unintentional overconsumption. Pre-portioned frozen dough balls also support mindful eating.
- Allergen Notes: Naturally contains dairy, eggs, and gluten. For nut-free versions, omit walnuts/pecans and verify chocolate is processed in a nut-free facility. Vegan and GF versions require careful label scrutiny for hidden allergens.
- Blood Sugar Impact: Due to high glycemic load, individuals managing diabetes or insulin resistance should pair cookies with protein/fat (e.g., a glass of milk or handful of almonds) and limit to one serving. Low-sugar alternatives (erythritol + monk fruit blends) exist but often compromise texture—test extensively.
Ingredients
- 1 cup (227g) unsalted butter, softened to cool room temperature (~65°F)
- ¾ cup (150g) granulated sugar
- ¾ cup (150g) packed light brown sugar
- 2 large eggs, room temperature
- 2 teaspoons pure vanilla extract
- 2¼ cups (280g) all-purpose flour, spooned and leveled
- 2 tablespoons (16g) cornstarch (optional but recommended)
- 1 teaspoon baking soda
- 1 teaspoon fine sea salt
- 2 cups (340g) high-quality semi-sweet chocolate chips or finely chopped chocolate (52–62% cocoa)
- (Optional) ½ cup (60g) toasted walnuts or pecans, chopped
Directions
- Allow butter and eggs to come to cool room temperature (65°F/18°C) — about 1–1.5 hours. Line two large baking sheets with parchment paper; set aside.
- In the bowl of a stand mixer fitted with the paddle attachment, beat softened butter, granulated sugar, and brown sugar on medium speed for 3–4 minutes, scraping down the bowl halfway, until light, fluffy, and pale in color.
- Add eggs one at a time, beating for 30 seconds after each addition until fully incorporated. Add vanilla and mix just until combined.
- In a separate medium bowl, whisk together flour, cornstarch (if using), baking soda, and salt until thoroughly combined and aerated.
- Reduce mixer speed to low. Gradually add dry ingredients in three additions, mixing only until no dry streaks remain — approximately 20–30 seconds after the final addition. Do not overmix.
- Using a flexible silicone spatula, gently fold in chocolate chips (and nuts, if using) until evenly distributed. Dough will be soft, slightly tacky, and hold a gentle peak.
- Divide dough in half. Flatten each portion into a 1-inch-thick disc. Wrap tightly in plastic wrap, pressing wrap directly onto surface. Refrigerate for a minimum of 24 hours and up to 72 hours.
- When ready to bake, position oven rack in center position and preheat oven to 375°F (190°C). Allow chilled dough to sit at room temperature for 10 minutes for easier scooping.
- Using a 3-tablespoon spring-loaded scoop, portion dough into balls. Roll each firmly between palms to create smooth, taut spheres. Place at least 3 inches apart on prepared baking sheets.
- Bake one sheet at a time for 11–13 minutes, rotating pan 180° at the 7-minute mark. Cookies are done when edges are deeply golden brown and set, and centers appear soft, puffed, and slightly underdone.
- Immediately upon removing from oven, firmly bang baking sheet on countertop twice. Let cookies rest on sheet for exactly 5 minutes, then carefully transfer to a wire rack to cool completely (10–15 minutes).
- Repeat with remaining dough, allowing baking sheets to cool completely between batches. Store cooled cookies in an airtight container at room temperature for up to 5 days.
FAQ
- Why do my cookies spread too much?
- Most commonly: butter too warm, insufficient chilling, or too much flour not being weighed. Also check oven temperature — a too-cool oven delays set and encourages spread. Ensure dough is chilled ≥24 hours and butter is cool-to-touch, not greasy.
- Can I skip the chilling step?
- Technically yes — but you’ll lose the defining crispy-chewy contrast. Unchilled dough spreads rapidly, bakes faster, and yields uniformly thin, crisp cookies with little chew. Chilling is non-negotiable for this specific texture profile.
- My cookies are too cakey — what went wrong?
- Overmixing after adding flour develops excess gluten. Also, too much flour (scooping instead of spooning), expired baking soda (causing uneven rise), or using cake flour instead of all-purpose can contribute. Stick to spoon-and-level or weighing.
- Can I freeze the dough?
- Absolutely — and it’s highly recommended. Portion dough into balls, freeze on a tray until solid (1 hour), then transfer to freezer bags. Bake straight from frozen — add 1–2 minutes to bake time. Dough freezes well for up to 3 months.
- Why do you recommend cornstarch?
- Cornstarch inhibits gluten formation, resulting in a more tender, delicate crumb in the center — enhancing chew without making cookies fragile. It also absorbs excess moisture, promoting crisp edges and preventing sogginess.
- What’s the best chocolate to use?
- Finely chopped high-cocoa chocolate bars (e.g., Valrhona Guayaquil 64%, Ghirardelli 60%, or Scharffen Berger 70%) yield superior flavor, varied melt patterns, and glossy pools. Chips work, but lack complexity and often contain stabilizers that resist melting.
- Can I make these dairy-free?
- Yes — use high-fat vegan butter (like Miyoko’s), flax or aquafaba eggs, and dairy-free chocolate. Add 1 tsp apple cider vinegar to activate baking soda. Expect slightly softer edges — chill dough 48+ hours and consider adding 1 extra tbsp cornstarch.
- How do I get those beautiful crinkles on top?
- Crinkles form from rapid expansion followed by surface drying. Key factors: properly creamed butter/sugar (traps air), correct oven temp (375°F), immediate post-bake “bang,” and slightly underbaked centers that puff then settle.
- Why use both granulated and brown sugar?
- Granulated sugar promotes spread and crispness via caramelization; brown sugar contributes moisture, acidity, and chew via molasses. Together, they create the ideal textural dichotomy — neither alone achieves the same balance.
- Can I double the batch?
- Yes — but chill dough in smaller portions (e.g., four ½-inch discs instead of two 1-inch discs) for faster, more even chilling. Mix in two separate batches if your mixer bowl is small — overfilling prevents proper creaming.
Summary
The Crispy and Chewy Chocolate Chip Cookie is a masterclass in controlled contrast—golden, shatter-prone edges giving way to a soft, yielding, almost fudgy center, all bound by deep caramel sweetness, rich chocolate, and a whisper of sea salt.
Its perfection hinges not on shortcuts, but on intentionality: precisely tempered butter, scientifically timed chilling, weighted accuracy, and the courage to underbake—transforming a humble pantry staple into a timeless, texturally transcendent experience.