Introduction
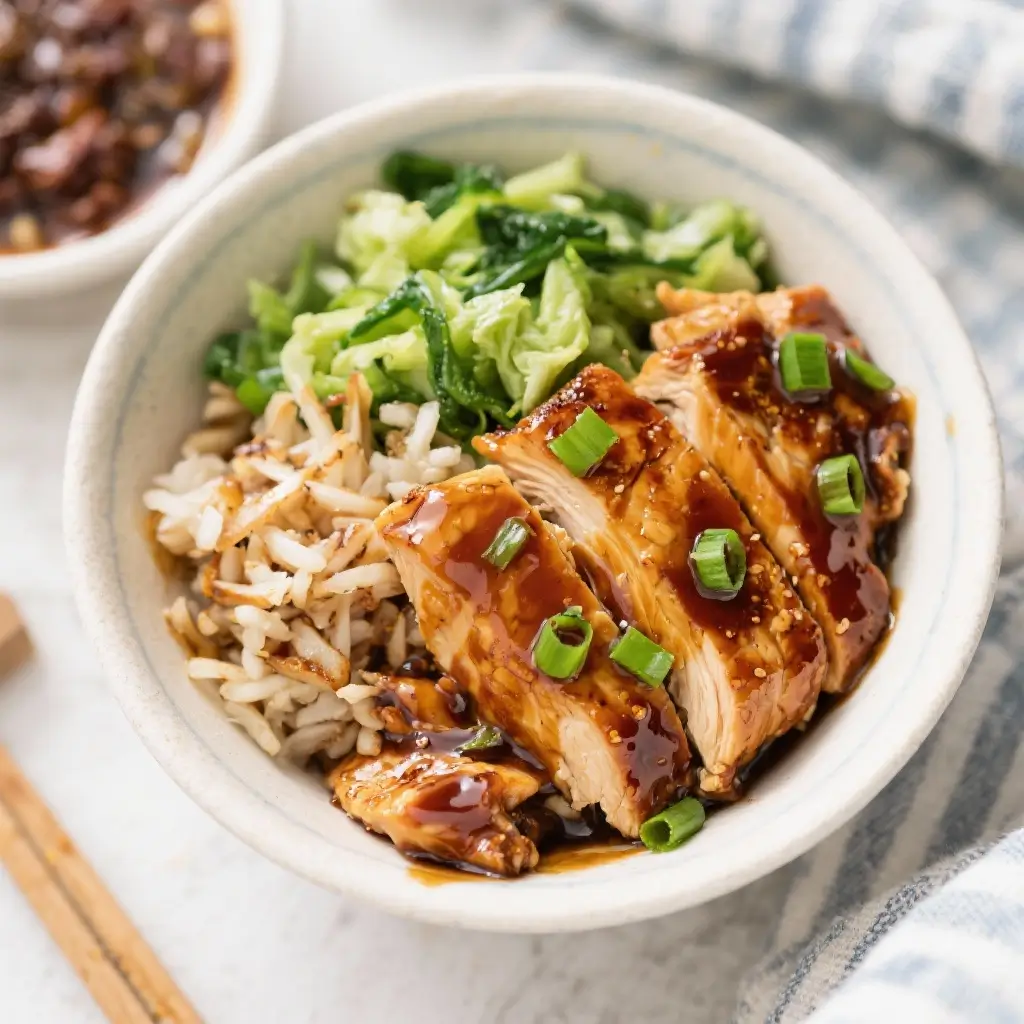
Welcome to a culinary journey that brings the vibrant flavors of Japan right into your kitchen with our delicious and satisfying Teriyaki Chicken Bowls. These bowls are more than just a meal—they’re a harmonious blend of savory, sweet, and umami-rich components that come together in perfect balance. Ideal for busy weeknights, meal prep Sundays, or a cozy family dinner, Teriyaki Chicken Bowls offer both convenience and gourmet appeal. Whether you’re new to Japanese-inspired cuisine or a seasoned food enthusiast, this dish is guaranteed to become a staple in your recipe rotation thanks to its bold flavor profile, ease of preparation, and endless customization options.
The History
The origins of teriyaki trace back to Japan during the Edo period (1603–1868), where the term “teri” refers to the lustrous, glossy sheen created by the sugar content in the sauce, and “yaki” means grilled or broiled. Traditionally, teriyaki was a cooking technique applied to fish—especially salmon or mackerel—where proteins were broiled or grilled with a glaze made from soy sauce, mirin (sweet rice wine), and sake. Over time, this method evolved and spread globally, particularly gaining popularity in Hawaii and North America through Japanese immigration and cultural fusion. In Hawaiian cuisine, teriyaki became adapted with local ingredients and often served over rice with tropical garnishes. Today’s Teriyaki Chicken Bowl is a modern interpretation, combining traditional Japanese flavors with Western presentation styles, resulting in a globally beloved comfort meal that’s both nourishing and deeply flavorful.
Ingredients Breakdown
To create an authentic yet approachable Teriyaki Chicken Bowl, it’s important to understand each ingredient and its role in building layers of taste and texture:
- Chicken Breast or Thighs: Boneless, skinless chicken breasts offer a lean protein option, while thighs provide richer flavor and tenderness due to higher fat content.
- Soy Sauce: The backbone of the teriyaki sauce, providing saltiness and umami depth. Use low-sodium soy sauce if you prefer better control over salt levels.
- Low-Sodium Soy Sauce: Helps maintain flavor without making the dish overly salty.
- Honey or Brown Sugar: Adds sweetness to counterbalance the saltiness and helps achieve that signature sticky, caramelized glaze when cooked.
- Fresh Ginger: Grated ginger infuses the sauce with a warm, slightly spicy note essential for authenticity.
- Garlic: Minced garlic enhances aroma and adds complexity to the sauce.
- Mirin: A sweet Japanese rice wine that softens the sharpness of soy sauce and contributes to the glossy finish.
- Rice Vinegar: Adds subtle tanginess and brightness, balancing the richness of the sauce.
- Sesame Oil: Just a drizzle imparts nutty fragrance, especially when used as a finishing oil.
- Green Onions: Provide freshness and color contrast; sliced thinly for garnish.
- Sesame Seeds: Toasted white or black sesame seeds add crunch and visual appeal.
- Vegetables: Common additions include steamed broccoli, sautéed bell peppers, carrots, snap peas, mushrooms, or zucchini—offering color, nutrients, and texture.
- Cooked Rice: Typically jasmine, sushi rice, or brown rice forms the base. For grain-free versions, cauliflower rice works beautifully.
- Cornstarch: Used as a thickening agent to give the teriyaki sauce its luxurious, clingy consistency.
- Water or Broth: Dilutes the sauce slightly and helps blend ingredients evenly during simmering.
Optional enhancements may include pineapple chunks (a nod to Hawaiian teriyaki), red pepper flakes for heat, or a splash of orange juice for citrusy brightness.
Step-by-Step Recipe
- Prepare the Rice: Rinse 1 cup of jasmine or sushi rice under cold water until the water runs clear. Combine with 1¾ cups water in a saucepan. Bring to a boil, then reduce heat to low, cover, and simmer for 15–18 minutes until water is absorbed and rice is tender. Remove from heat and let it sit, covered, for 10 minutes. Fluff with a fork before serving. Alternatively, use a rice cooker for hands-off preparation.
- Make the Teriyaki Sauce: In a small saucepan, combine ½ cup low-sodium soy sauce, ¼ cup water, ¼ cup honey (or packed brown sugar), 2 tablespoons mirin, 1 tablespoon rice vinegar, 1 tablespoon cornstarch, 2 cloves minced garlic, and 1 tablespoon freshly grated ginger. Whisk thoroughly to dissolve cornstarch. Place over medium heat and bring to a gentle boil, stirring frequently. Reduce heat and simmer for 3–5 minutes until the sauce thickens and coats the back of a spoon. Remove from heat and set aside. This makes approximately 1 cup of sauce.
- Marinate the Chicken (Optional): Cut 1½ pounds of boneless chicken into bite-sized pieces. Place in a bowl and pour ¼ cup of the prepared teriyaki sauce over the chicken. Toss to coat and marinate for at least 15 minutes (or up to 2 hours in the refrigerator) for deeper flavor infusion.
- Cook the Chicken: Heat 1 tablespoon of neutral oil (like vegetable or avocado oil) in a large skillet or wok over medium-high heat. Add the marinated chicken in a single layer, reserving excess marinade. Cook for 5–7 minutes, turning occasionally, until golden brown and cooked through (internal temperature reaches 165°F). Push chicken to one side of the pan.
- Sauté the Vegetables: Add chopped vegetables (such as broccoli florets, sliced bell peppers, and carrots) to the empty side of the skillet. Drizzle with a little sesame oil and stir-fry for 4–6 minutes until crisp-tender. You can also steam or roast vegetables separately for different textures.
- Glaze the Chicken: Pour the remaining teriyaki sauce into the skillet with the chicken and vegetables. Stir everything together and simmer for 2–3 minutes until heated through and well-coated. The sauce will thicken further and cling to the ingredients.
- Assemble the Bowls: Divide the cooked rice among serving bowls. Top generously with the teriyaki chicken and vegetables. Drizzle with extra sauce if desired.
- Garnish and Serve: Sprinkle with sliced green onions, toasted sesame seeds, and optional extras like pickled ginger, nori strips, or chili flakes. Serve immediately while hot.
Tips
- Balancing Sweetness: Adjust honey or sugar based on your preference. Some brands of soy sauce vary in saltiness, so taste as you go.
- Avoid Burning: Teriyaki sauce contains sugar, which can burn easily. Keep heat at medium or medium-high and stir frequently during cooking.
- Thicker Glaze? If you want a stickier coating, increase cornstarch by ½ teaspoon or reduce the liquid slightly.
- Meal Prep Friendly: Cook the components separately and store them in airtight containers. Reheat in a skillet or microwave, adding a splash of water or broth to refresh the sauce.
- Double the Sauce: Make a larger batch of teriyaki sauce and store it in the fridge for up to two weeks or freeze for three months. It’s excellent for quick stir-fries, glazing salmon, or as a dipping sauce.
- Use Fresh Ingredients: Freshly grated ginger and minced garlic make a noticeable difference compared to powdered versions.
- Don’t Overcrowd the Pan: When searing chicken, cook in batches if necessary to ensure proper browning rather than steaming.
- Rest the Chicken: Let marinated chicken come to room temperature before cooking for even doneness.
- Rice Perfection: After cooking, let rice rest covered for 10 minutes to absorb residual moisture and achieve fluffy grains.
- Add Crunch: Top with crispy fried onions, tempura flakes, or roasted edamame for added texture.
Variations and Customizations
The beauty of Teriyaki Chicken Bowls lies in their versatility. Here are numerous ways to personalize your dish:
- Protein Swaps: Replace chicken with salmon, shrimp, tofu, tempeh, or thinly sliced beef for different dietary preferences.
- Vegan Option: Use firm tofu or seitan, substitute honey with maple syrup or agave nectar, and ensure all other ingredients are plant-based.
- Gluten-Free Version: Use tamari or a certified gluten-free soy sauce instead of regular soy sauce to accommodate gluten sensitivities.
- Pineapple Teriyaki: Add diced fresh pineapple during the last few minutes of cooking or serve on top for a sweet-tart tropical twist inspired by Hawaiian plates.
- Spicy Kick: Stir 1–2 teaspoons of sriracha, gochujang, or chili garlic sauce into the teriyaki sauce, or garnish with sliced jalapeños.
- Different Grains: Swap white rice for brown rice, quinoa, farro, or wild rice blend for increased fiber and nuttiness.
- Vegetable Rotations: Try bok choy, asparagus, spinach, cabbage slaw, or roasted sweet potatoes for seasonal variety.
- Korean Fusion: Add kimchi on the side, sprinkle with gochugaru (Korean chili flakes), or mix in a bit of sesame paste for a Korean-Japanese fusion flair.
- Buddha Bowl Style: Turn it into a deconstructed bowl with hummus, avocado slices, sprouts, and pickled veggies alongside teriyaki chicken.
- Noodle Base: Instead of rice, serve over soba noodles, udon, or ramen for a heartier, slurp-worthy version.
- Breakfast Bowl: Top with a fried egg—the yolk acts as a rich sauce when broken over the bowl.
- Cold Salad Version: Chill the chicken and vegetables and serve over mixed greens with a teriyaki vinaigrette for a refreshing lunch option.
Health Considerations and Nutritional Value
Teriyaki Chicken Bowls can be part of a balanced diet when prepared mindfully. Here’s a breakdown of nutritional considerations:
- Calories: A typical serving (without extra sauce or high-calorie toppings) ranges between 450–600 calories, depending on portion sizes and ingredients used.
- Protein: Chicken provides high-quality lean protein (about 30–40g per serving), supporting muscle repair and satiety.
- Carbohydrates: Primarily from rice and natural sugars in the sauce. Using brown rice or cauliflower rice increases fiber and reduces glycemic impact.
- Fat: Generally low in saturated fat, especially when using chicken breast. Sesame oil adds healthy monounsaturated and polyunsaturated fats in moderation.
- Sodium: Soy sauce is naturally high in sodium. Opt for low-sodium versions and avoid oversaucing to manage intake, especially for those with hypertension.
- Sugar Content: Honey and mirin contribute natural sugars. For lower sugar options, reduce sweeteners or use sugar substitutes like monk fruit in the sauce.
- Antioxidants & Phytonutrients: Garlic, ginger, and colorful vegetables provide anti-inflammatory compounds and immune-supportive nutrients.
- Digestive Benefits: Ginger aids digestion and may help reduce nausea, while fiber-rich veggies support gut health.
- Portion Control: Serve in moderate portions with emphasis on vegetables (aim for half the bowl) to boost nutrient density without excess calories.
- Allergens: Contains soy and sesame. Always check labels if serving someone with allergies, and consider substitutions where needed.
For individuals managing diabetes, heart disease, or weight goals, modifying ingredients—such as using less sauce, increasing non-starchy vegetables, and choosing whole grains—can make this dish both delicious and health-conscious.
Ingredients
- 1½ lbs boneless, skinless chicken breasts or thighs, cut into 1-inch cubes
- 1 cup uncooked jasmine rice (or brown rice/cauliflower rice)
- 1½ cups water (for cooking rice)
- ½ cup low-sodium soy sauce
- ¼ cup honey (or packed brown sugar)
- ¼ cup mirin (Japanese sweet rice wine)
- 1 tbsp rice vinegar
- 1 tbsp cornstarch
- 2 cloves garlic, minced
- 1 tbsp fresh ginger, grated
- ¼ cup water (for sauce)
- 1 tbsp neutral oil (vegetable, canola, or avocado)
- 2 cups mixed vegetables (broccoli, bell peppers, carrots, snap peas)
- 1 tsp sesame oil (for finishing)
- Green onions, sliced (for garnish)
- Toasted sesame seeds (for garnish)
- Optional: pineapple chunks, red pepper flakes, pickled ginger
Directions
- In a saucepan, combine rice and water. Bring to a boil, cover, reduce heat to low, and simmer for 15–18 minutes (or per package instructions). Remove from heat, let stand 10 minutes, then fluff with a fork.
- While rice cooks, prepare the teriyaki sauce: In a small saucepan, whisk together soy sauce, honey, mirin, rice vinegar, cornstarch, garlic, ginger, and ¼ cup water.
- Heat the sauce mixture over medium heat, stirring constantly, until it begins to bubble and thicken (about 3–5 minutes). Once it coats the back of a spoon, remove from heat and set aside.
- Marinate chicken: Place chicken pieces in a bowl and pour ¼ cup of the cooled teriyaki sauce over them. Mix well and let sit for 15–30 minutes.
- Heat 1 tbsp neutral oil in a large skillet or wok over medium-high heat. Add chicken in a single layer and cook 5–7 minutes, turning occasionally, until golden and cooked through. Transfer to a plate.
- Add chopped vegetables to the same skillet. Stir-fry 4–6 minutes until crisp-tender. Return chicken to the pan.
- Pour remaining teriyaki sauce over chicken and vegetables. Stir well and simmer 2–3 minutes until everything is heated and coated.
- Drizzle with sesame oil and toss to combine.
- To assemble bowls: Divide rice among four bowls. Top with teriyaki chicken and vegetables.
- Garnish with green onions, sesame seeds, and any optional toppings. Serve immediately.
FAQ
Can I make teriyaki sauce ahead of time?
Yes! Teriyaki sauce keeps well in an airtight container in the refrigerator for up to 2 weeks or can be frozen for up to 3 months. Reheat gently on the stove or in the microwave before using.
Is teriyaki chicken healthy?
It can be! By controlling sodium, sugar, and portion sizes, and loading up on vegetables, teriyaki chicken becomes a nutritious, protein-packed meal. Choose lean chicken, whole grains, and minimal added sugar for a healthier version.
Can I use frozen vegetables?
Absolutely. Frozen broccoli, stir-fry blends, or edamame work well—just thaw and drain excess moisture before adding to the pan to prevent sogginess.
How do I store leftovers?
Store components separately in airtight containers in the refrigerator for up to 4 days. Reheat in a skillet with a splash of water to revive the sauce, or microwave gently.
Why did my sauce turn out too thin or too thick?
Too thin? Simmer longer to reduce or add a cornstarch slurry (½ tsp cornstarch + 1 tsp water). Too thick? Whisk in a little warm water or broth to loosen.
Can I bake the chicken instead of stovetop?
Yes. Marinate chicken, place on a lined baking sheet, and bake at 400°F for 20–25 minutes, flipping halfway. Brush with sauce in the last 5–10 minutes to caramelize.
What can I use instead of mirin?
Substitute with dry sherry, sweet marsala wine, or a mix of rice vinegar and sugar (1 tbsp rice vinegar + 1 tsp sugar per 1 tbsp mirin).
Are teriyaki chicken bowls kid-friendly?
Definitely! Kids love the sweet-savory flavor. Serve with mild vegetables and fun toppings like sesame seeds or pineapple to encourage eating.
Summary
Delicious, versatile, and easy to customize, Teriyaki Chicken Bowls bring restaurant-quality flavor to your home kitchen with minimal effort. Packed with protein, vibrant vegetables, and a glossy homemade sauce, they’re a satisfying meal the whole family will love.