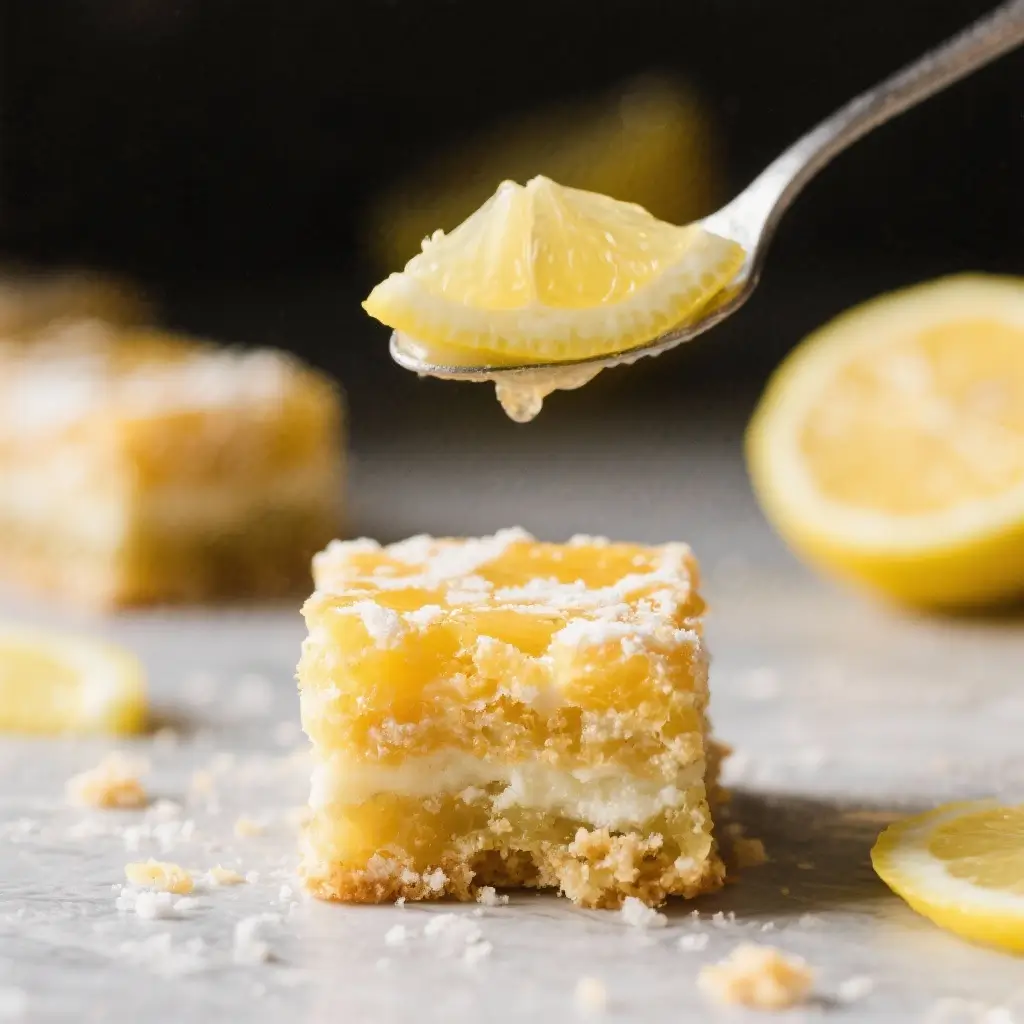
Lemon Bars: A Zesty Delight That Brightens Every Occasion
Lemon bars are a classic American dessert that combines the perfect balance of sweet and tart in every bite. With their buttery shortbread crust and smooth, tangy lemon filling, they’ve become a staple at family gatherings, holiday parties, and afternoon tea tables across the country. Loved for their vibrant flavor and elegant simplicity, lemon bars offer an effortless way to impress guests or treat yourself to a refreshing confection. Whether you’re a seasoned baker or trying your hand at dessert-making for the first time, this guide will walk you through everything you need to know about crafting the ultimate lemon bar—right from its history to expert tips, variations, and nutritional insights.
The History of Lemon Bars
The exact origins of lemon bars are somewhat hazy, but their roots can be traced back to mid-20th century American home cooking. They likely evolved from earlier European custard tarts and lemon curd desserts brought over by immigrants and adapted with American ingredients and baking techniques. The rise of boxed cake mixes and condensed milk in post-war America encouraged experimentation with simple, one-bowl desserts, paving the way for easy-to-make treats like lemon bars.
By the 1970s and 80s, lemon bars began appearing regularly in community cookbooks, women’s magazines, and recipe exchanges. Their popularity soared thanks to their bright, refreshing taste and ease of preparation. The classic version typically features a shortbread-like base topped with a luscious lemon filling made from eggs, sugar, flour, and fresh lemon juice, baked until set and dusted with powdered sugar. Over time, regional and personal variations emerged, incorporating different citrus fruits, alternative flours, and even vegan substitutes, making lemon bars a versatile favorite across generations.
Ingredients Breakdown: What Makes a Perfect Lemon Bar?
The magic of lemon bars lies in the harmony between two essential components: the crust and the filling. Each ingredient plays a vital role in creating the ideal texture, flavor, and structure. Let’s take a closer look at what goes into each layer and why it matters.
The Crust:
- Butter (unsalted): Provides richness and flakiness. Cold butter ensures a tender, melt-in-your-mouth shortbread base.
- All-purpose flour: Gives structure to the crust. Some bakers substitute part of it with almond flour for a nutty twist.
- Powdered sugar: Adds sweetness without making the dough too wet. It also helps create a fine, crumbly texture.
- Salt: Enhances all flavors and balances the sweetness.
- Vanilla extract (optional): Adds depth and warmth to the crust.
The Filling:
- Fresh lemon juice: The star of the show. Freshly squeezed juice delivers a vibrant, clean tartness. Bottled juice can work in a pinch but often lacks brightness.
- Lemon zest: Contains essential oils that intensify the lemon flavor. Always use organic lemons when zesting.
- Granulated sugar: Sweetens the filling and helps thicken the custard as it bakes.
- Eggs: Act as a binder and give the filling its silky, custard-like consistency. Room temperature eggs blend more smoothly.
- All-purpose flour: Helps stabilize the filling and prevent cracking.
- Baking powder (optional, in some recipes): Can add slight lift and softness to the filling.
Step-by-Step Recipe for Classic Lemon Bars
Follow these detailed steps to create perfectly balanced lemon bars with a crisp crust and velvety filling.
Ingredients
Makes 16 squares (8×8 inch pan)
- 1 cup (2 sticks / 227g) unsalted butter, cold and cubed
- 2 cups (250g) all-purpose flour
- 1/2 cup (60g) powdered sugar, plus extra for dusting
- 1/4 teaspoon salt
- 3 large eggs, room temperature
- 1 1/2 cups (300g) granulated sugar
- 1/4 cup (30g) all-purpose flour
- 2 tablespoons grated lemon zest (from about 2–3 large lemons)
- 1/2 cup (120ml) freshly squeezed lemon juice (from about 3–4 lemons)
Directions
- Preheat oven to 350°F (175°C). Line an 8×8 inch baking pan with parchment paper, leaving overhang on two sides for easy removal. Lightly grease the paper and sides.
- Make the crust: In a food processor, pulse together the cold cubed butter, 2 cups flour, powdered sugar, and salt until the mixture resembles coarse crumbs. Press evenly into the bottom of the prepared pan. Use a flat-bottomed glass or measuring cup to press firmly and smooth the surface.
- Bake the crust: Place in the preheated oven and bake for 20–25 minutes, or until lightly golden around the edges. Remove and let cool slightly while preparing the filling. Keep oven on.
- Prepare the filling: In a large bowl, whisk together eggs and granulated sugar until smooth and slightly pale. Add the 1/4 cup flour and whisk until no lumps remain. Stir in lemon zest and lemon juice until fully combined.
- Pour filling over warm crust: Gently pour the lemon mixture over the partially baked crust. Return the pan to the oven.
- Bake the bars: Bake for 20–25 minutes, or until the filling is set and no longer jiggles in the center. A toothpick inserted should come out clean.
- Cool completely: Remove from oven and allow to cool at room temperature for 30 minutes. Then transfer to the refrigerator and chill for at least 2 hours (preferably 3–4) to ensure clean slicing.
- Cut and serve: Using the parchment overhang, lift the bars out of the pan. Place on a cutting board and slice into squares using a sharp knife wiped clean between cuts. Dust generously with powdered sugar just before serving.
Tips for Perfect Lemon Bars Every Time
- Use fresh lemons: Never underestimate the difference fresh-squeezed juice and zest make. They provide a brighter, more complex flavor than bottled alternatives.
- Room temperature eggs: Help emulsify the filling better, resulting in a smoother texture.
- Don’t overbake: The filling should be set but still have a slight wobble in the very center when removed from the oven—it will continue to firm up as it cools.
- Chill thoroughly: This step is crucial! Cutting into warm bars leads to messy edges and a runny filling.
- Dust with powdered sugar right before serving: Prevents it from dissolving into the surface too early. For a professional touch, use a stencil or sieve for even distribution.
- Sharp knife is key: A hot knife (run under hot water and dried) can help achieve cleaner cuts, especially for presentation.
- Store properly: Keep refrigerated in an airtight container with layers separated by parchment paper to avoid sticking.
Variations and Customizations
While the classic lemon bar is timeless, there are countless ways to personalize this dessert to suit your taste or dietary needs.
Flavor Twists:
- Lime or orange bars: Substitute lemon juice and zest with lime or orange for a tropical variation.
- Berry swirl: Swirl raspberry or strawberry puree into the filling before baking for a fruity contrast.
- Honey or maple syrup: Replace part of the granulated sugar with honey or maple syrup for a nuanced sweetness (adjust liquid accordingly).
- Herbal notes: Infuse the filling with a hint of lavender, basil, or mint for a sophisticated twist.
Dietary Adaptations:
- Gluten-free: Use a 1:1 gluten-free flour blend in both crust and filling. Almond flour crusts also work beautifully.
- Vegan: Substitute butter with vegan margarine or coconut oil. Replace eggs with flax eggs (3 tbsp ground flax + 9 tbsp water) or commercial egg replacers. Use plant-based sugar.
- Dairy-free: Simply use dairy-free butter alternatives.
- Lower sugar: Reduce sugar in the filling slightly and use a natural sweetener like erythritol or monk fruit. Note: texture may change slightly.
Presentation Ideas:
- Mini bars: Bake in a muffin tin for individual portions.
- Layered bars: Add a white chocolate drizzle or a thin layer of cream cheese beneath the lemon filling.
- Garnishes: Top with fresh berries, edible flowers, or a sprinkle of toasted coconut.
- Seasonal themes: Add pastel colors for spring, or pair with meringue peaks for a lemon meringue bar effect.
Health Considerations and Nutritional Value
Lemon bars are undeniably delicious, but understanding their nutritional profile can help you enjoy them mindfully.
Nutritional Breakdown (per serving, approx. 1/16 of recipe):
- Calories: ~220–250
- Total Fat: 12–15g (mostly from butter)
- Saturated Fat: 7–8g
- Carbohydrates: 28–32g
- Sugars: 20–24g (primarily from added sugar)
- Protein: 2–3g
- Fiber: 0.5–1g
- Vitamin C: High due to lemon juice (about 15–20% DV per serving)
- Calcium & Iron: Minimal amounts
Health Notes:
- High in sugar and fat: Enjoy in moderation, especially if managing blood sugar or heart health.
- Lemons are beneficial: Rich in antioxidants, vitamin C, and citric acid, which may support immune function and digestion.
- Portion control: Cutting smaller squares allows for satisfying indulgence without excess.
- Homemade advantage: You control the ingredients—avoid preservatives, artificial flavors, and excess additives found in store-bought versions.
- Energy-dense: Good as an occasional treat or energy boost, but not ideal for daily consumption.
Frequently Asked Questions (FAQ)
Q: Why did my lemon bars crack?
A: Cracking usually occurs from overbaking or rapid cooling. Avoid opening the oven door during baking and allow bars to cool gradually at room temperature before refrigerating.
Q: Can I freeze lemon bars?
A: Yes! Wrap tightly in plastic wrap and place in an airtight container. Freeze for up to 3 months. Thaw in the refrigerator and dust with powdered sugar before serving.
Q: My filling came out runny. What went wrong?
A: Underbaking is the most common cause. Ensure the center is set and a toothpick comes out clean. Also, make sure you used enough flour and didn’t skimp on eggs.
Q: Can I use bottled lemon juice?
A: While possible, fresh lemon juice provides superior flavor and acidity. Bottled juice often tastes flat or metallic due to preservatives.
Q: How long do lemon bars last?
A: Stored in the refrigerator in an airtight container, they stay fresh for 4–5 days. For best quality, consume within 3 days.
Q: Can I make them ahead of time?
A: Absolutely! Lemon bars actually benefit from being made a day in advance—the flavors deepen and the texture firms up nicely.
Q: Can I double the recipe?
A: Yes, but use a 9×13 inch pan and adjust baking times slightly. The crust may need 25–28 minutes, and the filling 25–30 minutes. Watch closely for doneness.
Summary
Lemon bars are a timeless dessert that marries a buttery shortbread crust with a vibrant, citrusy filling for a treat that’s both refreshing and indulgent. Easy to make, endlessly customizable, and beloved by all ages, they’re the perfect addition to any table.