Homemade Granola: A Crunchy, Healthy Delight for Every Breakfast Table
There’s something uniquely satisfying about a bowl of homemade granola. Whether sprinkled over yogurt, enjoyed with milk, or eaten by the handful as a snack, granola brings together crisp textures, rich flavors, and wholesome ingredients in perfect harmony. Unlike store-bought versions that often contain hidden sugars and preservatives, making your own granola allows you to control every ingredient, tailor it to your taste, and enjoy a fresher, more nutritious breakfast staple. In this comprehensive guide, we’ll dive into the fascinating history of granola, break down its core components, provide a detailed step-by-step recipe, offer expert tips, explore variations, discuss health considerations, and answer frequently asked questions—all so you can master the art of crafting the perfect batch of homemade granola.
The History of Granola
Granola may feel like a modern health food trend, but its roots stretch back to the 19th century. The story begins in 1863 with Dr. James Caleb Jackson, a physician at the Jackson Sanitarium in Dansville, New York. He created a breakfast dish called “granula,” made from graham flour dough that was baked until hard, then broken into chunks and served with milk. Due to trademark issues, later versions adopted the name “granola.” However, it wasn’t until the early 20th century that John Harvey Kellogg, founder of the Kellogg Company, developed a similar product using toasted whole wheat flakes—laying the groundwork for modern breakfast cereals.
Granola gained widespread popularity during the 1960s and 1970s, coinciding with the rise of the natural foods movement and increasing consumer interest in vegetarianism and holistic nutrition. It became synonymous with health-conscious lifestyles, backpackers, and outdoor adventurers due to its portability and energy-boosting properties. Today, granola is a global phenomenon, available in countless varieties—from classic honey-oat blends to exotic spice-infused mixes—but nothing beats the flavor, texture, and satisfaction of a fresh, homemade version crafted in your own kitchen.
Ingredients Breakdown: What Makes Granola Tick?
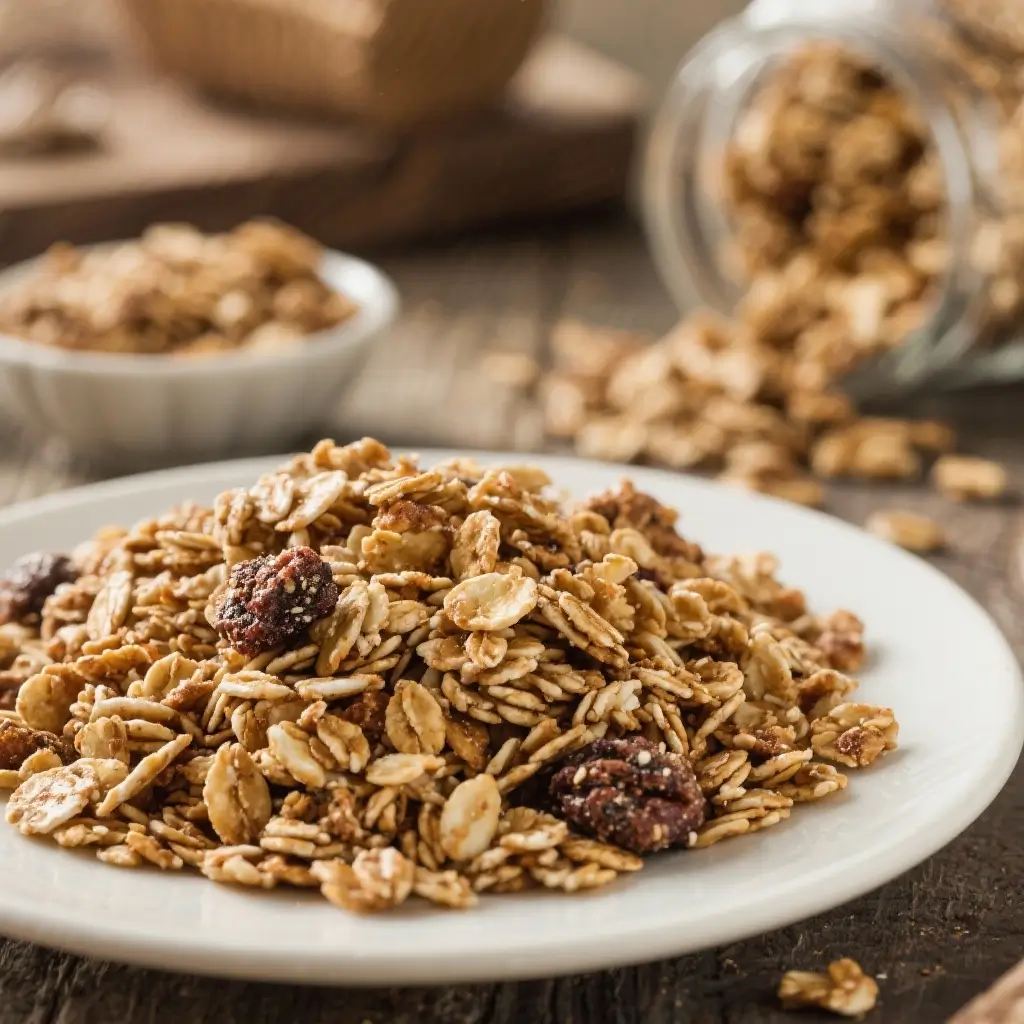
The magic of granola lies in its simplicity and versatility. At its core, granola is a mixture of rolled oats, sweeteners, fats, flavorings, and add-ins that are baked until golden brown and crispy. Let’s take a closer look at each component:
- Base Grains (Oats): Rolled oats form the foundation of most granola recipes. They’re high in fiber, particularly beta-glucan, which supports heart health and helps regulate blood sugar. Quick oats can be used, but old-fashioned rolled oats yield a chewier, more satisfying crunch. Steel-cut oats are less common due to their density but can be incorporated in small amounts for added texture.
- Sweeteners: These bind the ingredients and promote browning. Common options include pure maple syrup, honey, agave nectar, brown rice syrup, or coconut nectar. Each imparts a unique flavor profile—maple syrup adds earthiness, honey brings floral notes, and agave offers a milder sweetness. For vegan versions, avoid honey and opt for plant-based syrups.
- Fats: Essential for richness and even baking. Coconut oil, olive oil, avocado oil, or neutral vegetable oils work well. Melted coconut oil adds a subtle tropical aroma and helps create clusters, while extra virgin olive oil lends a savory depth ideal for low-sugar or gourmet versions.
- Flavor Enhancers: Vanilla extract, almond extract, citrus zest, cinnamon, nutmeg, cardamom, or pumpkin pie spice elevate the taste. Salt—preferably sea salt or kosher—is crucial for balancing sweetness.
- Binders (Optional): To encourage large, clustery granola pieces, some recipes include egg whites. Whipped and folded into the mix, they create a crispy, cracker-like texture when baked.
- Add-Ins: Nuts (almonds, walnuts, pecans, cashews), seeds (pumpkin, sunflower, flax, chia, sesame), dried fruits (raisins, cranberries, apricots, dates, mango), unsweetened coconut flakes, cacao nibs, dark chocolate chips, or freeze-dried fruit add layers of flavor, texture, and nutrition.
Every ingredient plays a role—not just in taste, but in how the granola bakes, crisps, and stores. Understanding these components empowers you to experiment confidently and customize your blend.
Step-by-Step Recipe: How to Make Perfect Homemade Granola
Follow this detailed method to create a deliciously crunchy, aromatic batch of granola that stays fresh for weeks. This recipe yields approximately 6 cups and takes about 45 minutes, including prep and cooling time.
Ingredients
- 3 cups old-fashioned rolled oats (certified gluten-free if needed)
- 1 cup raw nuts (e.g., chopped almonds, walnuts, or pecans)
- ½ cup raw seeds (e.g., pumpkin seeds, sunflower seeds)
- ¼ cup unsweetened shredded coconut (optional)
- 1 tsp ground cinnamon
- ½ tsp sea salt
- ⅓ cup pure maple syrup or honey (use maple syrup for vegan option)
- ⅓ cup melted coconut oil or neutral oil
- 1 tsp pure vanilla extract
- 1 large egg white (optional, for extra clumping)
- ¾ cup dried fruit (e.g., raisins, dried cranberries, chopped apricots)
- ⅓ cup dark chocolate chips or cacao nibs (added after baking)
Directions
- Preheat Oven & Prepare Pan: Preheat your oven to 300°F (150°C). Line a large rimmed baking sheet with parchment paper or a silicone baking mat to prevent sticking.
- Mix Dry Ingredients: In a large mixing bowl, combine the rolled oats, chopped nuts, seeds, shredded coconut (if using), cinnamon, and salt. Stir thoroughly to distribute spices and ingredients evenly.
- Prepare Wet Mixture: In a separate bowl, whisk together the maple syrup (or honey), melted coconut oil, and vanilla extract until smooth and emulsified. If using an egg white, beat it lightly in a small bowl until frothy, then whisk it into the wet ingredients. The egg white helps create those coveted large clusters.
- Combine Wet and Dry: Pour the wet mixture over the dry ingredients. Use a spatula or wooden spoon to stir until every oat and nut is evenly coated. The mixture should clump slightly when pressed together—if it seems too dry, add an extra tablespoon of oil or syrup.
- Spread on Baking Sheet: Transfer the mixture to the prepared baking sheet. Spread it out into a single, even layer. For larger clusters, gently press the mixture down with the back of a spoon or spatula to create compact sections. Avoid spreading too thin.
- Bake Low and Slow: Bake for 30–40 minutes, rotating the pan halfway through for even browning. The granola is done when it turns a deep golden brown, especially around the edges. It will still feel soft when hot but will crisp up as it cools. Do not stir during baking if you want big clusters.
- Cool Completely: Remove the pan from the oven and let the granola cool completely without stirring—this is key to forming clusters. Allow it to sit for at least 45 minutes to 1 hour.
- Add Final Mix-Ins: Once cooled, break the granola into desired chunk sizes. Stir in the dried fruit and chocolate chips or cacao nibs. If adding coconut flakes, consider toasting them separately and mixing in now to preserve texture.
- Store Properly: Transfer the granola to an airtight container. Store at room temperature for up to 4 weeks, or freeze for longer shelf life (up to 3 months).
Pro Tips for Making the Best Homemade Granola
- Don’t Overbake: Granola continues to crisp as it cools. If it looks slightly underdone when you pull it out, that’s okay—it will firm up. Overbaking leads to burnt edges and bitterness.
- Avoid Stirring Mid-Bake: Resist the urge to stir! Stirring breaks up clusters. For chunky granola, keep it undisturbed until fully cooled.
- Use Parchment Paper: It prevents sticking and makes cleanup effortless. Silicone mats also work, but ensure they’re rated for the temperature used.
- Cool Before Breaking: Patience pays off. Letting the granola cool completely ensures maximum crunch and cluster formation.
- Customize Sweetness: Adjust syrup or honey based on your preference. You can reduce sweetener by 25% and add mashed banana or applesauce for natural sweetness and moisture.
- Toast Nuts Separately (Optional): For deeper flavor, toast nuts and seeds before mixing them in. Just be careful not to burn them.
- Double the Batch: Granola keeps well and makes a great gift. Consider making a double batch and storing half in the freezer.
- Watch the Oil: Too much oil can make granola greasy. Stick to the recommended ratios unless adjusting for specific dietary needs.
Variations and Customizations: Make It Your Own
One of the greatest joys of homemade granola is the ability to personalize it endlessly. Here are some popular variations to inspire your creativity:
- Tropical Granola: Use coconut oil, add dried pineapple, mango, banana chips, and extra coconut flakes. Flavor with macadamia nuts and a hint of lime zest.
- Chocolate-Peanut Butter Granola: Swap maple syrup for peanut butter blended with a little honey and oil. Add cocoa powder to the dry mix and finish with chocolate chips.
- Apple Cinnamon Granola: Mix in dried apples, increase cinnamon, add a pinch of nutmeg, and use apple cider instead of part of the syrup for a tangy twist.
- Spiced Chai Granola: Infuse the oil with chai spices (cinnamon, cardamom, cloves, ginger, black pepper), then strain and use in the recipe. Add golden raisins and slivered almonds.
- Seedy Superfood Granola: Replace half the oats with additional seeds (pumpkin, sunflower, flax, hemp, chia). Use minimal sweetener and top with goji berries and mulberries.
- Savory Herb Granola: Skip the sweeteners and use olive oil, rosemary, thyme, garlic powder, black pepper, and Parmesan (if not vegan). Great as a salad topping or cheese board accompaniment.
- Protein-Packed Granola: Add two tablespoons of unflavored or vanilla protein powder to the dry mix and include roasted soy nuts or chickpeas for crunch.
- Kid-Friendly Fun Mix: Use mini marshmallows, colorful sprinkles (after baking), and kid-approved dried fruit. Opt for mild honey and butter flavor (using ghee) for familiarity.
You can also adapt granola for dietary needs: gluten-free (use certified GF oats), vegan (skip honey and egg white), paleo (replace oats with nuts, seeds, and coconut), keto (use low-carb nuts and sugar-free sweeteners), or nut-free (substitute seeds and oats only).
Health Considerations and Nutritional Value
While granola is often marketed as a health food, its nutritional profile varies widely depending on ingredients. Store-bought versions can be loaded with added sugars, hydrogenated oils, and empty calories. Homemade granola gives you full control, allowing you to maximize nutrition while minimizing processed additives.
Nutritional Highlights (Per ¼ Cup Serving, Approximate):
- Calories: 150–180
- Fat: 8–10g (mostly healthy unsaturated fats from nuts and seeds)
- Carbohydrates: 18–22g (including 3–5g fiber)
- Protein: 4–6g
- Sugars: 5–8g (naturally occurring from fruit and minimal added sweeteners)
- Key Nutrients: Magnesium, iron, zinc, vitamin E, selenium, omega-3s (from flax/chia), and antioxidants.
Health Benefits:
- Heart Health: Oats and nuts support healthy cholesterol levels thanks to soluble fiber and monounsaturated fats.
- Digestive Health: High fiber content promotes regular bowel movements and gut microbiome balance.
- Energy Sustenance: Complex carbs and healthy fats provide long-lasting energy, ideal for athletes or active individuals.
- Blood Sugar Management: When made with low-glycemic sweeteners and balanced macros, granola can be part of a diabetic-friendly diet in moderation.
Potential Concerns:
- Calorie Density: Granola is energy-rich. A small handful goes a long way—measure servings to avoid overeating.
- Added Sugars: Even homemade versions can become sugary if sweeteners aren’t measured. Aim to keep added sugars under 8g per serving.
- Allergens: Nuts, seeds, coconut, and gluten (from oats) are common allergens. Always label accordingly if sharing.
- Oxalates: Some nuts and seeds are high in oxalates, which may be a concern for individuals prone to kidney stones.
For weight management or metabolic health, pair granola with Greek yogurt, cottage cheese, or fresh fruit rather than eating it dry. Portion control is essential—one serving is typically ¼ to ½ cup, not a heaping bowl.
Frequently Asked Questions (FAQ)
Q: Can I make granola without oil?
A: Yes, though oil contributes to crispiness and binding. You can substitute with unsweetened applesauce, mashed banana, or prune purée, but the texture will be chewier and less crunchy.
Q: Why didn’t my granola form clusters?
A: Clusters rely on binders. Try adding an egg white next time, pressing the mixture firmly onto the pan before baking, and avoiding stirring until completely cooled.
Q: Can I use instant oats?
A: Not recommended. Instant oats are too fine and will burn easily. Stick with old-fashioned rolled oats for best results.
Q: How do I store homemade granola?
A: Keep it in an airtight container at room temperature for up to 4 weeks. For longer storage, freeze in portioned bags for up to 3 months.
Q: Is granola safe for dogs?
A: Not always. Many granola recipes contain ingredients toxic to dogs, such as raisins, chocolate, xylitol, or excessive sugar. Never feed human granola to pets unless specifically formulated for them.
Q: Can I bake granola at a higher temperature for less time?
A: It’s not advisable. Low and slow baking ensures even toasting without burning. Higher heat risks scorching the sugars and creating bitter flavors.
Q: Can I make granola on the stovetop or in a slow cooker?
A: While unconventional, yes—some people toast granola mixtures in a large skillet over low heat, stirring frequently. A slow cooker method exists but requires careful monitoring to avoid sogginess.
Q: Why does my granola get soggy over time?
A: Exposure to moisture or humidity. Always use a dry spoon when scooping and re-crisp stale granola in a 300°F oven for 5–10 minutes.
Summary
Homemade granola is a delicious, customizable, and nutritious addition to any pantry, offering endless possibilities for flavor, texture, and dietary adaptation. By mastering the basics and experimenting with ingredients, you can create a healthier, tastier alternative to commercial cereals that delights the senses and fuels the body.