Microwave Caramels: A Quick and Delicious Homemade Treat
There’s something irresistibly comforting about a rich, chewy caramel—its buttery sweetness melting on the tongue with every bite. While traditional caramel recipes require constant stirring over a stovetop and careful temperature monitoring, modern kitchens offer a faster, easier alternative: microwave caramels. This convenient method allows you to whip up decadent homemade caramels in a fraction of the time, without sacrificing flavor or texture. Whether you’re making them for holiday gifts, dessert platters, or just a sweet indulgence at home, microwave caramels are surprisingly simple to make and endlessly customizable. In this comprehensive guide, we’ll dive deep into the history of caramels, break down the essential ingredients, provide a foolproof step-by-step recipe, and explore variations, health considerations, and expert tips to ensure your candy-making experience is a success.
The History of Caramels
The word “caramel” traces its roots back to the Spanish term caramelo, which itself may have originated from the Latin calamellus, meaning “sugar cane.” However, the concept of cooking sugar into a sticky, sweet confection has existed for centuries across various cultures. Ancient Indians and Persians were among the first to boil sugarcane juice to create early forms of caramelized sweets. By the 17th century, Europeans had refined sugar-boiling techniques, leading to the development of what we now recognize as caramel.
In the United States, caramels gained widespread popularity in the late 1800s, thanks to innovations in dairy processing and condensed milk. The invention of vacuum evaporation allowed manufacturers to produce large quantities of soft, chewy caramels efficiently. Names like Good & Plenty and Werther’s Original became household staples. Today, while store-bought caramels are widely available, there’s a growing trend toward artisanal, homemade versions that allow for control over ingredients and flavors. The microwave method is a contemporary twist on this timeless treat, offering a safe and accessible way for home cooks to enjoy fresh, creamy caramels without specialized equipment.
Ingredients Breakdown: What Makes Microwave Caramels Work
The magic of microwave caramels lies in a carefully balanced combination of simple pantry ingredients. Each plays a critical role in achieving the perfect texture and flavor profile:
- Sugar: Granulated sugar is the foundation of any caramel. When heated, it undergoes a chemical transformation known as caramelization, developing deep golden hues and complex flavor notes ranging from nutty to slightly bitter.
- Brown Sugar: Unlike white sugar, brown sugar contains molasses, which adds moisture, a richer color, and a deeper, more robust flavor. It also helps keep the caramels soft and chewy rather than brittle.
- Butter: Unsalted butter contributes richness and smoothness. It also prevents the sugar from crystallizing and enhances the mouthfeel of the final product. For a creamier texture, some recipes use salted butter or add a pinch of sea salt.
- Evaporated Milk: This is concentrated milk with about 60% of the water removed. It’s thicker than regular milk but not as dense as sweetened condensed milk. Evaporated milk provides a creamy base without added sugar, giving you better control over sweetness.
- Corn Syrup: Light corn syrup acts as an anti-crystallization agent. It prevents sugar molecules from re-forming crystals during cooling, ensuring a smooth, consistent texture. You can substitute honey or golden syrup if desired, though this may alter flavor and color.
- Vanilla Extract: Pure vanilla extract adds aromatic depth and warmth. It balances the sweetness and rounds out the overall flavor. Always use real vanilla for best results—imitation vanilla lacks complexity.
- Salt: A small amount of salt enhances all the other flavors through contrast. For gourmet appeal, consider using flaky sea salt either mixed in or sprinkled on top.
Optional additions include nuts (like pecans or walnuts), chocolate drizzle, espresso powder, or spices such as cinnamon or cardamom, allowing for endless personalization.
Step-by-Step Recipe: How to Make Perfect Microwave Caramels
This easy microwave caramel recipe yields approximately 36 small squares and takes less than 20 minutes of active time. Follow these detailed steps for flawless results every time.
Ingredients
- 1 cup (2 sticks) unsalted butter
- 2 cups granulated sugar
- 1 cup packed light brown sugar
- 1/4 cup light corn syrup
- 1 can (12 oz) evaporated milk
- 1 teaspoon pure vanilla extract
- 1/2 teaspoon fine sea salt (optional, for enhanced flavor)
Directions
- Prepare Your Pan: Line an 8×8-inch square baking dish with parchment paper, leaving an overhang on two opposite sides to help lift the caramels out later. Lightly grease the parchment with nonstick spray or a thin layer of butter.
- Combine Ingredients: In a large microwave-safe bowl (preferably glass or ceramic), add the butter, granulated sugar, brown sugar, corn syrup, evaporated milk, and salt. Stir gently to combine. The mixture will be thick and grainy at this stage.
- First Microwave Cycle: Place the bowl in the microwave and heat on high power for 4 minutes. Remove and stir well with a silicone spatula or wooden spoon, scraping down the sides. This initial heating begins dissolving the sugars and warming the dairy components.
- Second Microwave Cycle: Return the bowl to the microwave and heat for another 4 minutes. Stir again thoroughly. You should notice the mixture becoming smoother and starting to bubble slightly around the edges.
- Third Microwave Cycle: Heat for a third 4-minute interval. Stir once more. At this point, the mixture should be noticeably thinner and beginning to darken slightly.
- Final Heating: Microwave for one last 2–3 minute cycle. The total microwave time will typically be between 14 and 15 minutes. The mixture should reach a gentle boil and thicken slightly. To test doneness, drop a small amount of caramel into a cup of cold water. If it forms a soft ball that holds its shape but flattens when pressed, it has reached the “soft-ball stage” (approximately 235–240°F). This is crucial for achieving the right chewy consistency.
- Add Vanilla: Once the desired thickness is achieved, carefully remove the bowl from the microwave (it will be very hot). Stir in the vanilla extract. Be cautious—adding vanilla may cause slight bubbling due to steam release.
- Pour and Cool: Immediately pour the hot caramel mixture into the prepared pan. Use a greased spatula to spread it evenly into the corners. Avoid overworking it, as this could introduce air bubbles.
- Cool Completely: Allow the caramels to cool at room temperature for at least 2 hours, or until completely set. For faster setting, you can refrigerate them for 45–60 minutes, but avoid freezing as it may affect texture.
- Cut Into Squares: Using the parchment overhang, lift the slab of caramel out of the pan. Place it on a cutting board. Dip a sharp knife in hot water and wipe dry between cuts to achieve clean edges. Cut into 1-inch squares.
- Wrap or Store: Individually wrap caramels in wax paper or store them in an airtight container with layers separated by parchment paper to prevent sticking.
Tips for Success: Expert Advice for Flawless Microwave Caramels
- Use a Large Bowl: Choose a microwave-safe bowl that’s significantly larger than the volume of ingredients. The mixture will bubble up during heating, and a small bowl increases the risk of overflow.
- Stir Thoroughly Between Intervals: Incomplete mixing can result in uneven cooking and potential scorching. Always scrape the bottom and sides of the bowl.
- Avoid Overcooking: Microwaves vary in strength. If your microwave runs hot, reduce each interval to 3 minutes and monitor closely after 12 minutes. Overcooked caramels become hard and brittle.
- Don’t Rush Cooling: Cutting the caramels too soon will lead to smearing and misshapen pieces. Patience ensures clean cuts and proper texture development.
- Grease Tools: Keep a small amount of butter or cooking spray nearby to grease your spatula and knife. This prevents sticking and makes cleanup easier.
- Check Altitude Adjustments: If you live at high altitudes, water boils at lower temperatures, affecting candy stages. You may need to extend cooking time slightly or use a candy thermometer calibrated for elevation.
- Work Safely: The caramel mixture reaches extremely high temperatures. Use oven mitts when handling the bowl and keep children and pets away during preparation.
Variations and Customizations: Make It Your Own
One of the greatest advantages of making microwave caramels at home is the ability to customize them to suit your taste. Here are some creative ideas:
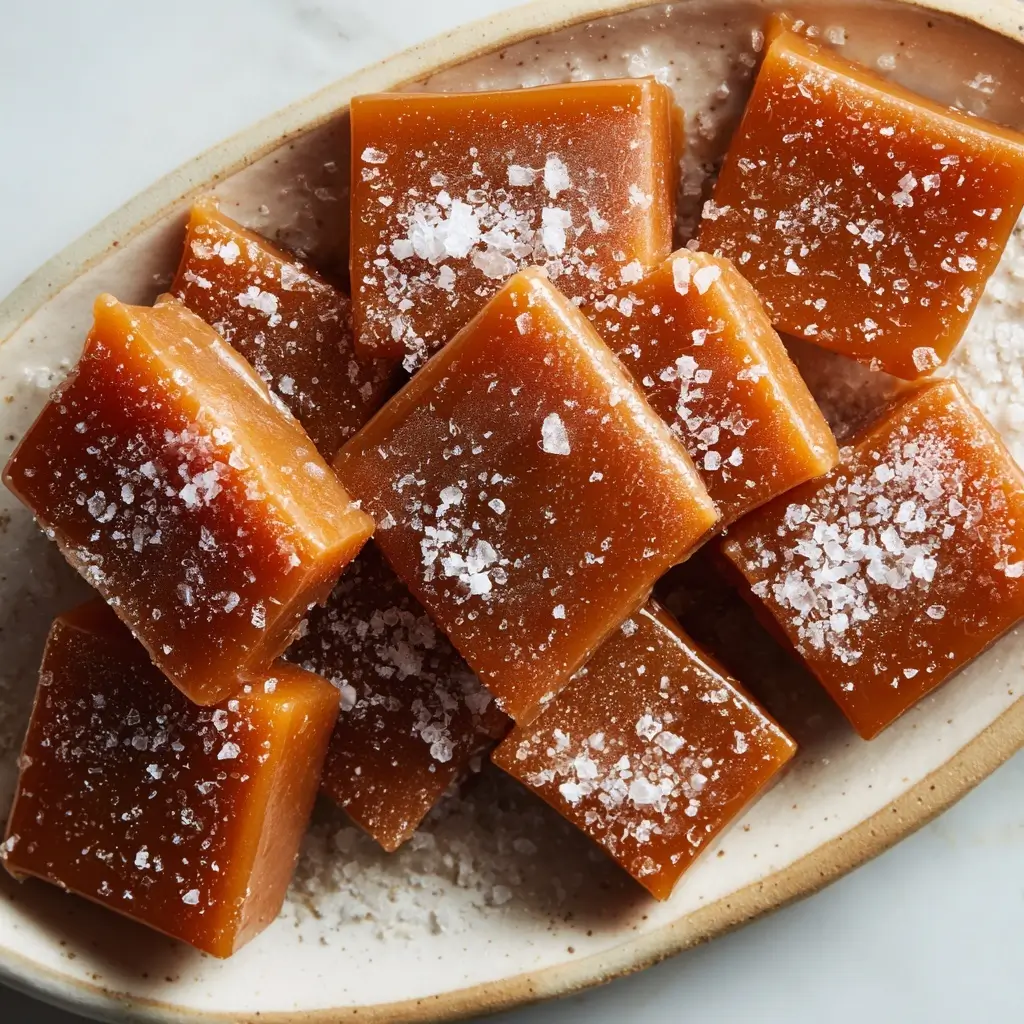
- Sea Salt Caramels: Sprinkle flaky sea salt on top immediately after pouring into the pan for a classic sweet-and-salty treat.
- Chocolate-Dipped Caramels: Melt dark, milk, or white chocolate and dip cooled caramel squares halfway. Let them set on parchment before serving.
- Nutty Caramels: Fold in 1/2 to 1 cup of toasted chopped pecans, walnuts, or almonds before pouring into the pan.
- Coffee Caramels: Add 1–2 teaspoons of instant espresso powder to the mixture before microwaving for a sophisticated mocha twist.
- Spiced Caramels: Mix in 1/2 teaspoon ground cinnamon, a pinch of nutmeg, or a dash of cayenne for warmth and complexity.
- Lactose-Free Option: Substitute evaporated milk with full-fat coconut milk and use dairy-free butter for a vegan-friendly version.
- Maple Caramels: Replace corn syrup with pure maple syrup and use maple sugar instead of part of the brown sugar for an autumnal flavor.
- Fruity Twist: Swirl in 2 tablespoons of fruit preserves (like raspberry or orange marmalade) after adding vanilla for a tangy contrast.
Health Considerations and Nutritional Value
While undeniably delicious, microwave caramels are a high-sugar, high-calorie confection best enjoyed in moderation. Here’s a general nutritional breakdown per serving (one 1-inch square):
- Calories: ~90–110
- Total Fat: 4–5g (mostly from butter)
- Saturated Fat: 2.5–3g
- Carbohydrates: 14–16g
- Sugars: 13–15g (naturally occurring and added)
- Protein: ~1g
- Sodium: 40–60mg (higher if salted)
Due to their high sugar content, individuals managing diabetes or insulin resistance should consume caramels sparingly. There are no significant vitamins or minerals in traditional recipes, though substitutions can improve nutritional profiles:
- Using coconut milk adds medium-chain triglycerides (MCTs), which some studies suggest may support metabolism.
- Replacing part of the sugar with erythritol or monk fruit sweetener can reduce glycemic impact, though texture may change.
- Adding nuts increases protein, fiber, and healthy fats.
Always consult a healthcare provider or dietitian for personalized advice, especially if you have food allergies (e.g., dairy, soy in some margarines) or dietary restrictions.
Frequently Asked Questions (FAQ)
Q: Can I double the recipe?
A: Yes, but only if your microwave and bowl can safely accommodate the increased volume. Doubling may require longer cooking times and more frequent stirring. It’s often safer to make two separate batches.
Q: Why did my caramels turn out too hard or too soft?
A: Hard caramels usually result from overcooking or exceeding the soft-ball stage. Soft or runny caramels haven’t been cooked long enough. Always perform the cold water test to check consistency.
Q: How long do microwave caramels last?
A: When stored in an airtight container at room temperature, they stay fresh for up to 2 weeks. In the refrigerator, they can last up to 3 weeks. Bring to room temperature before serving for best texture.
Q: Can I freeze microwave caramels?
A: Yes. Wrap individually or layer in an airtight container with parchment. Freeze for up to 3 months. Thaw in the refrigerator overnight, then bring to room temperature before eating.
Q: Can I use sweetened condensed milk instead of evaporated milk?
A: Not directly. Sweetened condensed milk contains added sugar and is much thicker. Using it would make the caramels excessively sweet and dense. Stick to evaporated milk unless the recipe specifically calls for condensed.
Q: My caramel seized or separated—what went wrong?
A: This can happen if the mixture gets too hot or cools too quickly. Try returning it to the microwave in 30-second bursts, stirring gently between intervals to re-emulsify. Adding a teaspoon of warm milk may help restore smoothness.
Q: Are microwave caramels safe for kids to eat?
A: Yes, but they are very sticky and chewy, so cut them into small pieces for young children to prevent choking hazards.
Summary
Microwave caramels offer a fast, foolproof way to enjoy rich, creamy homemade candy without the hassle of a candy thermometer or stovetop vigilance. With simple ingredients and minimal cleanup, this recipe brings gourmet-style treats within everyone’s reach.
Customizable with flavors, mix-ins, and toppings, microwave caramels are perfect for gifting, holiday trays, or satisfying your sweet tooth—just remember to savor them in moderation.