Introduction
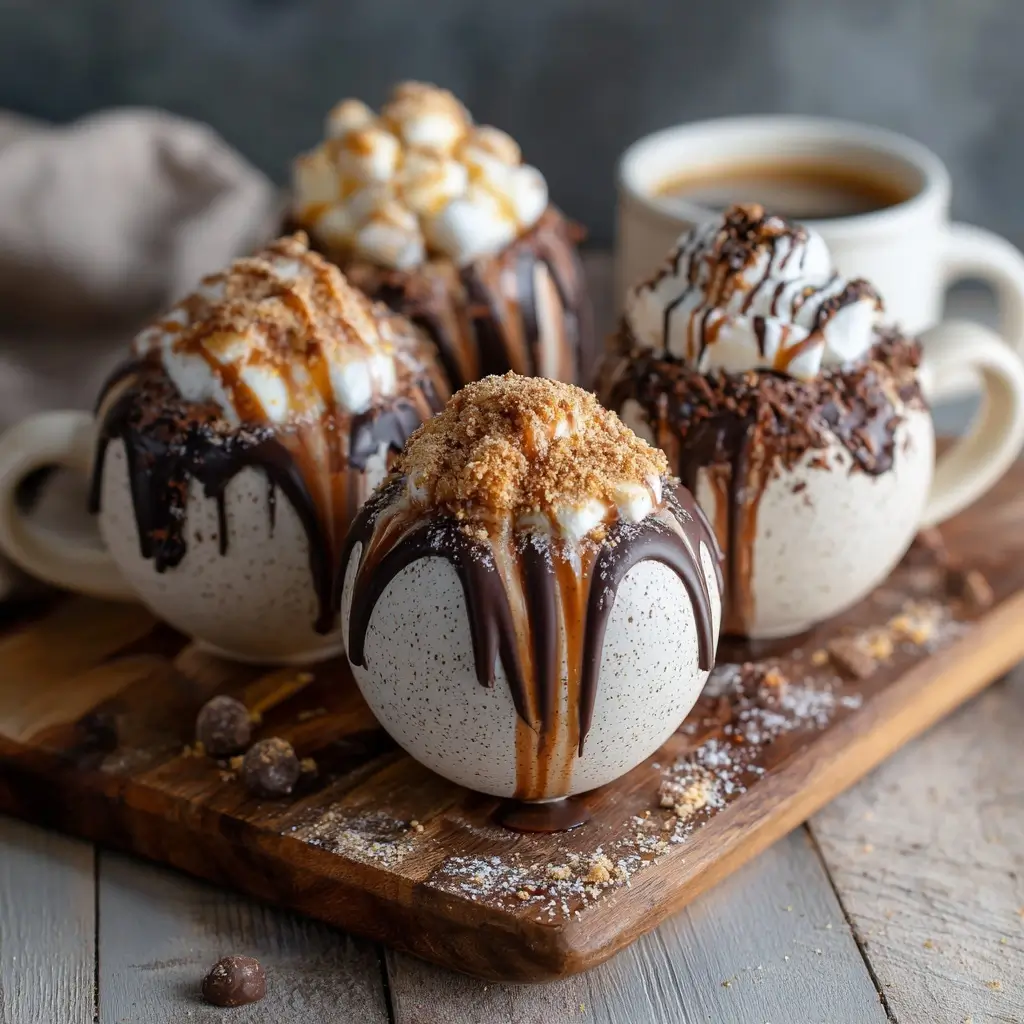
Hot chocolate bombs have taken the world by storm, captivating hearts and taste buds with their magical, melt-in-your-mouth experience. These whimsical spheres of chocolate delight are more than just a drink—they’re an experience. When you pour hot milk over a hot chocolate bomb, it dramatically cracks open, revealing a cascade of rich cocoa powder, mini marshmallows, and sometimes even hidden surprises like candy or sprinkles. Perfect for cozy winter nights, holiday gifts, or as a fun activity with kids, hot chocolate bombs combine visual appeal with indulgent flavor. Whether you’re making them for a special occasion or simply treating yourself, these edible snow globes offer warmth, nostalgia, and a touch of culinary magic.
The History
While hot chocolate itself dates back thousands of years to ancient Mesoamerican civilizations like the Mayans and Aztecs, who consumed a bitter, spiced version of cacao, the modern concept of the hot chocolate bomb is a recent innovation. The idea likely emerged in the late 2010s, gaining widespread popularity around 2020 during periods of increased home baking and social media sharing. Platforms like TikTok, Instagram, and Pinterest played a pivotal role in viralizing the trend, with creators showcasing mesmerizing videos of the chocolate spheres dissolving into steaming mugs of milk. Inspired by dessert trends such as cake pops and chocolate truffles, the hot chocolate bomb combines confectionery artistry with beverage culture. Its rise mirrors society’s growing love for interactive food experiences—edible moments that are as delightful to watch as they are to consume.
Ingredients Breakdown
The magic of a hot chocolate bomb lies in its simplicity and quality of ingredients. Each component serves both a structural and sensory purpose:
- Chocolate (Tempered): High-quality semi-sweet, dark, or milk chocolate is essential for forming sturdy shells. Tempering ensures the chocolate sets with a glossy finish and clean snap.
- Hot Chocolate Mix: This can be store-bought or homemade, typically consisting of cocoa powder, sugar, and powdered milk. Some recipes use gourmet mixes with added flavors like cinnamon, vanilla, or chili.
- Mini Marshmallows: These add sweetness and a fluffy texture when melted into the drink. They also create a visually pleasing “snowstorm” effect as they dissolve.
- Optional Fillings:
- Sprinkles (holiday-themed or colorful)
- Candy pieces (like crushed peppermints or toffee bits)
- Flavored powders (peppermint, caramel, or hazelnut)
- Edible glitter or gold dust for elegance
- Milk (for serving): Whole milk creates a creamier drink, but any dairy or non-dairy alternative (almond, oat, soy) works well.
- Flavor Enhancers (optional): A dash of vanilla extract, cinnamon, or a shot of liqueur (like peppermint schnapps or Baileys) can elevate the final beverage.
Using premium ingredients not only enhances flavor but also ensures the chocolate shell holds up during storage and transport.
Step-by-Step Recipe
- Prepare Your Workspace: Clean and dry all utensils. Work on a cool, dry surface to ensure proper chocolate setting.
- Melt and Temper the Chocolate: Finely chop the chocolate and melt using a double boiler or microwave in 30-second bursts, stirring frequently. For tempered chocolate, follow seeding method: heat two-thirds of chocolate to 115°F (46°C), remove from heat, add remaining chopped chocolate, and stir until cooled to 88–90°F (31–32°C).
- Coat the Mold: Use a silicone sphere mold (typically 2.5–3 inches in diameter). Brush tempered chocolate evenly into each hemisphere using a small pastry brush. Make sure the edges are slightly thicker for better sealing. Let harden at room temperature or in the refrigerator for 5 minutes.
- Repeat Layering: Apply 2–3 layers of chocolate to each half, refrigerating between coats. This builds strength and prevents cracking.
- Remove from Mold: Once fully hardened, gently pop out the chocolate hemispheres. If they stick, chill longer or briefly warm the mold’s exterior.
- Fill the Halves: Place one hemisphere on a flat surface. Add 1–2 tablespoons of hot chocolate mix, a generous handful of mini marshmallows, and any extras (sprinkles, candy, etc.). Avoid overfilling.
- Seal the Bomb: Warm the rim of the second hemisphere slightly with a heat gun or by rubbing fingers (body heat melts chocolate just enough). Press gently onto the filled half to seal. Wipe away excess chocolate for a clean finish.
- Decorate (Optional): Drizzle contrasting chocolate (white or colored), add sprinkles, or dust with cocoa powder or edible gold for visual flair.
- Let Set: Allow sealed bombs to harden completely before packaging or gifting.
- To Serve: Place one hot chocolate bomb in a large mug. Slowly pour 8–12 oz of hot (not boiling) milk over it. Watch it crack and dissolve, then stir well before enjoying.
Tips
- Use Silicone Molds: Flexible, food-grade silicone molds make removal easier and are reusable.
- Don’t Skip Tempering: Tempered chocolate resists blooming (white streaks) and has a professional look and crisp snap.
- Avoid Moisture: Even a drop of water can cause chocolate to seize. Ensure bowls and tools are completely dry.
- Work Quickly: Chocolate sets fast, so have all ingredients prepped and ready.
- Chill Between Layers: Refrigeration helps each layer set firmly. But bring chocolate close to room temperature before adding new layers to prevent cracking.
- Seal Gently: Too much pressure can break the shell. Use minimal heat and steady hands.
- Storage: Keep finished bombs in an airtight container at cool room temperature (below 70°F/21°C) for up to 2 weeks. Avoid humidity.
- Gifting Tip: Package bombs in clear cellophane with ribbons and a tag listing ingredients and brewing instructions.
Variations and Customizations
One of the joys of hot chocolate bombs is their versatility. Here are creative ways to personalize them:
- Seasonal Themes: Red and green sprinkles for Christmas, pastels for Easter, orange and black for Halloween.
- Flavored Chocolate Shells: Mix in edible colors or flavored oils (peppermint, orange, raspberry) into white chocolate for vibrant or aromatic shells.
- Dietary Adaptations: Use sugar-free chocolate and cocoa mix for keto versions, or dairy-free chocolate and plant-based marshmallows for vegan bombs.
- Alcoholic Infusions: Add a small chocolate cup containing a mini liquor-filled chocolate (e.g., Kahlua, Godiva, or amaretto) inside the bomb for adult versions.
- Novelty Centers: Hide small toys (food-safe, sealed), puzzle pieces, or handwritten notes for surprise elements.
- Protein-Powered: Incorporate protein powder into the hot cocoa mix for a post-workout treat.
- International Flavors: Mexican-style with cinnamon and chili; Italian with hazelnut and biscotti crumbs; French with lavender and almond.
- Crunchy Textures: Add crushed cookies, pretzels, or toffee bits for contrast.
- Gluten-Free & Allergen-Friendly: Ensure all components are certified gluten-free, nut-free, etc., if needed.
- Kid-Friendly Fun: Use themed molds (hearts, stars, animals) and include toy figurines or colorful candies.
Health Considerations and Nutritional Value
While undeniably indulgent, hot chocolate bombs should be enjoyed in moderation due to their high sugar and fat content. A typical bomb (depending on size and ingredients) may contain:
- Calories: 300–500 per serving
- Fat: 20–35g (mostly from chocolate)
- Sugar: 30–50g (from chocolate, marshmallows, and cocoa mix)
- Carbohydrates: 40–60g
- Protein: 4–8g (mainly from milk solids in chocolate)
Health Notes:
- Dark chocolate (70% or higher) offers antioxidants like flavonoids, which may support heart health.
- Excessive sugar intake can contribute to weight gain, blood sugar spikes, and dental issues.
- For lower-calorie options, use sugar substitutes, unsweetened cocoa, and marshmallow alternatives.
- Pairing with skim milk or unsweetened almond milk reduces overall fat and calories.
- Those with lactose intolerance, celiac disease, or nut allergies should verify all ingredients for safety.
- Enjoy as an occasional treat rather than a daily beverage.
Ingredients
- 12 oz high-quality chocolate (dark, milk, or white), finely chopped
- ½ cup hot chocolate mix (homemade or store-bought)
- ½ cup mini marshmallows
- ¼ cup sprinkles or additional fillings (optional)
- 8–12 oz hot milk (per serving)
- Food-grade silicone sphere mold (6-cavity, ~2.5 inches)
- Pastry brush or small spatula
- Double boiler or microwave-safe bowl
- Thermometer (recommended for tempering)
Directions
- Temper the chocolate using a double boiler or microwave, bringing it to the correct working temperature (88–90°F for dark chocolate).
- Lightly brush the inside of each hemisphere in the silicone mold with melted chocolate. Chill for 5 minutes.
- Repeat the coating process 2–3 times, chilling between layers, until shells are thick and firm.
- Once hardened, carefully remove the chocolate halves from the mold.
- Place one half on a clean surface. Fill with 1 tablespoon hot chocolate mix, 1–2 tablespoons mini marshmallows, and any desired extras.
- Warm the edge of the second half slightly and press it onto the filled half to seal. Smooth the seam gently.
- Decorate with drizzled chocolate, sprinkles, or edible dust as desired.
- Allow to set completely at room temperature or in a cool area.
- To serve, place one bomb in a large mug and pour 8–12 oz of hot milk over it. Stir well and enjoy immediately.
FAQ
Can I make hot chocolate bombs without a mold?
Yes, though it’s more challenging. You can form halves using balloon halves or dome-shaped objects lined with parchment, but silicone molds yield the best results.
Why did my chocolate crack?
This usually happens due to temperature shock or insufficient layering. Always let layers set gradually and avoid moving molds too quickly between hot and cold environments.
Can I use regular chocolate chips?
Most chocolate chips contain stabilizers and aren’t ideal for tempering. Use couverture or baking chocolate for best texture and shine.
How long do hot chocolate bombs last?
Up to 2 weeks in an airtight container at cool room temperature. Avoid refrigeration unless necessary (condensation can cause bloom).
Are they safe for kids?
Yes! Kids love helping assemble them. Just supervise around hot liquids and ensure no choking hazards in fillings.
Can I freeze them?
Not recommended. Freezing can cause condensation upon thawing, leading to moisture damage and chocolate bloom.
What kind of milk works best?
Whole milk gives the richest result, but any milk—dairy or non-dairy—works. Heat the milk gently to avoid scalding.
Can I make them ahead for gifts?
Absolutely! They make excellent homemade presents. Package them in clear bags with a ribbon and heating instructions.
Summary
Hot chocolate bombs are enchanting treats that transform a simple cup of cocoa into a festive, interactive experience. With rich chocolate shells that burst open into creamy, marshmallow-filled warmth, they’re perfect for gifting, holidays, or cozy moments at home.