Chocolate Wafer Icebox Cake: A Classic No-Bake Dessert
The Chocolate Wafer Icebox Cake is a beloved dessert that traces its origins back to the early 20th century, when iceboxes were the primary means of refrigeration in American homes. This cake became a staple because it required no baking and could be made with simple, readily available ingredients. The concept of layering cookies and creamy fillings was popularized by brands like Nabisco, who often included these recipes in their packaging. Over time, the wafer icebox cake evolved into countless variations, but the chocolate wafer version remains a timeless favorite for its rich flavor and ease of preparation.
History of the Icebox Cake
Icebox cakes were a clever solution for home cooks looking to create something indulgent without using an oven. The idea was simple: layer cookies or wafers with whipped cream or custard and let the cold environment of the icebox set the dessert. This technique was especially popular during the summer months and among those without access to ovens. The chocolate wafer icebox cake specifically gained popularity in the 1950s and 60s, often appearing in community cookbooks and food magazines as a go-to dessert for potlucks and family gatherings.
Ingredients Breakdown
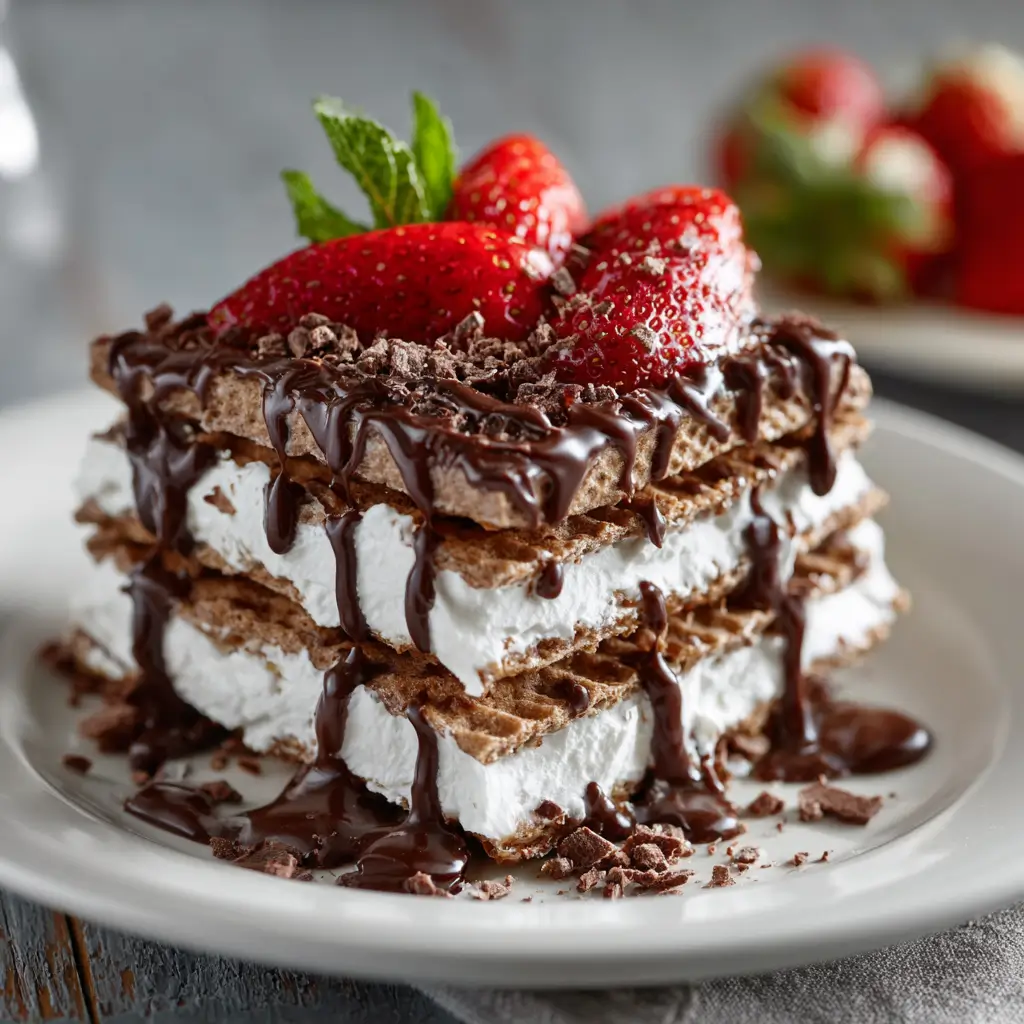
- Chocolate Wafers: These are the foundation of the cake and provide a rich, chocolatey base. They soften over time, creating a cohesive texture.
- Heavy Whipping Cream: This is whipped to stiff peaks and layered between the wafers, acting as both a binder and a luxurious texture enhancer.
- Sugar: Sweetens the whipped cream and balances the bitterness of the chocolate.
- Vanilla Extract: Adds depth and warmth to the overall flavor profile.
- Cocoa Powder (Optional): Can be used to dust the top for a finishing touch or mixed into the cream for a more intense chocolate flavor.
Step-by-Step Recipe
- Begin by whipping 2 cups of heavy cream with 1/4 cup of sugar and 1 teaspoon of vanilla extract until stiff peaks form.
- In a loaf pan or round dish, start layering: place a row of chocolate wafers on the bottom.
- Spread a layer of the whipped cream mixture over the wafers, pressing gently to ensure it fills in the gaps.
- Repeat the layers, finishing with a top layer of whipped cream.
- Cover the dish and refrigerate for at least 6 hours or overnight to allow the wafers to soften and meld with the cream.
- Before serving, optionally dust the top with cocoa powder or shaved chocolate for decoration.
Tips for Perfect Results
- Use a firm, sturdy wafer that won’t disintegrate when layered—chocolate wafers like Nabisco’s Famous Chocolate Wafers work best.
- Chill the bowl and beaters before whipping the cream to ensure it holds its shape.
- Don’t skip the refrigeration time; the cake needs time to set and the wafers to soften.
- If you’re making this in a loaf pan, line it with plastic wrap for easy removal and slicing.
- For a richer flavor, add a bit of melted dark chocolate or cocoa powder into the whipped cream mixture.
Variations and Customizations
- Chocolate Hazelnut Version: Add a layer of Nutella or hazelnut spread between the wafers.
- Espresso Twist: Add a few drops of espresso extract to the whipped cream for a mocha flavor.
- Chocolate-Mint: Infuse the whipped cream with mint extract and alternate with peppermint wafers if available.
- Fruit Layer: Add a thin layer of fresh berries or fruit compote between the cream layers.
- Alcohol Infusion: Add a splash of rum, Kahlua, or bourbon to the whipped cream for an adult twist.
Health Considerations and Nutritional Value
While the Chocolate Wafer Icebox Cake is a treat best enjoyed in moderation, there are ways to make it healthier:
- Lower Fat Option: Substitute heavy cream with full-fat coconut cream or a mixture of Greek yogurt and a bit of honey.
- Sugar Alternatives: Use natural sweeteners like maple syrup, honey, or a zero-calorie sweetener like erythritol or stevia.
- Gluten-Free: Use certified gluten-free chocolate wafers or cookies.
- Nutrition Facts (per serving, approx. 1 slice): Calories – 300–400 | Fat – 20–25g | Carbs – 25–30g | Protein – 3–5g | Fiber – 1–2g
Ingredients
- 1 package (about 40) chocolate wafers
- 2 cups heavy whipping cream
- 1/4 cup granulated sugar
- 1 teaspoon vanilla extract
- Cocoa powder or shaved chocolate (optional, for garnish)
Directions
- In a large mixing bowl, whip the heavy cream, sugar, and vanilla extract together until stiff peaks form.
- Line a loaf pan or 8-inch round dish with plastic wrap (optional, for easier removal).
- Begin layering: place a row of chocolate wafers at the bottom.
- Spread a generous layer of whipped cream over the wafers, pressing gently to spread evenly.
- Repeat the layers, finishing with a top layer of whipped cream.
- Cover and refrigerate for at least 6 hours or overnight.
- Before serving, remove from the pan, slice, and dust with cocoa powder or chocolate shavings if desired.
Frequently Asked Questions (FAQ)
Can I use other types of cookies?
Yes! While chocolate wafers are traditional, you can try graham crackers, Oreo cookies, or even shortbread for different flavor profiles.
How long can I keep the cake in the fridge?
It can be stored in the refrigerator for up to 3 days. Keep it covered to prevent it from absorbing fridge odors.
Can I freeze the icebox cake?
Yes, you can freeze it for up to 1 month. Wrap it tightly in plastic wrap and foil. Thaw in the refrigerator for a few hours before serving.
What if the cream doesn’t hold its shape?
Make sure your bowl and beaters are well chilled. If the cream is too warm, it won’t whip properly. You can also add a bit of powdered sugar or cornstarch to help stabilize it.
Is this cake suitable for kids?
Absolutely! It’s a kid-friendly dessert with no alcohol or strong flavors unless added intentionally.
Summary
The Chocolate Wafer Icebox Cake is a creamy, no-bake dessert made by layering chocolate wafers with sweetened whipped cream and chilling until firm. Simple, rich, and nostalgic, it’s perfect for any occasion.