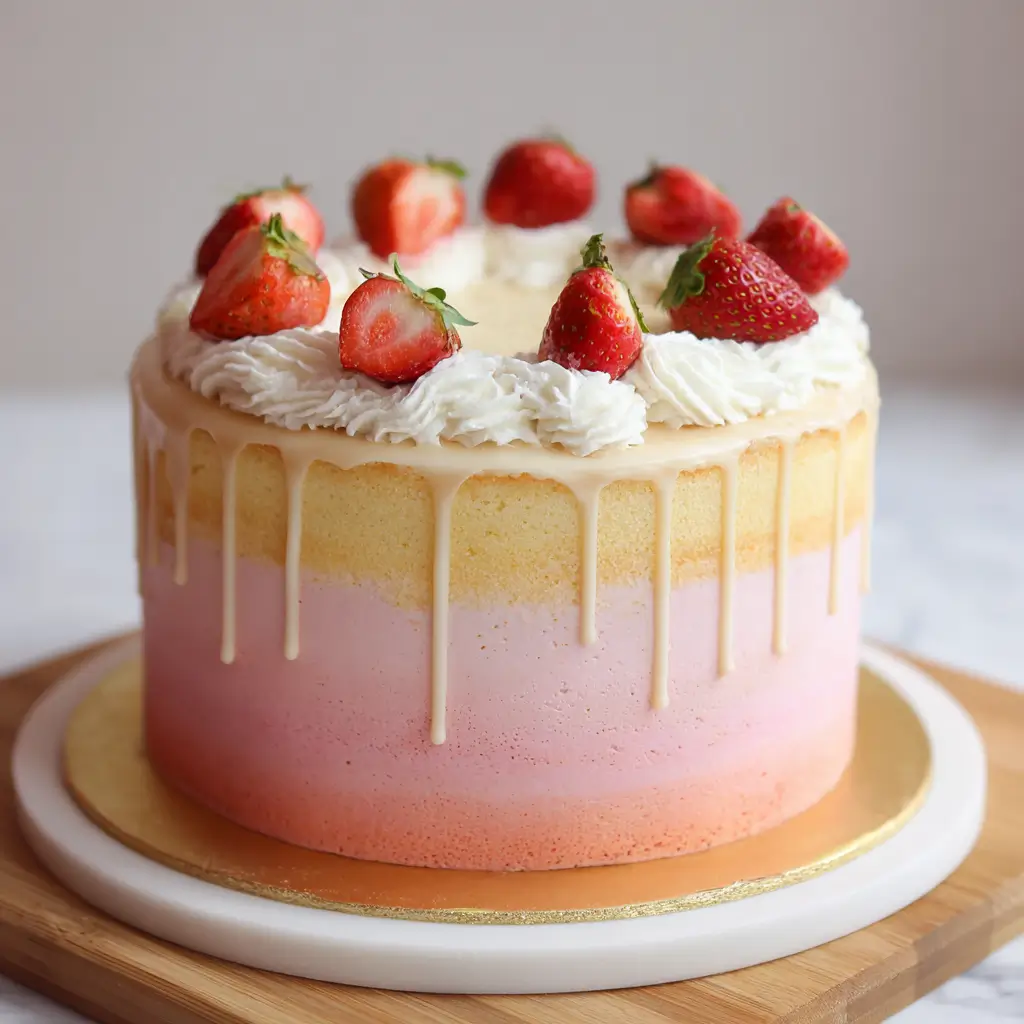
Vanilla Strawberry Ombre Cake: A Sweet Celebration of Flavor and Color
An ombre cake is more than just a dessert — it’s a visual masterpiece that delights the eyes as much as it does the palate. The Vanilla Strawberry Ombre Cake combines soft pastel hues with the classic flavors of vanilla and fresh strawberries, creating a layered treat that’s perfect for birthdays, baby showers, weddings, or any occasion worth celebrating. This stunning cake features multiple layers, each gradually deepening in color from pale pink to vibrant red, mirroring the sweet transition of flavor intensity.
A Slice of History
The concept of ombre — a French word meaning “graduated shadow” — has long been used in fashion and design, but it found its way into the culinary world through modern cake decorating trends that gained momentum in the early 2010s. Bakers began experimenting with gradient effects using food coloring, and soon, ombre cakes became a staple at bakeries and special events. The Vanilla Strawberry Ombre Cake is a delicious evolution of this trend, blending aesthetics with taste to create something truly memorable.
Ingredients Breakdown
This cake uses a combination of basic baking ingredients enhanced with real strawberries for both flavor and color. Here’s what you’ll need:
- All-Purpose Flour – Provides the structure of the cake layers.
- Baking Powder – Helps the cake rise and stay light and fluffy.
- Salt – Balances the sweetness and enhances flavor.
- Unsalted Butter – Adds richness and tenderness to the crumb.
- Granulated Sugar – Sweetens the cake and helps create a moist texture.
- Eggs – Bind the ingredients and contribute to the cake’s structure.
- Milk – Keeps the batter smooth and adds moisture.
- Vanilla Extract – Complements the strawberry flavor beautifully.
- Fresh Strawberries (or Puree) – Infuses natural flavor and provides the pink hue for the ombre effect.
- Pink Food Coloring (Optional) – Enhances the gradient if natural color isn’t strong enough.
- Buttercream Frosting – Used between layers and for covering the cake.
Step-by-Step Recipe
- Preheat oven to 350°F (175°C). Grease and line six 6-inch round cake pans with parchment paper.
- Prepare the dry ingredients: In a bowl, whisk together 2 cups flour, 1 tsp baking powder, and ½ tsp salt.
- Cream butter and sugar: In a stand mixer, beat 1 cup unsalted butter and 2 cups granulated sugar until light and fluffy.
- Add eggs: One at a time, mixing well after each addition.
- Mix in dry ingredients and milk: Alternately add the dry mixture and 1 cup milk, beginning and ending with the dry ingredients. Stir in 2 tsp vanilla extract.
- Divide batter: Into six separate bowls. To one bowl, add ¼ cup strawberry puree and mix well.
- Increase strawberry puree: Gradually in each subsequent bowl, up to 1½ cups in the final bowl to create progressively darker shades.
- Bake each layer: Pour each batter into prepared pans and bake for 20–25 minutes or until a toothpick comes out clean.
- Cool completely: Allow all layers to cool in their pans on wire racks for 1 hour before removing.
- Make frosting: Whip 1 cup butter, 4 cups powdered sugar, 2 tbsp milk, and 1 tsp vanilla extract into a smooth buttercream.
- Assemble the cake: Place the darkest layer on a cake board or plate, top with frosting and continue stacking lighter layers on top.
- Frost the exterior: Apply a crumb coat, chill, then frost the entire cake smoothly.
Tips for Success
- Use room temperature ingredients for smoother mixing and better texture.
- Strawberry puree should be thick — cook down fresh strawberries slightly if needed to intensify flavor and color.
- Color gradients work best when transitioning slowly from light to dark; consider adding small amounts of pink gel coloring if needed.
- Level your cakes before assembling to ensure even stacking.
- Chill layers briefly before frosting to prevent crumbling.
Variations and Customizations
While the Vanilla Strawberry version is a classic favorite, there are countless ways to personalize your ombre cake:
- Flavor Variants: Try chocolate, lemon, raspberry, or coconut for different ombre flavor profiles.
- Dietary Adjustments: Make gluten-free by using GF flour blend, or vegan by substituting egg replacer and plant-based milk/butter.
- Layer Options: Use cupcakes instead of cake layers for individual ombre treats.
- Decorations: Top with fresh strawberries, edible flowers, whipped cream, or gold leaf accents.
Health Considerations and Nutritional Value
While this cake is indulgent and rich, it can be enjoyed responsibly as part of a balanced diet. Each slice (based on 12 servings) contains approximately:
- Calories: 350–400
- Fat: 15–20g (mostly from butter and frosting)
- Carbohydrates: 50–60g (from sugar and flour)
- Protein: 4–6g (from eggs and milk)
- Fiber & Vitamins: Minimal unless whole wheat flour or added fruit toppings are used.
To make it healthier, consider substituting some butter with applesauce or Greek yogurt, reducing sugar content, or using alternative sweeteners like honey or maple syrup.
Ingredients Recap
For the Cake:
- 2 cups all-purpose flour
- 1 tsp baking powder
- ½ tsp salt
- 1 cup unsalted butter, softened
- 2 cups granulated sugar
- 4 large eggs
- 1 cup milk
- 2 tsp vanilla extract
- 1½ cups strawberry puree (divided among bowls for gradient effect)
For the Frosting:
- 1 cup unsalted butter, softened
- 4 cups powdered sugar
- 2 tbsp milk or heavy cream
- 1 tsp vanilla extract
Directions Recap
- Preheat oven and prepare pans.
- Mix dry ingredients in a bowl.
- Cream butter and sugar, add eggs one by one.
- Incorporate dry ingredients and milk alternately, finishing with vanilla extract.
- Divide batter into 6 bowls, adding increasing amounts of strawberry puree to each.
- Bake each layer until golden and springs back when touched.
- Cool completely, level if necessary.
- Whip frosting ingredients until smooth.
- Stack cooled layers with frosting in order from darkest to lightest.
- Apply a thin crumb coat, chill, then frost the outside smoothly.
FAQs
Can I make this cake ahead of time?
Yes! Bake the layers a day in advance and store them wrapped tightly at room temperature. Frost the cake the next day.