Introduction
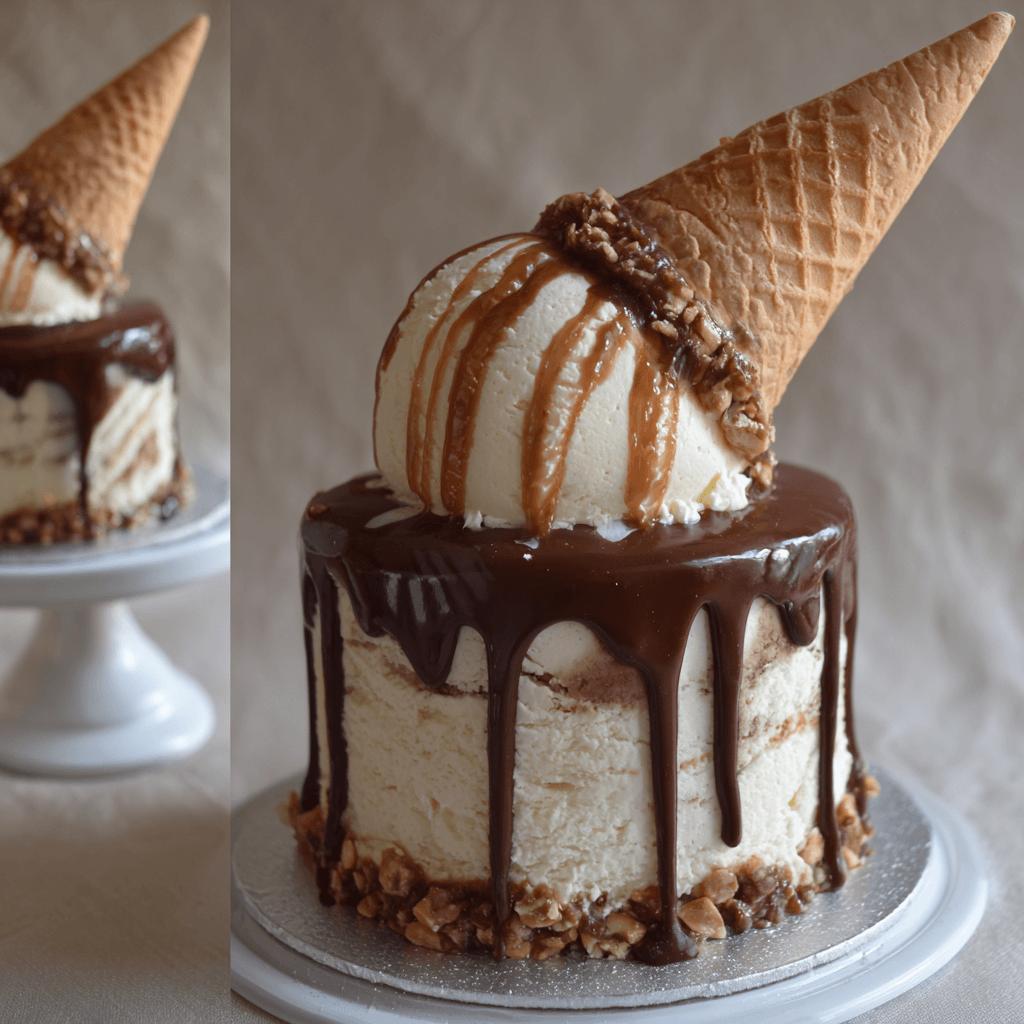
The Dipped Ice Cream Cone Cake is a sensational dessert that combines the joy of ice cream cones with the elegance of a layered cake. This show-stopping creation brings together creamy ice cream, crunchy waffle cones, and rich chocolate or caramel coatings to create a dessert that’s as fun to make as it is delicious to eat. Whether you’re celebrating a birthday, hosting a summer party, or simply craving something indulgent, this cake will surely impress your guests and satisfy every sweet tooth.
The History
While the exact origin of the Dipped Ice Cream Cone Cake isn’t well documented, its roots can be traced back to classic American desserts and novelty ice cream treats like the drumstick cone and ice cream roll cakes. Over time, home bakers began experimenting with layering and stacking techniques, eventually crafting this unique version that mimics the appearance of an oversized dipped ice cream cone. Its popularity has grown significantly on social media and in baking communities due to its creative presentation and delightful flavor combinations.
Ingredients Breakdown
- For the Ice Cream Layers: Vanilla, chocolate, or any flavor of premium ice cream
- Waffle Cones: Store-bought or homemade sugar cones or waffle cones
- Dipping Coating: Semi-sweet or dark chocolate, melted with coconut oil or shortening
- Optional Toppings: Sprinkles, crushed nuts, cookie crumbs, shredded coconut, or mini chocolate chips
- For Stabilizing: A cake board or serving plate, parchment paper for lining
Step-by-Step Recipe
- Prepare Your Freezer: Make sure your ice cream is softened slightly (not melted) for easier spreading. You may need to let it sit at room temperature for about 10–15 minutes.
- Layer Ice Cream: In a loaf pan or round mold lined with plastic wrap, begin layering scoops of ice cream. Alternate between different flavors if desired. Press each layer firmly to eliminate air pockets.
- Freeze Firm: Place the layered ice cream in the freezer for at least 4–6 hours or overnight until completely firm.
- Shape into Cone: Once frozen, carefully remove from the mold. Wrap the ice cream block in a large waffle cone or shape it like a cone using a stack of smaller cones pressed together.
- Dip in Chocolate: Melt chocolate with a small amount of coconut oil or vegetable shortening until smooth. Quickly dip the entire cone cake into the melted chocolate, ensuring it’s fully coated.
- Add Toppings: Immediately after dipping, roll the cake in your choice of sprinkles, crushed cookies, nuts, or other toppings while the chocolate is still wet.
- Chill Until Serving: Return the finished cone cake to the freezer for at least 30 minutes before slicing and serving.
Tips
- Work quickly when dipping and decorating to prevent melting.
- Use a hairdryer on low heat to gently warm the chocolate coating just enough to help it flow smoothly over the cake.
- If using multiple cones to build the shape, use softened ice cream as “glue” to stick them together.
- Line your mold with plastic wrap for easy removal.
- To ensure even layers, level off each scoop of ice cream with a spatula.
Variations and Customizations
- Flavor Variations: Use strawberry, mint chocolate chip, cookies and cream, or coffee-flavored ice cream.
- Coating Options: Swap chocolate for white chocolate, caramel sauce, or a combination of both.
- Theme-Based Decor: Add holiday-themed sprinkles, edible glitter, or themed candies for birthdays or special events.
- Cone Alternatives: Use sugar cones instead of waffle cones for a sturdier base.
- Mini Versions: Make individual cone cakes by using mini cones and small portions of ice cream.
Health Considerations and Nutritional Value
This dessert is rich in calories, fats, and sugars due to the high content of ice cream, chocolate, and added toppings. It should be enjoyed in moderation, especially by those watching their calorie intake or managing conditions like diabetes or heart disease. However, it does provide calcium and some protein from the dairy content. For a lighter version, consider using low-fat ice cream, dark chocolate (which contains antioxidants), and natural sweeteners or alternative toppings like fresh fruit or seeds for added nutrients.
Ingredients
- 4 cups vanilla ice cream
- 2 cups chocolate ice cream
- 8–10 waffle cones
- 1 cup semi-sweet chocolate chips
- 2 tablespoons coconut oil or vegetable shortening
- Sprinkles or toppings of choice
- Parchment paper or plastic wrap
Directions
- Soften ice creams slightly at room temperature.
- Line a loaf pan or round mold with plastic wrap.
- Layer scoops of vanilla and chocolate ice cream in the pan, pressing down firmly after each layer.
- Freeze for 4–6 hours or until solid.
- Remove from the mold and shape into a cone using additional cones or shaping with hands.
- Melt chocolate chips with coconut oil until smooth.
- Dip the ice cream cone cake into the melted chocolate, covering evenly.
- Immediately roll in sprinkles or desired toppings.
- Place on a parchment-lined tray and freeze for another 30 minutes before serving.
FAQ
Can I make this ahead of time?
Yes! The Dipped Ice Cream Cone Cake can be made up to a week in advance and stored in the freezer. Just keep it well wrapped to avoid freezer burn.
What kind of ice cream works best?
High-quality, full-fat ice creams hold their shape better and have a creamier texture. Avoid soft-serve or light versions unless you’re making a no-churn version.
How do I cut clean slices?
Use a sharp knife dipped in hot water and wiped dry between cuts for clean, neat slices.
Can I use a different coating besides chocolate?
Absolutely! Try caramel sauce, candy melts, or a combination of both for variety.
Is it possible to make this without a mold?
Yes, but it requires more shaping by hand or using stacked cones as a framework. A mold ensures even layers and uniform shape.
Summary
The Dipped Ice Cream Cone Cake is a fun and creative dessert that blends the flavors and textures of classic ice cream cones with the elegance of a layered cake. Perfect for parties, holidays, or a sweet treat any day, this cake is sure to delight everyone who tries it.