Introduction
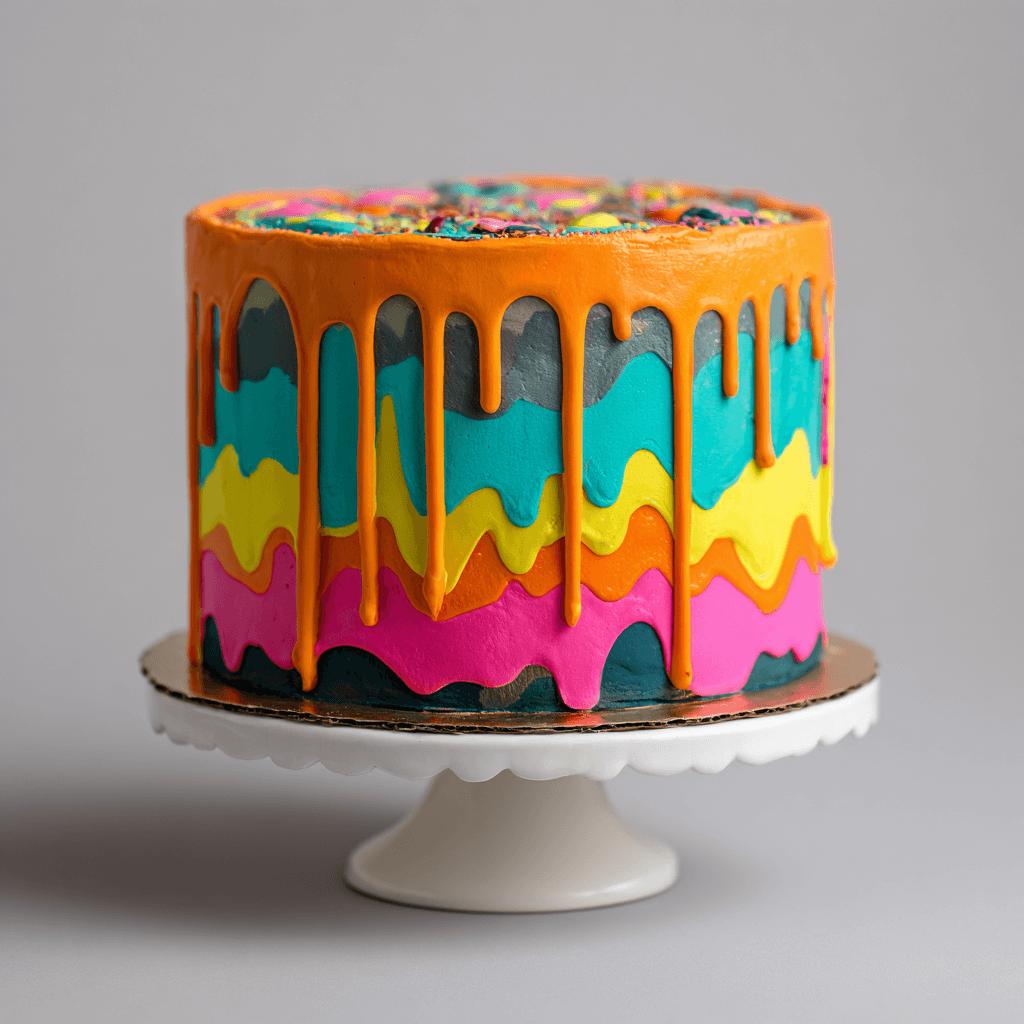
Welcome to the vibrant world of the Neon Waves Drip Cake, a show-stopping dessert that’s as much a visual masterpiece as it is a culinary delight. This cake combines bold neon colors, smooth chocolate drips, and soft pastel waves to create an ombre effect that looks like something straight out of a dreamy galaxy or a retro rave poster. Whether you’re making it for a birthday party, a special occasion, or just because you love baking with flair, this drip cake is guaranteed to be the centerpiece of any celebration.
The History
Drip cakes have become a staple in modern cake design over the past decade, gaining popularity through social media platforms like Instagram and Pinterest. The trend started with simple ganache drips but has evolved into elaborate works of art, incorporating everything from metallic paints to edible glitter. The Neon Waves Drip Cake takes inspiration from retro aesthetics, neon lights, and abstract art, blending them into one delicious canvas that showcases both technique and creativity.
Ingredients Breakdown
Creating a Neon Waves Drip Cake requires not only standard cake ingredients but also some specialty items to achieve those vivid colors and glossy drips. Here’s a breakdown:
- Cake Base: Flour, sugar, baking powder, eggs, milk, butter, vanilla extract
- Buttercream Frosting: Butter, powdered sugar, heavy cream, vanilla extract
- Neon Colors: Gel-based food coloring (pink, blue, green, yellow) – avoid liquid colors which can affect texture
- Chocolate Drip: Dark or white chocolate, heavy cream, corn syrup (for shine)
- Optional Decorations: Edible glitter, sprinkles, fondant accents, luster dust
Step-by-Step Recipe
- Bake the Cake: Prepare your favorite vanilla or chocolate sponge in round pans. Level the layers after cooling.
- Make the Frosting: Whip up a batch of American buttercream and divide it into portions for coloring.
- Color the Frosting: Add gel food colors to each portion to create neon pink, blue, green, and yellow frostings.
- Frost the Cake: Apply a crumb coat, chill, then stack the cake with alternating colored layers.
- Create the Wave Design: Using a bench scraper or palette knife, blend the colored frosting in wave patterns around the sides of the cake.
- Chill Again: Set the design by placing the cake in the fridge for 15–20 minutes.
- Prepare the Drip: Heat chopped chocolate with cream and a bit of corn syrup until smooth.
- Add the Drips: Spoon the warm chocolate mixture around the edges of the cake allowing it to drip down.
- Final Touches: Decorate the top with extra neon frosting swirls, edible glitter, and optional fondant elements.
Tips
- Use gel-based food coloring for the most vibrant results without affecting texture.
- Keep the cake chilled between steps to prevent colors from bleeding or melting.
- For smoother drips, ensure the ganache is warm but not too hot when applying.
- Practice your wave technique on parchment paper before working on the actual cake.
- Use a turntable and offset spatula for more control during frosting application.
Variations and Customizations
The beauty of the Neon Waves Drip Cake lies in its versatility. You can:
- Swap the base flavor for chocolate, red velvet, or funfetti.
- Use white chocolate ganache for a different kind of drip with a sweeter flavor.
- Incorporate ombre effects within the same color family instead of multiple neon shades.
- Add sparkle with edible gold leaf or disco dust.
- Try a naked cake version with exposed layers and minimal frosting for a rustic twist.
Health Considerations and Nutritional Value
While the Neon Waves Drip Cake is undeniably indulgent, moderation is key when enjoying such treats. A typical slice may contain around 600–800 calories, depending on the size and richness of the frosting and chocolate drips. To make it slightly healthier:
- Use low-fat dairy products and reduced-sugar frosting.
- Substitute some flour with almond or oat flour for added nutrients.
- Opt for dark chocolate drips (70% cocoa or higher) for antioxidants.
- Use stevia or monk fruit sweeteners in place of traditional sugar where possible.
Ingredients
For the Cake (Vanilla Base):
- 2 ½ cups all-purpose flour
- 2 cups granulated sugar
- 1 tbsp baking powder
- ½ tsp salt
- ½ cup unsalted butter, softened
- 2 large eggs
- 1 cup whole milk
- 2 tsp vanilla extract
For the Buttercream Frosting:
- 1 cup unsalted butter, softened
- 4 cups powdered sugar
- 2–3 tbsp heavy whipping cream
- 1 tsp vanilla extract
- Gel food coloring (neon pink, blue, green, yellow)
For the Chocolate Drip:
- 1 cup dark or white chocolate, chopped
- ⅓ cup heavy cream
- 1 tsp light corn syrup
Directions
- Preheat oven to 350°F (175°C). Grease and flour two 8-inch round pans.
- Mix dry ingredients: In a bowl, combine flour, sugar, baking powder, and salt.
- Add wet ingredients: Mix in butter, eggs, milk, and vanilla until smooth.
- Bake for 25–30 minutes, or until a toothpick comes out clean. Cool completely.
- Prepare buttercream: Beat butter until creamy, gradually add powdered sugar, cream, and vanilla. Divide into portions and color each with gel food coloring.
- Assemble the cake: Stack layers with colored buttercream, crumb coat, and chill.
- Apply final coat: Spread neon-colored frosting in wave patterns around the sides.
- Chill again, then prepare the chocolate drip by heating cream and chocolate together.
- Add drips around the edge, letting it cascade naturally. Decorate the top and chill before serving.
FAQ
Can I use liquid food coloring?
No, liquid food coloring dilutes the frosting and won’t give you the bright neon effect. Stick to gel-based colors for best results.
How long does the cake last?
Stored in the refrigerator, the cake will keep for 3–4 days. Bring to room temperature before serving.
Can I freeze this cake?
Yes! Wrap tightly in plastic wrap and foil. Freeze for up to 2 months. Thaw overnight in the fridge and bring to room temperature before serving.
What if my drip isn’t flowing?
If the chocolate is too thick, gently reheat it with a few seconds in the microwave or a splash more cream.
Is there a vegan option?
Absolutely! Use vegan butter, non-dairy milk, and egg substitutes. Ensure your